| Site News |
|---|
| Warning: This wiki contains spoilers. Read at your own risk! Social media: If you would like, please join our Discord server, and/or follow us on Twitter (X) or Tumblr! |
Sacred Stone (part 2): Difference between revisions
Thecornerman (talk | contribs) m (→Boss data) |
m (→Strategy) Tags: Mobile edit Mobile web edit |
||
| (11 intermediate revisions by 5 users not shown) | |||
| Line 1: | Line 1: | ||
{{Chapter Infobox | {{Chapter Infobox | ||
|title=Sacred Stone | |title=Sacred Stone | ||
| Line 27: | Line 26: | ||
|victory=Defeat [[Fomortiis]] | |victory=Defeat [[Fomortiis]] | ||
|defeat=[[Eirika]] or [[Ephraim]] dies | |defeat=[[Eirika]] or [[Ephraim]] dies | ||
|ally={{h| | |ally={{h|1–12|Every unit that survived part 1 will carry over; maximum 12}} | ||
|enemy=1{{h|+8|Reinforcements}} | |enemy=1{{h|+8|Reinforcements}} | ||
|map=[[File:Cm fe08 F-2.png]] | |map=[[File:Cm fe08 F-2.png]] | ||
| Line 37: | Line 36: | ||
{{ChapChars | {{ChapChars | ||
|game#=08 | |game#=08 | ||
| | |forced1=eirika | ||
| | |forced2=ephraim | ||
| | |return1=seth | ||
| | |return2=franz | ||
| | |return3=gilliam | ||
| | |return4=vanessa | ||
| | |return5=moulder | ||
| | |return6=ross | ||
| | |return7=garcia | ||
| | |return8=neimi | ||
|return9=colm | |||
| | |return10=artur | ||
| | |return11=lute | ||
| | |return12=natasha | ||
| | |return13=joshua | ||
| | |return14=forde | ||
| | |return15=kyle | ||
| | |return16=tana | ||
| | |return17=amelia | ||
| | |return18=innes | ||
| | |return19=gerik | ||
| | |return20=tethys | ||
| | |return21=marisa | ||
| | |return22=l'arachel | ||
| | |return23=dozla | ||
| | |return24=saleh | ||
| | |return25=ewan | ||
| | |return26=cormag | ||
| | |return27=rennac | ||
| | |return28=duessel | ||
| | |return29=knoll | ||
| | |return30=myrrh | ||
| | |return31=syrene | ||
| | |||
}} | }} | ||
| Line 230: | Line 228: | ||
|con=8 | |con=8 | ||
|mov=8 | |mov=8 | ||
|inventory={{Item|8|Fiery Fang}} | |inventory={{Item|8|Fiery Fang|link=Fiery Fang (The Sacred Stones)}} | ||
}} | }} | ||
{{ChapUnitCellGBA | {{ChapUnitCellGBA | ||
| Line 442: | Line 440: | ||
|con=8 | |con=8 | ||
|mov=8 | |mov=8 | ||
|inventory={{Item|8|Fiery Fang}} | |inventory={{Item|8|Fiery Fang|link=Fiery Fang (The Sacred Stones)}} | ||
}} | }} | ||
{{ChapUnitCellGBA | {{ChapUnitCellGBA | ||
| Line 517: | Line 515: | ||
|content1={{BossStats GBA | |content1={{BossStats GBA | ||
|name=Fomortiis | |name=Fomortiis | ||
|portrait=[[File:Generic portrait demon king fe08. | |portrait=[[File:Generic portrait demon king fe08.png]] | ||
|sprite=demon king enemy | |sprite=demon king enemy | ||
|class=Demon King | |class=Demon King | ||
| Line 537: | Line 535: | ||
|content2={{BossStats GBA | |content2={{BossStats GBA | ||
|name=Fomortiis | |name=Fomortiis | ||
|portrait=[[File:Generic portrait demon king fe08. | |portrait=[[File:Generic portrait demon king fe08.png]] | ||
|sprite=demon king enemy | |sprite=demon king enemy | ||
|class=Demon King | |class=Demon King | ||
| Line 559: | Line 557: | ||
==Strategy== | ==Strategy== | ||
{{strategy}} | {{strategy}} | ||
[[Fomortiis]] can either be very easy or challenging, depending on if the player can kill him in two turns. It is important to note that Fomortiis will always waste his first turn [[summon]]ing. The [[monster]]s he summons will also not act on the turn that they are summoned. He is close enough that Eirika, Ephraim, Seth, and a promoted L'Arachel will be able to reach him and attack him on the first turn. With enough units able to wield the [[Sacred Twin]]s, this fight is easily won. | |||
[[Fomortiis]] | |||
If the player has managed to break all the [[Sacred Twin]]s in their possession, killing Fomortiis | If the player has managed to break all the [[Sacred Twin]]s in their possession, or has not trained up enough units to two-turn him, killing Fomortiis becomes more difficult. If the player finds they cannot kill him on turn 2, is best to fall back and await the assault from the summoned monsters. It is imperative to clear the monsters out quickly, as Fomortiis will summon more if the fight drags on. When an opportunity arises, send in someone powerful to get some chip damage in before they are forced to retreat due to the next wave of monsters showing up. Do beware his [[Nightmare]] attack as it can send several allies within a three tile radius of him to sleep. Fomortiis is mobile, though his movement is low, so keep allies healed or out of his range if they have taken heavy damage. Without the Sacred Twins the [[Wyvern Knight (The Sacred Stones)|Wyvern Knight]]'s [[Pierce]] skill and the [[Bishop]]'s [[Slayer]]-boosted [[Aura]] become effective alternate options for quickly dealing large amounts of damage. If the [[Berserk (staff)|Berserk Staff]] was obtained (requires making an enemy break [[Mend]] in international releases), it can be used on enemy [[Draco Zombie]]s, which will maul Fomortiis for heavy damage before dying, if you clear out other enemies to force them to go after Fomortiis. | ||
==Etymology and other languages== | ==Etymology and other languages== | ||
| Line 571: | Line 565: | ||
|eng-name=Sacred Stone | |eng-name=Sacred Stone | ||
|eng-mean=Refers to the last of the Sacred Stones. | |eng-mean=Refers to the last of the Sacred Stones. | ||
| | |jpn-name={{h|聖魔の光石|Seima no kōseki}} | ||
| | |jpn-mean=Light Stones of Saints and Demons; named after the game's subtitles. | ||
|ger-name=Der Heilige Stein | |ger-name=Der Heilige Stein | ||
|ger-mean=The Sacred Stone. Same as above. | |ger-mean=The Sacred Stone. Same as above. | ||
| Line 578: | Line 572: | ||
==Gallery== | ==Gallery== | ||
<gallery> | |||
Map fe08 black temple depths.png|The chapter map. | |||
</gallery> | |||
{{ChapterNav | {{ChapterNav | ||
Latest revision as of 19:43, 14 November 2023
| ||||||
|

| “ | Listen, everyone. I can never repay you for all you've done so far. Now, please, one last time...Lend me your strength. To defeat the Demon King! To restore peace to our lands! To take the peace we all dream of and make it real! | ” | — Eirika |
|---|
Sacred Stone (Japanese: 聖魔の光石 Light Stones of Saints and Demons) is the final chapter of Fire Emblem: The Sacred Stones. This page covers the second part of the chapter.
Plot
- Main articles:
Sacred Stone (part 2)/Script (Eirika) and Sacred Stone (part 2)/Script (Ephraim)
The Demon King Fomortiis revives himself with Lyon's power; Eirika and Ephraim are astonished by his power, but resolve to defeat him with the help of each other and the rest of their friends. L'Arachel informs the twins that the power of the Sacred Stones comes from human will. With the group's combined willpower, Fomortiis's soul is trapped within Rausten's Sacred Stone; however, they then contend with the Demon King's soulless body.
Once Fomortiis's body is destroyed, everyone rejoices at the end of the conflict across Magvel. Innes points out that Fomortiis cannot return with his body destroyed, and Ephraim and Eirika note that they achieved such without the might of the legendary heroes. Other groups of character converse, discussing how they claimed victory, or what to do with the future. The twins then return home.
In the epilogue, Eirika and Ephraim see off many major figures they encountered; the leave L'Arachel at Rausten, Joshua at Jehanna, Myrrh to Caer Pelyn, and Innes to Frelia, before reaching Renais Castle. In Eirika's route, the twins decide to rest at Castle Renais; Eirika suggests they seal away Rausten's Sacred Stone first, though she wonders if its power could resurrect the many that died in the war—Ephraim reminds her they cannot, and the two decide to fulfill Lyon's dreams of bettering the world. In Ephraim's route, Ephraim receives word of a massive landslide in Grado and leaves to aid its people, wishing to aid the citizens Lyon aimed to protect, and hoping to become a great king in the future.
After the staff credits, the epilogue ends with a flashback to when Lyon first met Ephraim and Eirika, hoping they can become friends.
Chapter data
| ||||||
|
| |||||
| Victory: Defeat Fomortiis | Player | Enemy | ||||
|---|---|---|---|---|---|---|
| Defeat: Eirika or Ephraim dies | 1–12 | 1+8 | ||||
| ||||||
Units deployed in the previous part of the chapter carry over into this one, and are arranged on the map based on deployment order. Eirika and Ephraim are placed in fixed positions and ignored in the deployment order; if deployed, Seth and L'Arachel are also placed in fixed positions and ignored in deployment order.
Character data
| Characters | |
|---|---|
New units
| |
| |
Required characters
| |
Available characters
| |
Enemy data
| This section is missing stats, calculations, or growth rates which may be currently unknown. If this information is available, please help improve the page by adding it. |
- Stats with two figures separated by a ~ are presented as a range, representing stats that vary due to random growths. The figures to the left and right of the ~ are the stat's minimum and maximum possible values respectively.
Easy/Normal Difficult
| |||||||||||||||||||||||||||||||||||||||||||||||||||||||||||||||||||||||||||||||||||||||||||||||||||||||||||||||||||||||||||||||||||||||||||||||||||||||||||||||||||||||||||||||||||||||||||||||||||||||||||||||||||||||||||||||||||||||||||||||||||||||||||||||||||||||||||||||||||||||||||||||||||||||||||||||||||||||||||||||||||||||||||||||||||
| |||||||||||||||||||||||||||||||||||||||||||||||||||||||||||||||||||||||||||||||||||||||||||||||||||||||||||||||||||||||||||||||||||||||||||||||||||||||||||||||||||||||||||||||||||||||||||||||||||||||||||||||||||||||||||||||||||||||||||||||||||||||||||||||||||||||||||||||||||||||||||||||||||||||||||||||||||||||||||||||||||||||||||||||||||
| |||||||||||||||||||||||||||||||||||||||||||||||||||||||||||||||||||||||||||||||||||||||||||||||||||||||||||||||||||||||||||||||||||||||||||||||||||||||||||||||||||||||||||||||||||||||||||||||||||||||||||||||||||||||||||||||||||||||||||||||||||||||||||||||||||||||||||||||||||||||||||||||||||||||||||||||||||||||||||||||||||||||||||||||||||
| |||||||||||||||||||||||||||||||||||||||||||||||||||||||||||||||||||||||||||||||||||||||||||||||||||||||||||||||||||||||||||||||||||||||||||||||||||||||||||||||||||||||||||||||||||||||||||||||||||||||||||||||||||||||||||||||||||||||||||||||||||||||||||||||||||||||||||||||||||||||||||||||||||||||||||||||||||||||||||||||||||||||||||||||||||
Reinforcements
- On turn 1, Fomortiis will spawn 8 random promoted monster units around him. Fomortiis will not initiate combat on this turn.
Boss data
- Stats with two figures separated by a ~ are presented as a range, representing stats that vary due to random growths. The figures to the left and right of the ~ are the stat's minimum and maximum possible values respectively.
- Main article:
Fomortiis
Easy/Normal Difficult
|
|
| |||||||||||||||||||||||||||||||||||||||||||||||||||

Strategy
| This section details unofficial strategies that may help with completion of the chapter. This may not work for everybody. |
Fomortiis can either be very easy or challenging, depending on if the player can kill him in two turns. It is important to note that Fomortiis will always waste his first turn summoning. The monsters he summons will also not act on the turn that they are summoned. He is close enough that Eirika, Ephraim, Seth, and a promoted L'Arachel will be able to reach him and attack him on the first turn. With enough units able to wield the Sacred Twins, this fight is easily won.
If the player has managed to break all the Sacred Twins in their possession, or has not trained up enough units to two-turn him, killing Fomortiis becomes more difficult. If the player finds they cannot kill him on turn 2, is best to fall back and await the assault from the summoned monsters. It is imperative to clear the monsters out quickly, as Fomortiis will summon more if the fight drags on. When an opportunity arises, send in someone powerful to get some chip damage in before they are forced to retreat due to the next wave of monsters showing up. Do beware his Nightmare attack as it can send several allies within a three tile radius of him to sleep. Fomortiis is mobile, though his movement is low, so keep allies healed or out of his range if they have taken heavy damage. Without the Sacred Twins the Wyvern Knight's Pierce skill and the Bishop's Slayer-boosted Aura become effective alternate options for quickly dealing large amounts of damage. If the Berserk Staff was obtained (requires making an enemy break Mend in international releases), it can be used on enemy Draco Zombies, which will maul Fomortiis for heavy damage before dying, if you clear out other enemies to force them to go after Fomortiis.
Etymology and other languages
| Names, etymology, and in other regions | ||
|---|---|---|
| Language | Name | Definition, etymology, and notes |
| English |
Sacred Stone |
Refers to the last of the Sacred Stones. |
| Japanese |
聖魔の光石 |
Light Stones of Saints and Demons; named after the game's subtitles. |
| German |
Der Heilige Stein |
The Sacred Stone. Same as above. |
Gallery
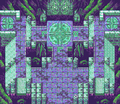
The chapter map.

| ← Sacred Stone (part 1) • | Sacred Stone |
|---|