| Site News |
|---|
| Warning: This wiki contains spoilers. Read at your own risk! Social media: If you would like, please join our Discord server, and/or follow us on Twitter (X) or Tumblr! |
Battle of the Pass: Difference between revisions
m (→Strategy) |
(Added FE12 stuff) |
||
| Line 1: | Line 1: | ||
{{Chapter Infobox | {{Chapter Infobox | ||
|image=[[File:Cm fe12 18.png|200px]] | |image=[[File:Cm fe12 18.png|200px]] | ||
| Line 11: | Line 10: | ||
==Plot== | ==Plot== | ||
{{main|Battle of the Pass/Script|Battle of the Pass/Conversations}} | {{main|Battle of the Pass/Script|Battle of the Pass/Conversations}} | ||
Once the Altean Army arrives at Adria Pass, besides [[Archanea (country)|Archanea]]n troops, the [[Wolfguard]] of [[Aurelis]] is waiting for them too. [[Roshea]] expresses his doubts about the whole campaign, and has a hard time believing [[Marth]] harbors evil ambitions. [[Vyland]] and [[Sedgar]] rebuff him, and [[Wolf (Shadow Dragon)|Wolf]] says he will go on without him if necessary. Roshea decides to reluctantly go along after all. Jagen informs Marth that the King of Aurelis wants to talk, and is in the village to the west. | |||
The army fights the Archanean forces, and Marth visits the village. He asks the King of Aurelis why Aurelian forces are fighting him. King Aurelis responds that he will order the Aurelian forces to retreat, and indicates he accepts his younger brother Hardin's fate. After the castle is seized, the army goes onward to the Archanean palace to end the war. [[Jagen]] informs them that an uprising has broken out in the capital. However, the rebels were defeated, and are being executed by the day. Marth orders his army to make haste to Archanea. | |||
==Chapter data== | ==Chapter data== | ||
| Line 167: | Line 168: | ||
===Item data=== | ===Item data=== | ||
{{tab | |||
|width=100% | |width=100% | ||
|default=2 | |default=2 | ||
|tab1=''Mystery of the Emblem'' | |tab1=''Mystery of the Emblem'' | ||
|tab2=''New Mystery of the Emblem'' | |tab2=''New Mystery of the Emblem'' | ||
|content1= | |content1={{ChapItems | ||
|platform=snes01 | |platform=snes01 | ||
|itemlast=Lifesphere | |itemlast=Lifesphere | ||
|obtainlast=Visit the village | |obtainlast=Visit the village | ||
}} | }} | ||
|content2={{ChapItems | |content2={{ChapItems | ||
|platform=ds | |platform=ds | ||
|itemlast= | |item1=Lifesphere | ||
|obtainlast= | |obtain1=Village | ||
|item2=Arms Scroll | |||
|obtain2=Hidden in the cave | |||
|item3=Silver Lance | |||
|obtain3=Dropped by a [[General]] | |||
|item4=Vulnerary | |||
|obtain4=Dropped by a [[General]] | |||
|item5=Recover | |||
|obtain5=Dropped by a [[Bishop]] | |||
|itemlast=Master Seal | |||
|obtainlast=Dropped by a [[General]] | |||
}} | |||
}} | }} | ||
===Shop data=== | ===Shop data=== | ||
| Line 203: | Line 213: | ||
|secost5=10000 | |secost5=10000 | ||
}} | }} | ||
:''The secret shop is located on the northernmost river tile with rocks'' | |||
|content2={{ChapShop DS | |content2={{ChapShop DS | ||
|secret1=Master Seal | |secret1=Master Seal | ||
| Line 210: | Line 221: | ||
}} | }} | ||
:''Only three Master Seals and one Elysian Whip may be purchased.'' | :''Only three Master Seals and one Elysian Whip may be purchased.'' | ||
:''The secret shop is located on the plain tile wedged in between the two mountain tiles and the peak tiles, east of the starting point'' | |||
}} | }} | ||
===Enemy data=== | ===Enemy data=== | ||
{{Tab | |||
|header=Enemy data | |header=Enemy data | ||
|width=100% | |width=100% | ||
| Line 221: | Line 232: | ||
|tab1=''Mystery of the Emblem'' | |tab1=''Mystery of the Emblem'' | ||
|tab2=''New Mystery of the Emblem'' | |tab2=''New Mystery of the Emblem'' | ||
|content1= | |content1={{ChapUnitHdr|type=Enemy|platform=snes01}} | ||
{{ChapUnitCellFE3 | {{ChapUnitCellFE3 | ||
|name=Aurelis | |name=Aurelis | ||
| Line 387: | Line 398: | ||
|inventory={{Item|3|Silver Lance}} | |inventory={{Item|3|Silver Lance}} | ||
|last=y | |last=y | ||
}} | }} | ||
{{ChapUnitFtr}} | {{ChapUnitFtr}} | ||
| | |content2={{ChapEnemies | ||
{{ | |platform=ds02 | ||
| | |name1=Wolfguard | ||
| | |class1=Paladin | ||
| | |lv1=7 | ||
|#= | |#1=2 | ||
| | |inventory1={{Item|12|Silver Lance}} | ||
| | |- | ||
| | |name2=Wolfguard | ||
| | |class2=Paladin | ||
| | |lv2=7 | ||
| | |#2=2 | ||
| | |inventory2={{Item|12|Silver Sword}} | ||
| | |- | ||
| | |name3=Wolfguard | ||
| | |class3=Horseman | ||
|lv3=7 | |||
|#3=3 | |||
|inventory3={{Item|12|Silver Bow}} | |||
|- | |||
|name4=Archanea | |||
|class4=Paladin | |||
|lv4=7 | |||
|#4=2 | |||
|inventory4={{Item|12|Silver Sword}} | |||
|- | |||
|name5=Archanea | |||
|class5=General | |||
|lv5=7 | |||
|#5=1 | |||
|inventory5={{Item|12|Killer Lance}} | |||
|- | |||
|name6=Archanea | |||
|class6=General | |||
|lv6=7 | |||
|#6=1 | |||
|inventory6={{Item|12|Silver Lance}} | |||
|- | |||
|name7=Archanea | |||
|class7=General | |||
|lv7=7 | |||
|#7=1 | |||
|inventory7={{Item|12|Silver Lance|type=drop}} | |||
|- | |||
|name8=Archanea | |||
|class8=General | |||
|lv8=7 | |||
|#8=2 | |||
|inventory8={{Item|12|Silver Lance}} • {{Item|12|Silver Bow}} | |||
|- | |||
|name9=Archanea | |||
|class9=General | |||
|lv9=7 | |||
|#9=1 | |||
|inventory9={{Item|12|Ridersbane}} | |||
|- | |||
|name10=Archanea | |||
|class10=General | |||
|lv10=7 | |||
|#10=1 | |||
|inventory10={{Item|12|Silver Lance}} • {{Item|12|Vulnerary|type=drop}} | |||
|- | |||
|name11=Archanea | |||
|class11=Ballistician | |||
|lv11=18 | |||
|#11=2 | |||
|inventory11={{Item|12|Hoistflamme}} | |||
|- | |||
|name12=Archanea | |||
|class12=Bishop | |||
|lv12=5 | |||
|#12=2 | |||
|inventory12={{Item|12|Fortify}} | |||
|- | |||
|name13=Archanea | |||
|class13=Bishop | |||
|lv13=5 | |||
|#13=1 | |||
|inventory13={{Item|12|Fortify}} • {{Item|12|Recover|type=drop}} | |||
|- | |||
|name14=[[Vyland]] | |||
|class14=Paladin | |||
|lv14=8 | |||
|#14=1 | |||
|inventory14={{Item|12|Silver Lance}} | |||
|- | |||
|name15=[[Roshea]] | |||
|class15=Paladin | |||
|lv15=8 | |||
|#15=1 | |||
|inventory15={{Item|12|Silver Lance}} | |||
|- | |||
|name16=[[Wolf]] | |||
|class16=Horseman | |||
|lv16=12 | |||
|#16=1 | |||
|inventory16={{Item|12|Silver Bow}} | |||
|- | |||
|name17=[[Sedgar]] | |||
|class17=Horseman | |||
|lv17=10 | |||
|#17=1 | |||
|inventory17={{Item|12|Silver Bow}} | |||
|- | |||
|nameb=Archanea | |||
|classb=General | |||
|lvb=7 | |||
|#b=1 | |||
|inventoryb={{Item|12|Spear}} • {{Item|12|Master Seal|type=drop}} | |||
|notesb=Immobile; stands on a [[Terrain/Nintendo DS games#Fire Emblem: New Mystery of the Emblem|gate]], the chapter's seize point. | |||
|- | |||
|namer1=Ruffian | |||
|classr1=Thief | |||
|lvr1=17 | |||
|#r1=1 | |||
|inventoryr1={{Item|12|Silver Sword}} | |||
|- | |||
|namer2=Wolfguard | |||
|classr2=Horseman | |||
|lvr2=7 | |||
|#r2=7 | |||
|inventoryr2={{Item|12|Silver Bow}} | |||
|- | |||
|namer3=Wolfguard | |||
|classr3=Paladin | |||
|lvr3=7 | |||
|#r3=3 | |||
|inventoryr3={{Item|12|Silver Sword}} | |||
|- | |||
|namerl=Wolfguard | |||
|classrl=Paladin | |||
|lvrl=7 | |||
|#rl=5 | |||
|inventoryrl={{Item|12|Silver Lance}} | |||
}} | }} | ||
}} | }} | ||
====Reinforcements==== | ====Reinforcements==== | ||
=====''Mystery of the Emblem''===== | |||
*Starting turn 1, continuing until 10 have appeared | *Starting turn 1, continuing until 10 have appeared | ||
**1 [[Thief]] from the cave | **1 [[Thief]] from the cave | ||
*After visiting the village | *After visiting the village | ||
**7 [[Dracoknight]]s from the northeast | **7 [[Dracoknight]]s from the northeast | ||
=====''New Mystery of the Emblem''===== | |||
*Turn 2 | |||
**1 [[Thief]] from the cave | |||
*Turns 2-6 | |||
**2 [[Paladin]]s and 1 [[Horseman]] on even turns, 1 [[Paladin]] and 2 [[Horseman|Horsemen]] on odd turns, all from the north. | |||
===Boss data=== | ===Boss data=== | ||
Revision as of 20:29, 28 October 2021
| ||||||
|

Battle of the Pass (Japanese: 峠の戦い Battle of the Mountain Pass) is the eighteenth chapter of Fire Emblem: Mystery of the Emblem and Fire Emblem: New Mystery of the Emblem.
Plot
- Main articles:
Battle of the Pass/Script and Battle of the Pass/Conversations
Once the Altean Army arrives at Adria Pass, besides Archanean troops, the Wolfguard of Aurelis is waiting for them too. Roshea expresses his doubts about the whole campaign, and has a hard time believing Marth harbors evil ambitions. Vyland and Sedgar rebuff him, and Wolf says he will go on without him if necessary. Roshea decides to reluctantly go along after all. Jagen informs Marth that the King of Aurelis wants to talk, and is in the village to the west.
The army fights the Archanean forces, and Marth visits the village. He asks the King of Aurelis why Aurelian forces are fighting him. King Aurelis responds that he will order the Aurelian forces to retreat, and indicates he accepts his younger brother Hardin's fate. After the castle is seized, the army goes onward to the Archanean palace to end the war. Jagen informs them that an uprising has broken out in the capital. However, the rebels were defeated, and are being executed by the day. Marth orders his army to make haste to Archanea.
Chapter data
Mystery of the Emblem New Mystery of the Emblem

| ||||||
|
| |||||
| Victory: Seize | Player | Enemy | ||||
|---|---|---|---|---|---|---|
| Defeat: Marth dies | 12 | 24+4-14 | ||||
| ||||||
Character data
Mystery of the Emblem New Mystery of the Emblem
| Characters | |||||||||||
|---|---|---|---|---|---|---|---|---|---|---|---|
New units
| |||||||||||
| |||||||||||
Available characters
| |||||||||||
Default male player's unit                                                               
| |||||||||||

Item data
Mystery of the Emblem New Mystery of the Emblem
| |||||||||||||||||||||
|
Shop data
Mystery of the Emblem New Mystery of the Emblem
Swords Lances Axes Bows Tomes Staves Items Secret
None
- Only three Master Seals and one Elysian Whip may be purchased.
- The secret shop is located on the plain tile wedged in between the two mountain tiles and the peak tiles, east of the starting point
Enemy data
Mystery of the Emblem New Mystery of the Emblem
| |||||||||||||||||||||||||||||||||||||||||||||||||||||||||||||||||||||||||||||||||||||||||||||||||||||||||||||||||||||||||||||||||||||
| |||||||||||||||||||||||||||||||||||||||||||||||||||||||||||||||||||||||||||||||||||||||||||||||||||||||||||||||||||||||||||||||||||||
| |||||||||||||||||||||||||||||||||||||||||||||||||||||||||||||||||||||||||||||||||||||||||||||||||||||||||||||||||||||||||||||||||||||
|
Reinforcements
Mystery of the Emblem
- Starting turn 1, continuing until 10 have appeared
- 1 Thief from the cave
- After visiting the village
- 7 Dracoknights from the northeast
New Mystery of the Emblem
- Turn 2
- 1 Thief from the cave
- Turns 2-6
Boss data
Mystery of the Emblem New Mystery of the Emblem
Normal Hard Maniac Lunatic
|
|
| |||||||||||||||||||||||||||||||||||||||||||

Strategy
This section has been marked as a stub. Please help improve the page by adding information.
| This section details unofficial strategies that may help with completion of the chapter. This may not work for everybody. |
In New Mystery of the Emblem, this chapter can be rather easily cleared in 1 turn if you've trained a few certain units:
If you want the Lifesphere from the village, you will require 4 Staff Users (3 whose Staff Rank is C or higher), a flying Unit that can easily defeat the boss (i.e. a trained Dracoknight Caeda with a forged Wing Spear and the Lightsphere) and Phina; Without the Lifesphere you will only need 1 Staff User whose Rank is C or higher.
Frost and Wendell (after the latter has reclassed into a Bishop) instantly have the ability to use Warp. For a third Warp User either a trained Marisha or Wrys are the prime candidates if you haven't beaten Hard Mode yet; if you did, you can reclass Etzel into a Bishop for a third Warp User.The Rescue User can be any Unit that can use staves.
- [Lifesphere Only] Warp Marth to the village and visit it, then Rescue him and Dance for him with Phina (without the Dance he can't seize this turn).
- Warp the trained Caeda next to the Boss (it needs to be a flying Unit because the only space that isn't occupied by an enemy can only be occupied by flying units) and attack with the Wing Spear; The amount of training she needs (obviously) varies depending on the difficulty. (Caeda will survive the battle with the boss without any HP or Defense increases except in Lunatic Mode)
- Normal Mode: Dracoknight Caeda (with the Lightsphere) can kill the boss without any Strength increases or Wing Spear Forges. (She will deal a total of 36 damage in 2 hits).
- Hard Mode: Caeda needs to have +3 Speed to double attack the boss [which she will most likely have thanks to her ludicrously high 95% Speed Growth] & will either require a +1 Might Wing Spear forge or +3 Strength to kill the boss (She will deal a total of 42 damage in 2 hits).
- Maniac Mode: Caeda needs to have +7 Speed [2 of which gained from levels as a Dracoknight due to the speed cap of Pegasus Knights] to double attack the boss & a +2 Wing Spear Forge and +1 Strength to kill the boss (She will deal a total of 50 damage in 2 hits)
- After killing the Boss, Warp Marth to the seize point and end the Chapter.
- [Non-Lifesphere] Warp Caeda to the boss, kill him, dance for the Warp User with Phina, and then Warp Marth to seize.
Etymology and other languages
| Names, etymology, and in other regions | ||
|---|---|---|
| Language | Name | Definition, etymology, and notes |
| English (unofficial) |
Battle of the Pass |
Used in the Mystery of the Emblem and New Mystery of the Emblem fan translations |
Gallery

CG image displayed during the intro in Mystery of the Emblem
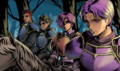
CG image displayed during the intro in New Mystery of the Emblem


References
| ← Gra's Sun Sets • | Battle of the Pass | • The Last Decisive Battle → |
|---|
| Fire Emblem: New Mystery of the Emblem: Heroes of Light and Shadow | ||||||||||||||||||||||||||||||||||
|---|---|---|---|---|---|---|---|---|---|---|---|---|---|---|---|---|---|---|---|---|---|---|---|---|---|---|---|---|---|---|---|---|---|---|
| ||||||||||||||||||||||||||||||||||