| Site News |
|---|
| Warning: This wiki contains spoilers. Read at your own risk! Social media: If you would like, please join our Discord server, and/or follow us on Twitter (X) or Tumblr! |
Sands of Time: Difference between revisions
m (Text replacement - "|return20article=Raven (character)↵" to "") |
Thecornerman (talk | contribs) m (Text replacement - "([Cc])hapter (\d+)" to "$1hapter $2") |
||
| (9 intermediate revisions by 5 users not shown) | |||
| Line 2: | Line 2: | ||
{{Chapter Infobox | {{Chapter Infobox | ||
|image=[[File:Cm fe07 29.png|200px]] | |image=[[File:Cm fe07 29.png|200px]] | ||
|location=[[Ostia]] | |location=Inside Castle [[Ostia]] | ||
|boss=[[Denning]] | |boss=[[Denning]] | ||
|previous=*[[Valorous Roland]] <small>(Eliwood's tale)</small> | |previous=*[[Valorous Roland]] <small>(Eliwood's tale)</small> | ||
*[[The Berserker]] <small>(Hector's tale)</small> | *[[The Berserker]] <small>(Hector's tale)</small> | ||
|next=*[[Victory or Death]] | |next=*[[Victory or Death]] | ||
*[[Battle Preparations]] <small>( | *[[Battle Preparations]] <small>(side quest)</small> | ||
|sidequest=[[Battle Preparations]] is automatically unlocked. | |sidequest=[[Battle Preparations]] is automatically unlocked. | ||
}} | }} | ||
| Line 42: | Line 42: | ||
|victory=Protect the throne for 11 turns | |victory=Protect the throne for 11 turns | ||
|defeat=[[Eliwood]], [[Hector]], or [[Lyn]] dies, or an enemy seizes the throne | |defeat=[[Eliwood]], [[Hector]], or [[Lyn]] dies, or an enemy seizes the throne | ||
|ally= | |ally=3–18 | ||
|other=7 | |other=7 | ||
|enemy=28{{h|+25|reinforcements}} | |enemy=28{{h|+25|reinforcements}} | ||
| Line 55: | Line 55: | ||
|victory=Protect the throne for 11 turns | |victory=Protect the throne for 11 turns | ||
|defeat=[[Eliwood]], [[Hector]], or [[Lyn]] dies, or an enemy seizes the throne | |defeat=[[Eliwood]], [[Hector]], or [[Lyn]] dies, or an enemy seizes the throne | ||
|ally= | |ally=3–15 | ||
|other=7 | |other=7 | ||
|enemy=35{{h|+40|reinforcements}} | |enemy=35{{h|+40|reinforcements}} | ||
| Line 68: | Line 68: | ||
|victory=Protect the throne for 11 turns | |victory=Protect the throne for 11 turns | ||
|defeat=[[Hector]], [[Eliwood]], or [[Lyn]] dies, or an enemy seizes the throne | |defeat=[[Hector]], [[Eliwood]], or [[Lyn]] dies, or an enemy seizes the throne | ||
|ally= | |ally=3–18 | ||
|other=7 | |other=7 | ||
|enemy=27{{h|+42|reinforcements}} | |enemy=27{{h|+42|reinforcements}} | ||
| Line 81: | Line 81: | ||
|victory=Protect the throne for 11 turns | |victory=Protect the throne for 11 turns | ||
|defeat=[[Hector]], [[Eliwood]], or [[Lyn]] dies, or an enemy seizes the throne | |defeat=[[Hector]], [[Eliwood]], or [[Lyn]] dies, or an enemy seizes the throne | ||
|ally= | |ally=3–15 | ||
|other=7 | |other=7 | ||
|enemy=37{{h|+57|reinforcements}} | |enemy=37{{h|+57|reinforcements}} | ||
| Line 96: | Line 96: | ||
===Character data=== | ===Character data=== | ||
{{ChapChars | {{Tab | ||
|width=100% | |||
|tab1=Eliwood's tale | |||
|tab2=Hector's tale | |||
|content1={{ChapChars | |||
|game#=07 | |||
|forced1=eliwood | |||
|forced2=hector | |||
|forced3=lyn | |||
|return1=marcus | |||
|return2=lowen | |||
|return3=rebecca | |||
|return4=dorcas | |||
|return5=bartre | |||
|return6=oswin | |||
|return7=matthew | |||
|return8=serra | |||
|return9=guy | |||
|return10=merlinus | |||
|return11=erk | |||
|return12=priscilla | |||
|return13=florina | |||
|return14=wil | |||
|return15=kent | |||
|return16=sain | |||
|return17=raven | |||
|return18=lucius | |||
|return19=canas | |||
|return20=dart | |||
|return21=fiora | |||
|return22=legault | |||
|return23=isadora | |||
|return24=rath | |||
|return25=heath | |||
|return26=hawkeye | |||
|return27=wallace | |||
|return28=geitz | |||
|return29=pent | |||
|return30=louise | |||
|return31=karel | |||
|return32=harken | |||
|return33=nino | |||
|return34=jaffar | |||
|return35=vaida | |||
|nodeploy1=nils | |||
}} | |||
|content2={{ChapChars | |||
|game#=07 | |game#=07 | ||
|return1= | |forced1=hector | ||
|forced2=eliwood | |||
|forced3=lyn | |||
|return1=matthew | |||
|return2=marcus | |return2=marcus | ||
|return3= | |return3=rebecca | ||
|return4= | |return4=lowen | ||
|return5=dorcas | |return5=dorcas | ||
|return6=bartre | |return6=bartre | ||
|return7= | |return7=oswin | ||
|return8= | |return8=serra | ||
|return9= | |return9=guy | ||
|return10= | |return10=merlinus | ||
|return11= | |return11=erk | ||
|return12= | |return12=priscilla | ||
|return13= | |return13=florina | ||
|return14= | |return14=wil | ||
|return15= | |return15=kent | ||
|return16= | |return16=sain | ||
|return17= | |return17=raven | ||
|return18= | |return18=lucius | ||
|return19= | |return19=canas | ||
|return20= | |return20=dart | ||
|return21= | |return21=fiora | ||
|return22= | |return22=legault | ||
|return23= | |return23=isadora | ||
|return24= | |return24=rath | ||
|return25= | |return25=heath | ||
|return26= | |return26=hawkeye | ||
|return27= | |return27=wallace | ||
|return28= | |return28=geitz | ||
|return29= | |return29=farina | ||
|return30= | |return30=pent | ||
|return31= | |return31=louise | ||
|return32= | |return32=karel | ||
|return33= | |return33=harken | ||
|return34= | |return34=nino | ||
|return35= | |return35=jaffar | ||
|return36= | |return36=vaida | ||
|nodeploy1=nils | |||
| | }} | ||
}} | }} | ||
===Item data=== | ===Item data=== | ||
| Line 178: | Line 225: | ||
|secost5=10,000 | |secost5=10,000 | ||
}} | }} | ||
:''The secret shop is located in the bottom-left of the map, in the 2×2 plains area outside the castle's walls; requires [[ | :''The secret shop is located in the bottom-left of the map, in the 2×2 plains area outside the castle's walls; requires [[Warp]].'' | ||
===Enemy data=== | ===Enemy data=== | ||
| Line 189: | Line 236: | ||
|tab4=Hector Hard | |tab4=Hector Hard | ||
|content1={{ChapUnitHdr|type=Enemy|platform=gba}} | |content1={{ChapUnitHdr|type=Enemy|platform=gba}} | ||
{{ChapUnitCellGBA | |||
|name=[[Denning]] | |||
|class=Sniper | |||
|lv=19 | |||
|#=1 | |||
|hp=51 | |||
|str=18 | |||
|skill=18 | |||
|spd=18 | |||
|lck=0 | |||
|def=14 | |||
|res=22 | |||
|con=8 | |||
|mov=6 | |||
|inventory={{Item|7|Silver Bow}} • {{Item|7|Longbow}} | |||
|notes=Moves to attack units in range. | |||
}} | |||
{{ChapUnitCellGBA | {{ChapUnitCellGBA | ||
|name=Morph | |name=Morph | ||
| Line 392: | Line 456: | ||
|inventory={{Item|7|Steel Bow}} | |inventory={{Item|7|Steel Bow}} | ||
|notes=Moves towards the [[Terrain/Game Boy Advance games#Fire Emblem: The Blazing Blade|throne]]. | |notes=Moves towards the [[Terrain/Game Boy Advance games#Fire Emblem: The Blazing Blade|throne]]. | ||
|last=y | |||
}} | }} | ||
{{ChapUnitReinf|type=Enemy|platform=gba}} | |||
{{ChapUnitCellGBA | {{ChapUnitCellGBA | ||
|name=Morph | |||
|class=Thief | |||
|lv=15 | |||
|#=3 | |||
|name=Morph | |||
|class=Thief | |||
|lv=15 | |||
|#=3 | |||
|hp=22~24 | |hp=22~24 | ||
|str=3~4 | |str=3~4 | ||
| Line 518: | Line 565: | ||
|content2={{ChapUnitHdr|type=Enemy|platform=gba}} | |content2={{ChapUnitHdr|type=Enemy|platform=gba}} | ||
{{ChapUnitCellGBA | {{ChapUnitCellGBA | ||
|name= | |name=[[Denning]] | ||
|class=Sniper | |class=Sniper | ||
|lv= | |lv=19 | ||
|#=1 | |#=1 | ||
|hp=32~37 | |hp=51 | ||
|str=11~15 | |str=18 | ||
|skill=10~14 | |skill=18 | ||
|spd=18 | |||
|lck=0 | |||
|def=14 | |||
|res=22 | |||
|con=8 | |||
|mov=6 | |||
|inventory={{Item|7|Silver Bow}} • {{Item|7|Longbow}} | |||
|notes=Moves to attack units in range. | |||
}} | |||
{{ChapUnitCellGBA | |||
|name=Morph | |||
|class=Sniper | |||
|lv=3 | |||
|#=1 | |||
|hp=32~37 | |||
|str=11~15 | |||
|skill=10~14 | |||
|spd=8~11 | |spd=8~11 | ||
|lck=0 | |lck=0 | ||
| Line 771: | Line 835: | ||
|inventory={{Item|7|Nosferatu}} • {{Item|7|Berserk|link=Berserk (staff)}} | |inventory={{Item|7|Nosferatu}} • {{Item|7|Berserk|link=Berserk (staff)}} | ||
|notes=Moves to attack units in range. | |notes=Moves to attack units in range. | ||
|last=y | |||
}} | }} | ||
{{ChapUnitReinf|type=Enemy|platform=gba}} | |||
{{ChapUnitCellGBA | {{ChapUnitCellGBA | ||
|name=Morph | |||
|class=Thief | |||
|lv=15 | |||
|#=4 | |||
|hp=22~24 | |||
|str=3~4 | |||
|skill=6~9 | |||
|name=Morph | |||
|class=Thief | |||
|lv=15 | |||
|#=4 | |||
|hp=22~24 | |||
|str=3~4 | |||
|skill=6~9 | |||
|spd=13~16 | |spd=13~16 | ||
|lck=0 | |lck=0 | ||
| Line 931: | Line 978: | ||
|content3={{ChapUnitHdr|type=Enemy|platform=gba}} | |content3={{ChapUnitHdr|type=Enemy|platform=gba}} | ||
{{ChapUnitCellGBA | {{ChapUnitCellGBA | ||
|name= | |name=[[Denning]] | ||
|class=Sniper | |class=Sniper | ||
|lv= | |lv=19 | ||
|#=1 | |#=1 | ||
|hp=27~30 | |hp=51 | ||
|str=9~12 | |str=18 | ||
|skill=8~11 | |skill=18 | ||
|spd=18 | |||
|lck=0 | |||
|def=14 | |||
|res=22 | |||
|con=8 | |||
|mov=6 | |||
|inventory={{Item|7|Silver Bow}} • {{Item|7|Longbow}} | |||
|notes=Moves to attack units in range. | |||
}} | |||
{{ChapUnitCellGBA | |||
|name=Morph | |||
|class=Sniper | |||
|lv=3 | |||
|#=1 | |||
|hp=27~30 | |||
|str=9~12 | |||
|skill=8~11 | |||
|spd=6~9 | |spd=6~9 | ||
|lck=0 | |lck=0 | ||
| Line 1,235: | Line 1,299: | ||
|inventory={{Item|7|Longbow}} | |inventory={{Item|7|Longbow}} | ||
|notes=Moves towards the [[Terrain/Game Boy Advance games#Fire Emblem: The Blazing Blade|throne]]. | |notes=Moves towards the [[Terrain/Game Boy Advance games#Fire Emblem: The Blazing Blade|throne]]. | ||
|last=y | |||
}} | }} | ||
{{ChapUnitReinf|type=Enemy|platform=gba}} | |||
{{ChapUnitCellGBA | {{ChapUnitCellGBA | ||
|name=Morph | |||
|class=Thief | |||
|lv=15 | |||
|#=4 | |||
|hp=22~24 | |||
|str=3~4 | |||
|skill=6~9 | |||
|name=Morph | |||
|class=Thief | |||
|lv=15 | |||
|#=4 | |||
|hp=22~24 | |||
|str=3~4 | |||
|skill=6~9 | |||
|spd=13~16 | |spd=13~16 | ||
|lck=0 | |lck=0 | ||
| Line 1,411: | Line 1,458: | ||
{{ChapUnitFtr}} | {{ChapUnitFtr}} | ||
|content4={{ChapUnitHdr|type=Enemy|platform=gba}} | |content4={{ChapUnitHdr|type=Enemy|platform=gba}} | ||
{{ChapUnitCellGBA | |||
|name=[[Denning]] | |||
|class=Sniper | |||
|lv=19 | |||
|#=1 | |||
|hp=53~55 | |||
|str=19~20 | |||
|skill=19~20 | |||
|spd=18~20 | |||
|lck=0 | |||
|def=14~15 | |||
|res=22~23 | |||
|con=8 | |||
|mov=6 | |||
|inventory={{Item|7|Silver Bow}} • {{Item|7|Longbow}} | |||
|notes=Moves to attack units in range. | |||
}} | |||
{{ChapUnitCellGBA | {{ChapUnitCellGBA | ||
|name=Morph | |name=Morph | ||
| Line 1,849: | Line 1,913: | ||
|mov=6 | |mov=6 | ||
|inventory={{Item|7|Nosferatu}} • {{Item|7|Berserk|link=Berserk (staff)}} | |inventory={{Item|7|Nosferatu}} • {{Item|7|Berserk|link=Berserk (staff)}} | ||
|notes=Moves to attack units in range. | |notes=Moves to attack units in range. | ||
|last=y | |last=y | ||
| Line 2,225: | Line 2,272: | ||
==Strategy== | ==Strategy== | ||
The last defend map of the game. The map features multiple [[Druid]]s armed with status staves as well as quite a few [[Shaman]]s. On Eliwood mode, you fight a metric ton of [[Archer]]s, while on Hector mode, some of those Archers are swapped out for [[Knight]]s. In both modes, there are a lot of poison weapons among the enemy ranks, which is a very good thing. There's one of each status staff on the map, which can spell disaster if your [[Restore]] users get targeted by them (EHM throws in an extra Sleep caster for good measure), so it's a good idea to deploy at least 3 staff users that can use Restore. | |||
Deploy your strongest units with strong 1-2 range (for Archers and Shamans) or high firepower (for Hector mode Knights), such as [[Pent]] and [[Louise]], [[Vaida]], [[Harken]], [[Hawkeye]] etc. into the 4-man "island" away from the rest of the party; they will be responsible for most of the killing, as well as dealing with the boss. One of them (usually Pent), will need to carry Restore and be able to use it. The rest of the party stays up near the throne to start out; they also need at least one Restore caster with staff. It's also a good idea to give one of them a [[Chest Key]] to loot the [[Body Ring]] chest as they fight their way over. | |||
You can somewhat ignore the green units. Their stats are complete garbage and are lucky to last more than 2 rounds of combat without dying. The most they will do is be a distraction for a few enemies and keeping that fire off of your units, which can even be annoying or bad if using the strategy described below. There's no reward for keeping them alive, so don't bother with them. | |||
The first order of business is to intentionally get as many of your own units [[Poison (status)|poisoned]] as you safely can. Counterintuitive as it may be, it actually makes the status staff users easier to deal with, as they won't target units already under a bad status effect, which poison counts as. Since poison weapons are weak and poison damage is minimal, this should not pose any significant danger to your trained units. Poison weapons are inaccurate, so units shouldn't be relied on to get poisoned. However, status staff immunity is so useful on this map that it's still advised to try; worst-case scenario you just fall back to using a few more actions to Restore important units. A poisoned Restore caster will never be incapacitated so they can restore those hit by status staves, while poisoned units also can't be [[Berserk (staff)|Berserk]]ed, so there's no risk of their inventory being locked out in case they're holding a Restore for someone else. Likewise, poisoned units can safely be sent away from Restore users, as by the the time the poison wears off, all the status staves will be exhausted. | |||
Your 4-man elite squad deployed away from the rest of the army should immediately rush in and start killing everything in their path. There are a lot of enemies, so it's important they intercept and decimate them before they head further up the map. Additionally, they are likely the only ones able to reach the Body Ring chest in a safe and timely manner, so they should be heading into the fray regardless. They should take care not to pull [[Denning]] yet, as while he can be neutralized by boxing him in, killing him stops the reinforcements, which you may want to farm for EXP. If you don't mind losing out on reinforcement EXP however, you can pull him in early and take him out to shut down the reinforcements. | |||
Send [[Jaffar]] down the left side of the map with 1-2 units to escort him in order to loot the chests. Bashing the wall in is faster than going through the door, though one of the units going down this lane will need either great DEF or the [[Iron Rune]] on Hector Mode, due to a [[Killing Edge]] [[Swordmaster]] being there. The rest of the throne room units should simply form a 3-wide line behind the green units. The 3 bulkiest units not sent elsewhere should form a horizontal line to limit how many attacks each of them can be exposed to. Use [[Barrier]] or [[Pure Water]] to overcome magic damage problems, and simply have them stall the enemies there until the timer runs out. | |||
==Trivia== | ==Trivia== | ||
* This map shares portions of and takes place at the same area as {{FE6}}{{'}}s [[Reunion (The Binding Blade)|Chapter 8]]. | * This map shares portions of and takes place at the same area as {{FE6}}{{'}}s [[Reunion (The Binding Blade)|Chapter 8]]. | ||
* In the prototype version of this chapter, a door was present in the upper left corner of the map, which is also where the secret shop was located.<ref>{{Cite web|url=https://tcrf.net/Fire_Emblem_(Game_Boy_Advance)#Chapter_29_(Eliwood_Mode)/Chapter_31_(Hector_Mode):_Sands_of_Time|title=Fire Emblem (Game Boy Advance)|site=tcrf.net|retrieved=November 3, 2022}}</ref> | * In the prototype version of this chapter, a door was present in the upper left corner of the map, corresponding to a door that was present in ''The Binding Blade''{{'}}s Chapter 8, which is also where the secret shop was located.<ref>{{Cite web|url=https://tcrf.net/Fire_Emblem_(Game_Boy_Advance)#Chapter_29_(Eliwood_Mode)/Chapter_31_(Hector_Mode):_Sands_of_Time|title=Fire Emblem (Game Boy Advance)|site=tcrf.net|retrieved=November 3, 2022}}</ref> | ||
==Etymology and other languages== | ==Etymology and other languages== | ||
Latest revision as of 16:33, 28 March 2024
- This article is about the chapter of The Blazing Blade. For the Tempest Trial in Heroes, see Sands of Time (Heroes).
| ||||||||||
|

| “ | This is a message from Lord Nergal. "I await you on the Dread Isle." This is a message from Lord Nergal. "I await you on the Dread Isle." This is a message... | ” | — Denning |
|---|
Sands of Time (Japanese: 悠久の黄砂 Eternal Sand) is the twenty-ninth chapter of Eliwood's tale and thirty-first of Hector's tale in Fire Emblem: The Blazing Blade.
Plot
- Main articles:
Sands of Time/Script (Eliwood) and Sands of Time/Script (Hector)

The group arrives in Ostia; a soldier greets Hector and informs him that Uther has departed for a conference in Etruria. Inside the castle, Athos explains his history with Nergal. Athos met and befriended Nergal 500 years ago in the Nabata Desert, when they were in search of knowledge. One day, they discovered Arcadia in Nabata, where dragons lived in harmony with humans. Nergal and Athos erected a magical barrier to hide Arcadia and lived there for centuries, studying in their libraries. In Arcadia, Nergal learned how to steal quintessence and use it as power. Nergal was banished from Arcadia and fled to Bern, where he began making morphs.
Athos is interrupted by a soldier alerting that the castle is under attack. The group concludes that the forces were sent by Nergal and take to defending the throne.
The lead morph, Denning, repeats "This is a message from Lord Nergal: 'I await you on the Dread Isle.'" Lyn tells Eliwood to not overexert himself; Eliwood coldly responds that he is fine. Nils absent-mindedly wanders onto the battlefield before being shuffled off to a safe room.
The group manages to fend off the invaders long enough for reinforcements arrive and repel Nergal's forces. No longer under threat, Athos continues his story. Once Athos discovered how much more powerful Nergal had become, he assumed Nergal's next target would be the dragons of Arcadia, and prepared to defend it. However, Nergal instead went to the Dragon's Gate and called Ninian and Nils through it. Athos tells the group that the legendary weapons are their last hope, and he will go to Bramimond to seek his help in obtaining as many of them as possible to stop Nergal. Eliwood, Hector, and Lyn declare that they will go to Dread Isle to suppress Nergal's army of morphs and prevent him from ravaging Lycia any further.
Before Athos leaves, he ensures that Eliwood and Hector—in his tale—still have Durandal and Armads. They confirm that they still have the weapons, but have been uncomfortable with using them; however, they promise that they will not hesitate to use them against Nergal.
Later that night, Hector confronts Oswin about Uther; Hector threatens to kill him for keeping the secret, but Oswin remains silent. Hector concludes that Uther has died of his illness, and leaves the throne room alone.
Nergal returns to the Dragon's Gate with Ninian's quintessence and her dragonstone; he infuses the dragonstone with Ninian's quintessence, creating a tool which enables him to call dragons from the gate whenever he pleases. Nergal decides to wait and gather more quintessence from Eliwood's forces in order to recover from Athos's attack before calling the dragons, as they may break free of his control and kill him if he is too weak.
Chapter data
Eliwood Normal Eliwood Hard Hector Normal Hector Hard


The placement of the two non-main Lords is based on their position in deployment order, which can vary from previous maps.
Character data
Eliwood's tale Hector's tale
| Characters | |
|---|---|
New units
| |
| |
Required characters
| |
Available characters
| |
Undeployable characters
| |
Item data
| |||||||||||||||||||||||||||||||||
|
Shop data
Swords Lances Axes Bows Anima Light Dark Staves Items Secret
None
- The secret shop is located in the bottom-left of the map, in the 2×2 plains area outside the castle's walls; requires Warp.
Enemy data
- Stats with two figures separated by a ~ are presented as a range, representing stats that vary due to random growths. The figures to the left and right of the ~ are the stat's minimum and maximum possible values respectively.
Eliwood Normal Eliwood Hard Hector Normal Hector Hard
| ||||||||||||||||||||||||||||||||||||||||||||||||||||||||||||||||||||||||||||||||||||||||||||||||||||||||||||||||||||||||||||||||||||||||||||||||||||||||||||||||||||||||||||||||||||||||||||||||||||||||||||||||||||||||||||||||||||||||||||||||||||||||||||||||||||||||||||||||||||||||||||||||||||||||||||||||||||||||||||||||||||||||||||||||||||||||||||||||||||||||||||||
| ||||||||||||||||||||||||||||||||||||||||||||||||||||||||||||||||||||||||||||||||||||||||||||||||||||||||||||||||||||||||||||||||||||||||||||||||||||||||||||||||||||||||||||||||||||||||||||||||||||||||||||||||||||||||||||||||||||||||||||||||||||||||||||||||||||||||||||||||||||||||||||||||||||||||||||||||||||||||||||||||||||||||||||||||||||||||||||||||||||||||||||||
| ||||||||||||||||||||||||||||||||||||||||||||||||||||||||||||||||||||||||||||||||||||||||||||||||||||||||||||||||||||||||||||||||||||||||||||||||||||||||||||||||||||||||||||||||||||||||||||||||||||||||||||||||||||||||||||||||||||||||||||||||||||||||||||||||||||||||||||||||||||||||||||||||||||||||||||||||||||||||||||||||||||||||||||||||||||||||||||||||||||||||||||||
| ||||||||||||||||||||||||||||||||||||||||||||||||||||||||||||||||||||||||||||||||||||||||||||||||||||||||||||||||||||||||||||||||||||||||||||||||||||||||||||||||||||||||||||||||||||||||||||||||||||||||||||||||||||||||||||||||||||||||||||||||||||||||||||||||||||||||||||||||||||||||||||||||||||||||||||||||||||||||||||||||||||||||||||||||||||||||||||||||||||||||||||||
Reinforcements
All reinforcements are halted when Denning is defeated.
Eliwood's tale
- Turns 2 (Hard Mode)/3 (Normal Mode) – 5
- 1 Thief from the south stairs
- Turns 3, 5, 10, and 11
- 2 Cavaliers from the south stairs
- Turns 2–8 (Hard Mode only)
- Turns 4 (Hard Mode) and 5
- 2 Snipers from the south stairs
- Turn 6
- 2 Knights from the east edge of the map
- Turns 6–9
- 2 Myrmidons from the south stairs
- Turn 6 (Hard Mode) and 7
- 1 Druid from the east edge of the map
Hector's tale
- Turns 2–5
- 1 Thief from the south stairs
- Turns 2, 5 (Hard Mode), and 8
- 1 General and 2 Knights with Poison Lances from the south stairs (Normal Mode only)
- 1 General with a Silver Axe and 2 Knights—one with a Poison Lance, one with an Axereaver—from the south stairs (Hard Mode only)
- Turns 3 and 6
- 3 Knights—two with Poison Lances; one more with a Poison Lance in Normal Mode, or a Silver Lance in Hard Mode—from the south stairs
- Turns 3–8 (Normal Mode only)
- Turns 2–8 (Hard Mode only)
- Turns 4 (Hard Mode) and 5
- 2 Snipers from the south stairs
- Turn 6 (Normal Mode only)
- 2 Knights with Poison Lances from the east edge of the map
- Turns 5 and 6 (Hard Mode only)
- 2 Generals—one with an Axereaver, one with a Silver Lance—from the east edge of the map
- Turns 6 (Hard Mode) and 7
- Turns 7, 9 (Hard Mode), 10, and 11
- 2 Wyvern Riders—one with a Poison Lance; one more with a Poison Lance in Normal Mode, or an Axereaver in Hard Mode—and 1 Wyvern Lord from the south stairs
NPC data
- Stats with two figures separated by a ~ are presented as a range, representing stats that vary due to random growths. The figures to the left and right of the ~ are the stat's minimum and maximum possible values respectively.
| ||||||||||||||||||||||||||||||||||||||||||
| ||||||||||||||||||||||||||||||||||||||||||
Boss data
- Stats with two figures separated by a ~ are presented as a range, representing stats that vary due to random growths. The figures to the left and right of the ~ are the stat's minimum and maximum possible values respectively.
- Main article:
Denning
Normal/Eliwood Hard Hector Hard
|
|
| |||||||||||||||||||||||||||||||||||||||||||||||||||

Strategy
The last defend map of the game. The map features multiple Druids armed with status staves as well as quite a few Shamans. On Eliwood mode, you fight a metric ton of Archers, while on Hector mode, some of those Archers are swapped out for Knights. In both modes, there are a lot of poison weapons among the enemy ranks, which is a very good thing. There's one of each status staff on the map, which can spell disaster if your Restore users get targeted by them (EHM throws in an extra Sleep caster for good measure), so it's a good idea to deploy at least 3 staff users that can use Restore.
Deploy your strongest units with strong 1-2 range (for Archers and Shamans) or high firepower (for Hector mode Knights), such as Pent and Louise, Vaida, Harken, Hawkeye etc. into the 4-man "island" away from the rest of the party; they will be responsible for most of the killing, as well as dealing with the boss. One of them (usually Pent), will need to carry Restore and be able to use it. The rest of the party stays up near the throne to start out; they also need at least one Restore caster with staff. It's also a good idea to give one of them a Chest Key to loot the Body Ring chest as they fight their way over.
You can somewhat ignore the green units. Their stats are complete garbage and are lucky to last more than 2 rounds of combat without dying. The most they will do is be a distraction for a few enemies and keeping that fire off of your units, which can even be annoying or bad if using the strategy described below. There's no reward for keeping them alive, so don't bother with them.
The first order of business is to intentionally get as many of your own units poisoned as you safely can. Counterintuitive as it may be, it actually makes the status staff users easier to deal with, as they won't target units already under a bad status effect, which poison counts as. Since poison weapons are weak and poison damage is minimal, this should not pose any significant danger to your trained units. Poison weapons are inaccurate, so units shouldn't be relied on to get poisoned. However, status staff immunity is so useful on this map that it's still advised to try; worst-case scenario you just fall back to using a few more actions to Restore important units. A poisoned Restore caster will never be incapacitated so they can restore those hit by status staves, while poisoned units also can't be Berserked, so there's no risk of their inventory being locked out in case they're holding a Restore for someone else. Likewise, poisoned units can safely be sent away from Restore users, as by the the time the poison wears off, all the status staves will be exhausted.
Your 4-man elite squad deployed away from the rest of the army should immediately rush in and start killing everything in their path. There are a lot of enemies, so it's important they intercept and decimate them before they head further up the map. Additionally, they are likely the only ones able to reach the Body Ring chest in a safe and timely manner, so they should be heading into the fray regardless. They should take care not to pull Denning yet, as while he can be neutralized by boxing him in, killing him stops the reinforcements, which you may want to farm for EXP. If you don't mind losing out on reinforcement EXP however, you can pull him in early and take him out to shut down the reinforcements.
Send Jaffar down the left side of the map with 1-2 units to escort him in order to loot the chests. Bashing the wall in is faster than going through the door, though one of the units going down this lane will need either great DEF or the Iron Rune on Hector Mode, due to a Killing Edge Swordmaster being there. The rest of the throne room units should simply form a 3-wide line behind the green units. The 3 bulkiest units not sent elsewhere should form a horizontal line to limit how many attacks each of them can be exposed to. Use Barrier or Pure Water to overcome magic damage problems, and simply have them stall the enemies there until the timer runs out.
Trivia
- This map shares portions of and takes place at the same area as Fire Emblem: The Binding Blade's Chapter 8.
- In the prototype version of this chapter, a door was present in the upper left corner of the map, corresponding to a door that was present in The Binding Blade's Chapter 8, which is also where the secret shop was located.[1]
Etymology and other languages
| Names, etymology, and in other regions | ||
|---|---|---|
| Language | Name | Definition, etymology, and notes |
| English |
Sands of Time |
-- |
| Japanese |
悠久の黄砂 |
Eternal Sand |
| German |
Der Sand der Zeit |
The Sands of Time |
Gallery
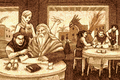
Athos recounts his and Nergal's studies in Arcadia.

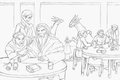
Athos remembers Nergal's new terrible power.


Prototype
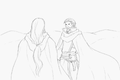
Athos and Nergal meet for the first time in the Nabata desert in the prototype.
Athos recounts his and Nergal's studies in Arcadia in the prototype.

Athos remembers Nergal's terrible power in the prototype.


References
- ↑ Fire Emblem (Game Boy Advance), tcrf.net, Retrieved: November 3, 2022
| ← Valorous Roland • ← The Berserker • |
Sands of Time | • Victory or Death → • Battle Preparations → |
|---|