| Site News |
|---|
| Warning: This wiki contains spoilers. Read at your own risk! Social media: If you would like, please join our Discord server, and/or follow us on Twitter (X) or Tumblr! |
The Pirates of Galder: Difference between revisions
m (Text replacement - "Nintendo Entertainment System games" to "Family Computer games") |
Thecornerman (talk | contribs) |
||
| (22 intermediate revisions by 5 users not shown) | |||
| Line 1: | Line 1: | ||
{{Chapter Infobox | {{Chapter Infobox | ||
|image=[[File:Cm fe11 2.png|200px]] | |image=[[File:Cm fe11 2.png|200px]] | ||
|location=Galder Harbor | |location=[[Galder]] Harbor | ||
|new units=[[Ogma]], [[Barst]], [[Bord]], [[Cord]], [[Darros]]{{ | |new units=[[Ogma]], [[Barst]], [[Bord]], [[Cord]], [[Darros]],<ref group="Note">Not in {{title|Mystery of the Emblem}}.</ref> [[Castor]] | ||
|boss=[[Gomer]] | |boss=[[Gomer]] | ||
|previous=[[Marth Embarks]] | |previous=[[Marth Embarks]] | ||
| Line 8: | Line 8: | ||
}} | }} | ||
'''The Pirates of Galder''' (Japanese: {{hl|ガルダの海賊|Garuda no kaizoku}} ''Pirates of Garda'') is the second chapter in {{FE1}}, Book | '''The Pirates of Galder''' (Japanese: {{hl|ガルダの海賊|Garuda no kaizoku}} ''Pirates of Garda'') is the second chapter in {{FE1}}, Book I of {{title|Mystery of the Emblem}}, and {{title|Shadow Dragon}}. | ||
==Plot== | ==Plot== | ||
{{main|The Pirates of Galder/Script}} | {{main|The Pirates of Galder/Script}} | ||
[[Marth]] sets out for Galder Harbor, a sleepy port town that has been taken over by a pirate crew led by [[Gomer]]. As he reaches the port, he is joined by the mercenaries King [[Mostyn]] promised him: [[Ogma]], [[Barst]], [[Bord]], and [[Cord]]. Ogma warns Marth that Grustian cavalry is heading this way to claim his head. Marth defeats Gomer and his pirate crew, much to the relief of the villagers. Upon learning that he intends to reach [[Aurelis]], one of the villagers warns Marth that his route will take him into the Ghoul's Teeth, where the fearsome Soothsires make their hideout. The villager also warns him to beware [[Navarre]], a skilled swordsman employed by the Soothsires. | [[Marth]] sets out for [[Galder]] Harbor, a sleepy port town that has been taken over by a pirate crew led by [[Gomer]]. As he reaches the port, he is joined by the mercenaries King [[Mostyn]] promised him: [[Ogma]], [[Barst]], [[Bord]], and [[Cord]]. Ogma warns Marth that Grustian cavalry is heading this way to claim his head. Marth defeats Gomer and his pirate crew, much to the relief of the villagers. Upon learning that he intends to reach [[Aurelis]], one of the villagers warns Marth that his route will take him into the Ghoul's Teeth, where the fearsome [[Soothsires]] make their hideout. The villager also warns him to beware [[Navarre]], a skilled swordsman employed by the Soothsires. | ||
==Chapter data== | ==Chapter data== | ||
{{Tab | {{Tab | ||
|default=3 | |default=3 | ||
|width=100% | |||
|tab1=''Shadow Dragon & the Blade of Light'' | |tab1=''Shadow Dragon & the Blade of Light'' | ||
|tab2=''Mystery of the Emblem'' | |tab2=''Mystery of the Emblem'' | ||
| Line 24: | Line 25: | ||
|defeat=[[Marth]] dies | |defeat=[[Marth]] dies | ||
|ally=12{{h|+2|Upon Darros and Castor being recruited}} | |ally=12{{h|+2|Upon Darros and Castor being recruited}} | ||
|enemy=17{{h| | |enemy=17{{h|−2|Upon Darros and Castor being recruited}} | ||
|map=[[File:Cm fe01 2.png]] | |map=[[File:Cm fe01 2.png]] | ||
|col=30 | |col=30 | ||
|row=13 | |row=13 | ||
}} | }} | ||
Units are arranged based on their position in deployment order after Marth. If every unit is alive, deployment order is Marth, Jagen, Cain, Abel, Draug, Gordin, Caeda, Wrys. | Units are arranged based on their position in deployment order after [[Marth]]. If every unit is alive, deployment order is Marth, [[Jagen]], [[Cain]], [[Abel]], [[Draug]], [[Gordin]], [[Caeda]], and [[Wrys]]. | ||
|content2={{ChapData | |content2={{ChapData | ||
|victory=Seize | |victory=Seize | ||
|defeat=[[Marth]] dies | |defeat=[[Marth]] dies | ||
|ally= | |ally=1–7{{h|+5|Upon Bord, Cord, Barst, Ogma, and Castor being recruited}} | ||
|enemy=17{{h| | |enemy=17{{h|−1|Upon Castor being recruited}} | ||
|map=[[File:Cm fe03 b1 2.png]] | |map=[[File:Cm fe03 b1 2.png]] | ||
|col=30 | |col=30 | ||
| Line 44: | Line 44: | ||
|defeat=[[Marth]] dies | |defeat=[[Marth]] dies | ||
|ally=12{{h|+2|Upon Darros and Castor being recruited}} | |ally=12{{h|+2|Upon Darros and Castor being recruited}} | ||
|enemy=17{{h| | |enemy=17{{h|−2|Upon Darros and Castor being recruited}} | ||
|map=[[File:Cm fe11 2.png|512px]] | |map=[[File:Cm fe11 2.png|512px]] | ||
|col=30 | |col=30 | ||
|row=13 | |row=13 | ||
}} | }} | ||
Units are arranged based on their position in deployment order. If every unit is alive and recruited, the deployment order is: | |||
*In Normal mode: Marth, [[Abel]], [[Frey]], [[Jagen]], [[Cain]], [[Gordin]], [[Draug]], [[Norne]], [[Caeda]], and [[Wrys]]. | |||
*In Hard mode: Marth, [[Caeda]], [[Cain]], [[Abel]], [[Draug]], [[Jagen]], [[Gordin]], and [[Wrys]]. | |||
}} | }} | ||
===Character data=== | ===Character data=== | ||
{{Tab | {{Tab | ||
|width=100% | |||
|default=3 | |default=3 | ||
|tab1=''Shadow Dragon & the Blade of Light'' | |tab1=''Shadow Dragon & the Blade of Light'' | ||
| Line 65: | Line 69: | ||
|HP=20 | |HP=20 | ||
|lv=3 | |lv=3 | ||
|inventory=[[Axe ( | |inventory=[[Axe (Famicom)|Axe]]<br>[[Hammer]] | ||
|recruitment method=Automatically from turn 1 | |recruitment method=Automatically from turn 1 | ||
}} | }} | ||
| Line 74: | Line 78: | ||
|HP=20 | |HP=20 | ||
|lv=3 | |lv=3 | ||
|inventory=[[Axe ( | |inventory=[[Axe (Famicom)|Axe]] | ||
|recruitment method=Automatically from turn 1 | |recruitment method=Automatically from turn 1 | ||
}} | }} | ||
| Line 113: | Line 117: | ||
|recruitment method=Enemy, talk to with [[Caeda]] | |recruitment method=Enemy, talk to with [[Caeda]] | ||
}} | }} | ||
| | |forced1=marth | ||
| | |return1=jagen | ||
| | |return2=cain | ||
| | |return3=abel | ||
| | |return4=draug | ||
| | |return5=gordin | ||
| | |return6=caeda | ||
| | |return7=wrys | ||
}} | }} | ||
|content2={{ChapChars | |content2={{ChapChars | ||
| Line 169: | Line 173: | ||
|recruitment method=Enemy, talk to with [[Caeda]] | |recruitment method=Enemy, talk to with [[Caeda]] | ||
}} | }} | ||
| | |forced1=marth 01 | ||
| | |forced1article=Marth | ||
| | |return1=abel | ||
| | |return2=cain | ||
| | |return3=jagen | ||
| | |return4=gordin | ||
| | |return5=draug | ||
| | |return6=caeda 01 | ||
| | |return6article=Caeda | ||
}} | }} | ||
|content3={{ChapChars | |content3={{ChapChars | ||
| Line 235: | Line 239: | ||
|recruitment method=Enemy, talk to with [[Caeda]] | |recruitment method=Enemy, talk to with [[Caeda]] | ||
}} | }} | ||
| | |forced1=marth | ||
| | |return1=abel | ||
| | |return2=frey | ||
| | |return3=jagen | ||
| | |return4=cain | ||
| | |return5=gordin | ||
| | |return6=draug | ||
| | |return7=norne | ||
| | |return8=caeda | ||
| | |return9=wrys | ||
}} | }} | ||
}} | }} | ||
| Line 298: | Line 302: | ||
|axcost1=300 | |axcost1=300 | ||
|axe2=Axe | |axe2=Axe | ||
|axe2article=Axe ( | |axe2article=Axe (Famicom) | ||
|axcost2=360 | |axcost2=360 | ||
|axe3=Steel Axe | |axe3=Steel Axe | ||
| Line 347: | Line 351: | ||
|tab3=''Shadow Dragon'' | |tab3=''Shadow Dragon'' | ||
|content1={{ChapUnitHdr|type=Enemy|platform=nes01}} | |content1={{ChapUnitHdr|type=Enemy|platform=nes01}} | ||
{{ChapUnitCellFE1 | |||
|name=[[Gomer]] | |||
|class=Pirate | |||
|lv=7 | |||
|#=1 | |||
|hp=27 | |||
|str=8 | |||
|skill=4 | |||
|spd=9 | |||
|def=7 | |||
|mov=6 | |||
|inventory=[[Hand Axe]] | |||
|notes=Drops a {{drop|Steel Sword}} upon defeat.<br>Moves onto the [[Terrain/Family Computer games#Fire Emblem: Shadow Dragon & the Blade of Light|gate]] on turn 1, then does not move. | |||
}} | |||
{{ChapUnitCellFE1 | {{ChapUnitCellFE1 | ||
|name=Pirate | |name=Pirate | ||
| Line 358: | Line 376: | ||
|def=4 | |def=4 | ||
|mov=6 | |mov=6 | ||
|inventory=[[Axe ( | |inventory=[[Axe (Famicom)|Axe]] | ||
}} | }} | ||
{{ChapUnitCellFE1 | {{ChapUnitCellFE1 | ||
| Line 426: | Line 444: | ||
|def=7 | |def=7 | ||
|mov=9 | |mov=9 | ||
|inventory=[[Lance ( | |inventory=[[Lance (Famicom)|Lance]] | ||
|last=y | |||
}} | }} | ||
{{ | {{ChapUnitFtr}} | ||
|content2={{ChapUnitHdr|type=Enemy|platform=snes01}} | |||
{{ChapUnitCellFE3 | |||
|name=[[Gomer]] | |name=[[Gomer]] | ||
|class=Pirate | |class=Pirate | ||
| Line 434: | Line 455: | ||
|#=1 | |#=1 | ||
|hp=27 | |hp=27 | ||
|str= | |str=7 | ||
|skill= | |skill=1 | ||
|spd= | |spd=3 | ||
|def= | |def=6 | ||
|mov= | |res=0 | ||
|inventory= | |mov=5 | ||
|inventory={{Item|3|Hand Axe}} • {{Item|3|Steel Sword|type=drop}} | |||
|notes=Moves onto the [[Terrain/Super Famicom games#Mystery of the Emblem|gate]] on turn 1, then does not move. | |||
}} | }} | ||
{{ChapUnitCellFE3 | {{ChapUnitCellFE3 | ||
|name=Galder | |name=Galder | ||
| Line 562: | Line 581: | ||
|mov=9 | |mov=9 | ||
|inventory={{Item|3|Iron Lance}} | |inventory={{Item|3|Iron Lance}} | ||
|last=y | |||
}} | }} | ||
{{ChapUnitFtr}} | |||
|content3=:''Stats with a decimal can vary randomly; the decimal represents the chance for the stat to increase to the nearest integer, or otherwise be truncated.'' | |||
{{ChapUnitFtr}} | |||
|content3=:''Stats with a decimal can vary randomly; the decimal represents the chance for the stat to increase to the nearest integer, or otherwise be truncated.'' | |||
{{Tab | {{Tab | ||
|width=100% | |width=100% | ||
| Line 591: | Line 595: | ||
|content1={{ChapUnitHdr|type=Enemy|platform=ds01}} | |content1={{ChapUnitHdr|type=Enemy|platform=ds01}} | ||
{{ChapUnitCellFE11 | {{ChapUnitCellFE11 | ||
|name= | |name=[[Gomer]] | ||
|class=Pirate | |class=Pirate | ||
|lv=1 | |lv=7 | ||
|#=8 | |#=1 | ||
|hp=18 | |hp=27 | ||
|str=5 | |str=8 | ||
|mag=0 | |||
|skill=4 | |||
|spd=9 | |||
|lck=0 | |||
|def=5 | |||
|res=0 | |||
|inventory={{Item|ds|Hand Axe}} • {{Item|ds|Steel Sword|type=drop}} | |||
|notes=Stands on a [[Terrain/Nintendo DS games#Fire Emblem: Shadow Dragon|gate]], the chapter's seize point. | |||
}} | |||
{{ChapUnitCellFE11 | |||
|name=Pirate | |||
|class=Pirate | |||
|lv=1 | |||
|#=8 | |||
|hp=18 | |||
|str=5 | |||
|mag=0 | |mag=0 | ||
|skill=1 | |skill=1 | ||
| Line 605: | Line 625: | ||
|mov=6 | |mov=6 | ||
|inventory={{Item|ds|Iron Axe}} | |inventory={{Item|ds|Iron Axe}} | ||
|notes=• The northeastern one immediately begins moving unprovoked.<br>• The northwestern | |notes=• The northeastern one immediately begins moving unprovoked.<br>• The northwestern and lower center-western ones begin moving if they could attack a unit with twice their movement. | ||
}} | }} | ||
{{ChapUnitCellFE11 | {{ChapUnitCellFE11 | ||
| Line 656: | Line 676: | ||
|mov=6 | |mov=6 | ||
|inventory={{Item|ds|Iron Bow}} | |inventory={{Item|ds|Iron Bow}} | ||
|notes=• The northeastern one immediately begins moving unprovoked.<br>• The western one begins moving if a unit | |notes=• The northeastern one immediately begins moving unprovoked.<br>• The western one begins moving if he could attack a unit with 1.5 times his movement. | ||
}} | }} | ||
{{ChapUnitCellFE11 | {{ChapUnitCellFE11 | ||
| Line 673: | Line 693: | ||
|mov=6 | |mov=6 | ||
|inventory={{Item|ds|Iron Bow}} | |inventory={{Item|ds|Iron Bow}} | ||
|notes=Begins moving if a unit | |notes=Begins moving if he could attack a unit with 1.5 times his movement. | ||
}} | }} | ||
{{ChapUnitCellFE11 | {{ChapUnitCellFE11 | ||
| Line 691: | Line 711: | ||
|inventory={{Item|ds|Iron Lance}} | |inventory={{Item|ds|Iron Lance}} | ||
|notes=Immediately begins moving unprovoked. | |notes=Immediately begins moving unprovoked. | ||
|last=y | |||
}} | }} | ||
{{ChapUnitFtr}} | |||
|content2={{ChapUnitHdr|type=Enemy|platform=ds01}} | |||
{{ChapUnitCellFE11 | {{ChapUnitCellFE11 | ||
|name=[[Gomer]] | |name=[[Gomer]] | ||
| Line 697: | Line 720: | ||
|lv=7 | |lv=7 | ||
|#=1 | |#=1 | ||
|hp= | |hp=28.8 | ||
|str= | |str=9.5 | ||
|mag=0 | |mag=0 | ||
|skill=4 | |skill=4.75 | ||
|spd=9 | |spd=9.45 | ||
|lck=0 | |lck=0 | ||
|def=5 | |def=5 | ||
| Line 707: | Line 730: | ||
|inventory={{Item|ds|Hand Axe}} • {{Item|ds|Steel Sword|type=drop}} | |inventory={{Item|ds|Hand Axe}} • {{Item|ds|Steel Sword|type=drop}} | ||
|notes=Stands on a [[Terrain/Nintendo DS games#Fire Emblem: Shadow Dragon|gate]], the chapter's seize point. | |notes=Stands on a [[Terrain/Nintendo DS games#Fire Emblem: Shadow Dragon|gate]], the chapter's seize point. | ||
}} | }} | ||
{{ChapUnitCellFE11 | {{ChapUnitCellFE11 | ||
|name=Pirate | |name=Pirate | ||
| Line 726: | Line 746: | ||
|mov=6 | |mov=6 | ||
|inventory={{Item|ds|Iron Axe}} | |inventory={{Item|ds|Iron Axe}} | ||
|notes=• The northeastern one immediately begins moving unprovoked.<br>• The northwestern | |notes=• The northeastern one immediately begins moving unprovoked.<br>• The northwestern and lower center-western ones begin moving if they could attack a unit with twice their movement. | ||
}} | }} | ||
{{ChapUnitCellFE11 | {{ChapUnitCellFE11 | ||
| Line 777: | Line 797: | ||
|mov=6 | |mov=6 | ||
|inventory={{Item|ds|Iron Bow}} | |inventory={{Item|ds|Iron Bow}} | ||
|notes=• The northeastern one immediately begins moving unprovoked.<br>• The western one begins moving if a unit | |notes=• The northeastern one immediately begins moving unprovoked.<br>• The western one begins moving if he could attack a unit with 1.5 times his movement. | ||
}} | }} | ||
{{ChapUnitCellFE11 | {{ChapUnitCellFE11 | ||
| Line 794: | Line 814: | ||
|mov=6 | |mov=6 | ||
|inventory={{Item|ds|Iron Bow}} | |inventory={{Item|ds|Iron Bow}} | ||
|notes=Begins moving if a unit | |notes=Begins moving if he could attack a unit with 1.5 times his movement. | ||
}} | }} | ||
{{ChapUnitCellFE11 | {{ChapUnitCellFE11 | ||
| Line 812: | Line 832: | ||
|inventory={{Item|ds|Iron Lance}} | |inventory={{Item|ds|Iron Lance}} | ||
|notes=Immediately begins moving unprovoked. | |notes=Immediately begins moving unprovoked. | ||
|last=y | |||
}} | }} | ||
{{ChapUnitFtr}} | |||
|content3={{ChapUnitHdr|type=Enemy|platform=ds01}} | |||
{{ChapUnitCellFE11 | {{ChapUnitCellFE11 | ||
|name=[[Gomer]] | |name=[[Gomer]] | ||
| Line 818: | Line 841: | ||
|lv=7 | |lv=7 | ||
|#=1 | |#=1 | ||
|hp= | |hp=30.6 | ||
|str= | |str=11 | ||
|mag=0 | |mag=0 | ||
|skill= | |skill=5.5 | ||
|spd=9. | |spd=9.9 | ||
|lck=0 | |lck=0 | ||
|def=5 | |def=5 | ||
| Line 828: | Line 851: | ||
|inventory={{Item|ds|Hand Axe}} • {{Item|ds|Steel Sword|type=drop}} | |inventory={{Item|ds|Hand Axe}} • {{Item|ds|Steel Sword|type=drop}} | ||
|notes=Stands on a [[Terrain/Nintendo DS games#Fire Emblem: Shadow Dragon|gate]], the chapter's seize point. | |notes=Stands on a [[Terrain/Nintendo DS games#Fire Emblem: Shadow Dragon|gate]], the chapter's seize point. | ||
}} | }} | ||
{{ChapUnitCellFE11 | {{ChapUnitCellFE11 | ||
|name=Pirate | |name=Pirate | ||
| Line 847: | Line 867: | ||
|mov=6 | |mov=6 | ||
|inventory={{Item|ds|Iron Axe}} | |inventory={{Item|ds|Iron Axe}} | ||
|notes=• The northeastern one immediately begins moving unprovoked.<br>• The northwestern | |notes=• The northeastern one immediately begins moving unprovoked.<br>• The northwestern and lower center-western ones begin moving if they could attack a unit with twice their movement. | ||
}} | }} | ||
{{ChapUnitCellFE11 | {{ChapUnitCellFE11 | ||
| Line 898: | Line 918: | ||
|mov=6 | |mov=6 | ||
|inventory={{Item|ds|Iron Bow}} | |inventory={{Item|ds|Iron Bow}} | ||
|notes=• The northeastern one immediately begins moving unprovoked.<br>• The western one begins moving if a unit | |notes=• The northeastern one immediately begins moving unprovoked.<br>• The western one begins moving if he could attack a unit with 1.5 times his movement. | ||
}} | }} | ||
{{ChapUnitCellFE11 | {{ChapUnitCellFE11 | ||
| Line 915: | Line 935: | ||
|mov=6 | |mov=6 | ||
|inventory={{Item|ds|Iron Bow}} | |inventory={{Item|ds|Iron Bow}} | ||
|notes=Begins moving if a unit | |notes=Begins moving if he could attack a unit with 1.5 times his movement. | ||
}} | }} | ||
{{ChapUnitCellFE11 | {{ChapUnitCellFE11 | ||
| Line 933: | Line 953: | ||
|inventory={{Item|ds|Iron Lance}} | |inventory={{Item|ds|Iron Lance}} | ||
|notes=Immediately begins moving unprovoked. | |notes=Immediately begins moving unprovoked. | ||
|last=y | |||
}} | }} | ||
{{ChapUnitFtr}} | |||
|content4={{ChapUnitHdr|type=Enemy|platform=ds01}} | |||
{{ChapUnitCellFE11 | {{ChapUnitCellFE11 | ||
|name=[[Gomer]] | |name=[[Gomer]] | ||
| Line 939: | Line 962: | ||
|lv=7 | |lv=7 | ||
|#=1 | |#=1 | ||
|hp= | |hp=32.4 | ||
|str= | |str=12.5 | ||
|mag=0 | |mag=0 | ||
|skill= | |skill=6.25 | ||
|spd= | |spd=10.35 | ||
|lck=0 | |lck=0 | ||
|def=5 | |def=5 | ||
| Line 949: | Line 972: | ||
|inventory={{Item|ds|Hand Axe}} • {{Item|ds|Steel Sword|type=drop}} | |inventory={{Item|ds|Hand Axe}} • {{Item|ds|Steel Sword|type=drop}} | ||
|notes=Stands on a [[Terrain/Nintendo DS games#Fire Emblem: Shadow Dragon|gate]], the chapter's seize point. | |notes=Stands on a [[Terrain/Nintendo DS games#Fire Emblem: Shadow Dragon|gate]], the chapter's seize point. | ||
}} | }} | ||
{{ChapUnitCellFE11 | {{ChapUnitCellFE11 | ||
|name=Pirate | |name=Pirate | ||
| Line 968: | Line 988: | ||
|mov=6 | |mov=6 | ||
|inventory={{Item|ds|Iron Axe}} | |inventory={{Item|ds|Iron Axe}} | ||
|notes=• The northeastern one immediately begins moving unprovoked.<br>• The northwestern | |notes=• The northeastern one immediately begins moving unprovoked.<br>• The northwestern and lower center-western ones begin moving if they could attack a unit with twice their movement. | ||
}} | }} | ||
{{ChapUnitCellFE11 | {{ChapUnitCellFE11 | ||
| Line 1,019: | Line 1,039: | ||
|mov=6 | |mov=6 | ||
|inventory={{Item|ds|Iron Bow}} | |inventory={{Item|ds|Iron Bow}} | ||
|notes=• The northeastern one immediately begins moving unprovoked.<br>• The western one begins moving if a unit | |notes=• The northeastern one immediately begins moving unprovoked.<br>• The western one begins moving if he could attack a unit with 1.5 times his movement. | ||
}} | }} | ||
{{ChapUnitCellFE11 | {{ChapUnitCellFE11 | ||
| Line 1,036: | Line 1,056: | ||
|mov=6 | |mov=6 | ||
|inventory={{Item|ds|Iron Bow}} | |inventory={{Item|ds|Iron Bow}} | ||
|notes=Begins moving if a unit | |notes=Begins moving if he could attack a unit with 1.5 times his movement. | ||
}} | }} | ||
{{ChapUnitCellFE11 | {{ChapUnitCellFE11 | ||
| Line 1,054: | Line 1,074: | ||
|inventory={{Item|ds|Iron Lance}} | |inventory={{Item|ds|Iron Lance}} | ||
|notes=Immediately begins moving unprovoked. | |notes=Immediately begins moving unprovoked. | ||
|last=y | |||
}} | }} | ||
{{ChapUnitFtr}} | |||
|content5={{ChapUnitHdr|type=Enemy|platform=ds01}} | |||
{{ChapUnitCellFE11 | {{ChapUnitCellFE11 | ||
|name=[[Gomer]] | |name=[[Gomer]] | ||
| Line 1,060: | Line 1,083: | ||
|lv=7 | |lv=7 | ||
|#=1 | |#=1 | ||
|hp= | |hp=34.2 | ||
|str= | |str=14 | ||
|mag=0 | |mag=0 | ||
|skill= | |skill=7 | ||
|spd=10. | |spd=10.8 | ||
|lck=0 | |lck=0 | ||
|def=5 | |def=5 | ||
| Line 1,070: | Line 1,093: | ||
|inventory={{Item|ds|Hand Axe}} • {{Item|ds|Steel Sword|type=drop}} | |inventory={{Item|ds|Hand Axe}} • {{Item|ds|Steel Sword|type=drop}} | ||
|notes=Stands on a [[Terrain/Nintendo DS games#Fire Emblem: Shadow Dragon|gate]], the chapter's seize point. | |notes=Stands on a [[Terrain/Nintendo DS games#Fire Emblem: Shadow Dragon|gate]], the chapter's seize point. | ||
}} | }} | ||
{{ChapUnitCellFE11 | {{ChapUnitCellFE11 | ||
|name=Pirate | |name=Pirate | ||
| Line 1,089: | Line 1,109: | ||
|mov=6 | |mov=6 | ||
|inventory={{Item|ds|Iron Axe}} | |inventory={{Item|ds|Iron Axe}} | ||
|notes=• The northeastern one immediately begins moving unprovoked.<br>• The northwestern | |notes=• The northeastern one immediately begins moving unprovoked.<br>• The northwestern and lower center-western ones begin moving if they could attack a unit with twice their movement. | ||
}} | }} | ||
{{ChapUnitCellFE11 | {{ChapUnitCellFE11 | ||
| Line 1,140: | Line 1,160: | ||
|mov=6 | |mov=6 | ||
|inventory={{Item|ds|Iron Bow}} | |inventory={{Item|ds|Iron Bow}} | ||
|notes=• The northeastern one immediately begins moving unprovoked.<br>• The western one begins moving if a unit | |notes=• The northeastern one immediately begins moving unprovoked.<br>• The western one begins moving if he could attack a unit with 1.5 times his movement. | ||
}} | }} | ||
{{ChapUnitCellFE11 | {{ChapUnitCellFE11 | ||
| Line 1,157: | Line 1,177: | ||
|mov=6 | |mov=6 | ||
|inventory={{Item|ds|Iron Bow}} | |inventory={{Item|ds|Iron Bow}} | ||
|notes=Begins moving if a unit | |notes=Begins moving if he could attack a unit with 1.5 times his movement. | ||
}} | }} | ||
{{ChapUnitCellFE11 | {{ChapUnitCellFE11 | ||
| Line 1,175: | Line 1,195: | ||
|inventory={{Item|ds|Iron Lance}} | |inventory={{Item|ds|Iron Lance}} | ||
|notes=Immediately begins moving unprovoked. | |notes=Immediately begins moving unprovoked. | ||
|last=y | |||
}} | }} | ||
{{ChapUnitFtr}} | |||
|content6={{ChapUnitHdr|type=Enemy|platform=ds01}} | |||
{{ChapUnitCellFE11 | {{ChapUnitCellFE11 | ||
|name=[[Gomer]] | |name=[[Gomer]] | ||
| Line 1,181: | Line 1,204: | ||
|lv=7 | |lv=7 | ||
|#=1 | |#=1 | ||
|hp= | |hp=36 | ||
|str= | |str=15.5 | ||
|mag=0 | |mag=0 | ||
|skill=7 | |skill=7.75 | ||
|spd= | |spd=11.25 | ||
|lck=0 | |lck=0 | ||
|def=5 | |def=5 | ||
| Line 1,191: | Line 1,214: | ||
|inventory={{Item|ds|Hand Axe}} • {{Item|ds|Steel Sword|type=drop}} | |inventory={{Item|ds|Hand Axe}} • {{Item|ds|Steel Sword|type=drop}} | ||
|notes=Stands on a [[Terrain/Nintendo DS games#Fire Emblem: Shadow Dragon|gate]], the chapter's seize point. | |notes=Stands on a [[Terrain/Nintendo DS games#Fire Emblem: Shadow Dragon|gate]], the chapter's seize point. | ||
}} | }} | ||
{{ChapUnitCellFE11 | {{ChapUnitCellFE11 | ||
|name=Pirate | |name=Pirate | ||
| Line 1,210: | Line 1,230: | ||
|mov=6 | |mov=6 | ||
|inventory={{Item|ds|Iron Axe}} | |inventory={{Item|ds|Iron Axe}} | ||
|notes=• The northeastern one immediately begins moving unprovoked.<br>• The northwestern | |notes=• The northeastern one immediately begins moving unprovoked.<br>• The northwestern and lower center-western ones begin moving if they could attack a unit with twice their movement. | ||
}} | }} | ||
{{ChapUnitCellFE11 | {{ChapUnitCellFE11 | ||
| Line 1,261: | Line 1,281: | ||
|mov=6 | |mov=6 | ||
|inventory={{Item|ds|Iron Bow}} | |inventory={{Item|ds|Iron Bow}} | ||
|notes=• The northeastern one immediately begins moving unprovoked.<br>• The western one begins moving if a unit | |notes=• The northeastern one immediately begins moving unprovoked.<br>• The western one begins moving if he could attack a unit with 1.5 times his movement. | ||
}} | }} | ||
{{ChapUnitCellFE11 | {{ChapUnitCellFE11 | ||
| Line 1,278: | Line 1,298: | ||
|mov=6 | |mov=6 | ||
|inventory={{Item|ds|Iron Bow}} | |inventory={{Item|ds|Iron Bow}} | ||
|notes=Begins moving if a unit | |notes=Begins moving if he could attack a unit with 1.5 times his movement. | ||
}} | }} | ||
{{ChapUnitCellFE11 | {{ChapUnitCellFE11 | ||
| Line 1,296: | Line 1,316: | ||
|inventory={{Item|ds|Iron Lance}} | |inventory={{Item|ds|Iron Lance}} | ||
|notes=Immediately begins moving unprovoked. | |notes=Immediately begins moving unprovoked. | ||
|last=y | |last=y | ||
}} | }} | ||
| Line 1,372: | Line 1,376: | ||
|tab6=Hard-5 | |tab6=Hard-5 | ||
|content1={{BossStats DS | |content1={{BossStats DS | ||
|portrait=[[File: | |portrait=[[File:Portrait gomer fe11.png]] | ||
|sprite=pirate enemy | |sprite=pirate enemy | ||
|class=Pirate | |class=Pirate | ||
| Line 1,388: | Line 1,392: | ||
}} | }} | ||
|content2={{BossStats DS | |content2={{BossStats DS | ||
|portrait=[[File: | |portrait=[[File:Portrait gomer fe11.png]] | ||
|sprite=pirate enemy | |sprite=pirate enemy | ||
|class=Pirate | |class=Pirate | ||
| Line 1,404: | Line 1,408: | ||
}} | }} | ||
|content3={{BossStats DS | |content3={{BossStats DS | ||
|portrait=[[File: | |portrait=[[File:Portrait gomer fe11.png]] | ||
|sprite=pirate enemy | |sprite=pirate enemy | ||
|class=Pirate | |class=Pirate | ||
| Line 1,420: | Line 1,424: | ||
}} | }} | ||
|content4={{BossStats DS | |content4={{BossStats DS | ||
|portrait=[[File: | |portrait=[[File:Portrait gomer fe11.png]] | ||
|sprite=pirate enemy | |sprite=pirate enemy | ||
|class=Pirate | |class=Pirate | ||
| Line 1,436: | Line 1,440: | ||
}} | }} | ||
|content5={{BossStats DS | |content5={{BossStats DS | ||
|portrait=[[File: | |portrait=[[File:Portrait gomer fe11.png]] | ||
|sprite=pirate enemy | |sprite=pirate enemy | ||
|class=Pirate | |class=Pirate | ||
| Line 1,452: | Line 1,456: | ||
}} | }} | ||
|content6={{BossStats DS | |content6={{BossStats DS | ||
|portrait=[[File: | |portrait=[[File:Portrait gomer fe11.png]] | ||
|sprite=pirate enemy | |sprite=pirate enemy | ||
|class=Pirate | |class=Pirate | ||
| Line 1,472: | Line 1,476: | ||
==Strategy== | ==Strategy== | ||
{{Strategy}} | {{Strategy}} | ||
For a safer battle in ''Shadow Dragon'' Hard-5, aim for [[Gomer]] to have 7 skill and 11 speed through resets. | |||
'''Your New Units:''' | |||
# '''[[Ogma]]:''' A balanced [[Mercenary]]. Ogma's speed is far more valuable on the NES version, whereas the DS version's lance-dominant environment and Ogma's unimpressive speed growth are disadvantageous. | |||
# '''[[Barst]]:''' Arguably the best axe user in the game. | |||
# '''[[Bord]]:''' A slower [[Fighter]] with a high weapon level. | |||
# '''[[Cord]]:''' A versatile Fighter, suitable for reclassing. | |||
# '''[[Darros]]:''' A recruitable [[Pirate]] with strong power but lacking skill. | |||
# '''[[Castor]]:''' A more agile and powerful alternative to [[Gordin]], albeit more frail. | |||
'''Battle Strategy:''' | |||
* As the chapter starts, five northern island enemies and two Grustian cavalry will move toward you. Place Ogma on the north bridge, with weapon choice depending on the enemy Pirate's speed. Place Barst, equipped with his [[Steel Axe]], on the northwest bridge. | |||
* Ensure [[Marth]] is outside of [[Darros]]'s attack range to prevent premature combat. By turn two, eliminate both enemy pirates, position Draug on the north bridge to confine the [[Thief|Thieves]], and recruit Darros. | |||
* As the [[Cavalier]]s approach, block the northwest bridge with Marth and his [[Rapier]]. [[Caeda]]'s [[Wing Spear]] is effective against them. Use [[Wrys]] for healing if needed. Adjusting unit positions will provoke specific enemy pirates and the [[Hunter]] without jeopardizing your team. | |||
* For battling Gomer, Marth, Abel, and Cain require 8 speed, while Abel, Cain, and Ogma need 4 luck for safety. Barst, Cord, and Ogma are already adequately equipped stat-wise to confront Gomer. Secure the map by eliminating other enemies before focusing on Gomer. Use Ogma to weaken Gomer, then use fast sword-users to finish him. Marth should get the dropped [[Steel Sword]]. To safeguard against critical hits in the next chapter, ensure your units have a minimum of 3 luck. | |||
Marth, | '''Battle Tips:''' | ||
* Darros is neutral and will not attack. He will recruit himself by initiating conversation with Marth if he's within range. | |||
* Approach Castor, one of the Hunters, with Caeda for recruitment but exercise caution to prevent unintended combat. | |||
* Remember to purchase weapons from the armory. Items acquired with full inventory are transferred to Marth's Convoy, accessible to other characters through him. | |||
'''Gomer:''' This boss, equipped with a [[Hand Axe]], is stronger than the previous chapter's boss. However, if your units are sufficiently leveled up, defeating Gomer should be simple. | |||
===Strategy for Merciless difficulty=== | |||
'''Engaging Darros's Group:''' | |||
* Allow Darros's group to approach the isle where your characters are positioned. | |||
* Station Ogma on the fort with Marth beside him so Darros can initiate a conversation. | |||
* Keep the rest of your units at a safe distance. | |||
'''Handling the Pirates:''' | |||
* Keep outside the attack range of other Pirates. They inflict significant damage, and you'll need multiple characters to defeat even one. | |||
* Position [[Jagen]] armed with his sword to lure and weaken the pirates individually, so they can be defeated by your other units on the following turn. Apply this tactic on the lower bridge as well. | |||
'''Engaging the Cavaliers with Caeda:''' | |||
* If possible, place Caeda within a single Cavalier's attack range. This will allow her to eliminate them on the enemy's turn with her [[Wing Spear]]. | |||
'''Dealing with the Remaining Enemies:''' | |||
* If everything has gone as planned, surround the Hunter using your Fighters, preventing him from acting while you address the other foes. | |||
* Take out the Thieves using your other units, but make sure no vulnerable characters are near them. | |||
* For the other approaching Hunter, surround him with sturdy characters capable of withstanding two hits from the remaining Pirates. | |||
* Use Jagen to damage the Pirates, and finish them off with other units. | |||
* Use the Hand Axe by rotating between Darros and your other Fighters, getting in up to three attacks per turn. | |||
'''Confronting the Boss:''' | |||
# Let the boss attack Ogma while equipped with his Iron Sword. Ideally, Ogma evades the blow and reduces the boss's HP to 28 or less. | |||
# On the next turn, engage with Jagen and his Silver Lance. | |||
# Follow up with both Marth and Ogma, slowly whittling down the boss's health. | |||
# Your next move relies heavily on chance. Try engaging with Barst, Cord, or Bord, recognizing that they won't defeat the boss in one move. Afterwards, test your luck with characters having better accuracy, like Gordin or Castor. Remember, even with a 60 HIT, there's a substantial miss rate, and there's no way to boost your accuracy at this point. | |||
'''Final Preparations:''' | |||
* Before finishing the level, purchase iron weapons for any characters that need them. These will be invaluable in the upcoming stages. | |||
<!-- | <!-- | ||
==Trivia== | ==Trivia== | ||
--> | --> | ||
==Etymology and other languages== | ==Etymology and other languages== | ||
{{Names | {{Names | ||
| Line 1,485: | Line 1,536: | ||
|eng-fan-name= | |eng-fan-name= | ||
|eng-fan-mean= | |eng-fan-mean= | ||
| | |jpn-name=• {{h|ガルダのかいぞく|Garuda no kaizoku}}<br>• {{h|ガルダの海賊|Garuda no kaizoku}} | ||
| | |jpn-mean=• Pirates of Garda, used in {{title|Shadow Dragon & the Blade of Light}}; excludes kanji due to Famicom limitations.<br>• Same meaning, used in {{title|Mystery of the Emblem}} and {{title|Shadow Dragon}}. | ||
|span-name=Piratas de Galder | |span-name=Piratas de Galder | ||
|span-mean=Pirates of Galder | |span-mean=Pirates of Galder | ||
| Line 1,498: | Line 1,549: | ||
==Gallery== | ==Gallery== | ||
<gallery> | <gallery> | ||
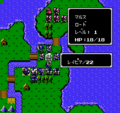
Ss fe01 chapter2.png|Screenshot from {{title|Shadow Dragon & the Blade of Light}}. | Ss fe01 chapter2.png|Screenshot from {{title|Shadow Dragon & the Blade of Light}}. | ||
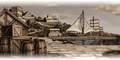
Cg fe11 c2.png|CG image displayed during the | Cg fe11 c2.png|CG image displayed during the introduction text in {{title|Shadow Dragon}}. | ||
</gallery> | </gallery> | ||
{{notes}} | |||
{{ref}} | {{ref}} | ||
Revision as of 14:39, 2 October 2023
| ||||||||||
|

The Pirates of Galder (Japanese: ガルダの海賊 Pirates of Garda) is the second chapter in Fire Emblem: Shadow Dragon & the Blade of Light, Book I of Mystery of the Emblem, and Shadow Dragon.
Plot
- Main article:
The Pirates of Galder/Script
Marth sets out for Galder Harbor, a sleepy port town that has been taken over by a pirate crew led by Gomer. As he reaches the port, he is joined by the mercenaries King Mostyn promised him: Ogma, Barst, Bord, and Cord. Ogma warns Marth that Grustian cavalry is heading this way to claim his head. Marth defeats Gomer and his pirate crew, much to the relief of the villagers. Upon learning that he intends to reach Aurelis, one of the villagers warns Marth that his route will take him into the Ghoul's Teeth, where the fearsome Soothsires make their hideout. The villager also warns him to beware Navarre, a skilled swordsman employed by the Soothsires.
Chapter data
Shadow Dragon & the Blade of Light Mystery of the Emblem Shadow Dragon


| ||||||
|
| |||||
| Victory: Seize | Player | Enemy | ||||
|---|---|---|---|---|---|---|
| Defeat: Marth dies | 12+2 | 17−2 | ||||
| ||||||
| Map dimensions: 30 columns by 13 rows | ||||||
Units are arranged based on their position in deployment order. If every unit is alive and recruited, the deployment order is:
Character data
Shadow Dragon & the Blade of Light Mystery of the Emblem Shadow Dragon
| Characters | ||||||||||||||||||||||||||||||||||||||||||||||||||||||||||||||||||
|---|---|---|---|---|---|---|---|---|---|---|---|---|---|---|---|---|---|---|---|---|---|---|---|---|---|---|---|---|---|---|---|---|---|---|---|---|---|---|---|---|---|---|---|---|---|---|---|---|---|---|---|---|---|---|---|---|---|---|---|---|---|---|---|---|---|---|
New units
| ||||||||||||||||||||||||||||||||||||||||||||||||||||||||||||||||||
| ||||||||||||||||||||||||||||||||||||||||||||||||||||||||||||||||||
Required characters
| ||||||||||||||||||||||||||||||||||||||||||||||||||||||||||||||||||

| ||||||||||||||||||||||||||||||||||||||||||||||||||||||||||||||||||
Available characters
| ||||||||||||||||||||||||||||||||||||||||||||||||||||||||||||||||||
        
| ||||||||||||||||||||||||||||||||||||||||||||||||||||||||||||||||||


Item data
Shadow Dragon & the Blade of Light Mystery of the Emblem Shadow Dragon
| |||||||||
|
Shop data
Shadow Dragon & the Blade of Light Mystery of the Emblem Shadow Dragon
Enemy data
Shadow Dragon & the Blade of Light Mystery of the Emblem Shadow Dragon
- Stats with a decimal can vary randomly; the decimal represents the chance for the stat to increase to the nearest integer, or otherwise be truncated.
Normal Hard-1 Hard-2 Hard-3 Hard-4 Hard-5
| ||||||||||||||||||||||||||||||||||||||||||||||||||||||||||||||||||||||||||||||||||||||||||||||||||||||||||||||||||||||||||||||||||||||||||||||||||||||||||||||||||||||||||||||||||||||||||||||||||||||||||||
| ||||||||||||||||||||||||||||||||||||||||||||||||||||||||||||||||||||||||||||||||||||||||||||||||||||||||||||||||||||||||||||||||||||||||||||||||||||||||||||||||||||||||||||||||||||||||||||||||||||||||||||
Boss data
- Main article:
Gomer
Shadow Dragon & the Blade of Light Mystery of the Emblem Shadow Dragon
- Stats with a decimal can vary randomly; the decimal represents the chance for the stat to increase to the nearest integer, or otherwise be truncated.

Strategy
| This section details unofficial strategies that may help with completion of the chapter. This may not work for everybody. |
For a safer battle in Shadow Dragon Hard-5, aim for Gomer to have 7 skill and 11 speed through resets.
Your New Units:
- Ogma: A balanced Mercenary. Ogma's speed is far more valuable on the NES version, whereas the DS version's lance-dominant environment and Ogma's unimpressive speed growth are disadvantageous.
- Barst: Arguably the best axe user in the game.
- Bord: A slower Fighter with a high weapon level.
- Cord: A versatile Fighter, suitable for reclassing.
- Darros: A recruitable Pirate with strong power but lacking skill.
- Castor: A more agile and powerful alternative to Gordin, albeit more frail.
Battle Strategy:
- As the chapter starts, five northern island enemies and two Grustian cavalry will move toward you. Place Ogma on the north bridge, with weapon choice depending on the enemy Pirate's speed. Place Barst, equipped with his Steel Axe, on the northwest bridge.
- Ensure Marth is outside of Darros's attack range to prevent premature combat. By turn two, eliminate both enemy pirates, position Draug on the north bridge to confine the Thieves, and recruit Darros.
- As the Cavaliers approach, block the northwest bridge with Marth and his Rapier. Caeda's Wing Spear is effective against them. Use Wrys for healing if needed. Adjusting unit positions will provoke specific enemy pirates and the Hunter without jeopardizing your team.
- For battling Gomer, Marth, Abel, and Cain require 8 speed, while Abel, Cain, and Ogma need 4 luck for safety. Barst, Cord, and Ogma are already adequately equipped stat-wise to confront Gomer. Secure the map by eliminating other enemies before focusing on Gomer. Use Ogma to weaken Gomer, then use fast sword-users to finish him. Marth should get the dropped Steel Sword. To safeguard against critical hits in the next chapter, ensure your units have a minimum of 3 luck.
Battle Tips:
- Darros is neutral and will not attack. He will recruit himself by initiating conversation with Marth if he's within range.
- Approach Castor, one of the Hunters, with Caeda for recruitment but exercise caution to prevent unintended combat.
- Remember to purchase weapons from the armory. Items acquired with full inventory are transferred to Marth's Convoy, accessible to other characters through him.
Gomer: This boss, equipped with a Hand Axe, is stronger than the previous chapter's boss. However, if your units are sufficiently leveled up, defeating Gomer should be simple.
Strategy for Merciless difficulty
Engaging Darros's Group:
- Allow Darros's group to approach the isle where your characters are positioned.
- Station Ogma on the fort with Marth beside him so Darros can initiate a conversation.
- Keep the rest of your units at a safe distance.
Handling the Pirates:
- Keep outside the attack range of other Pirates. They inflict significant damage, and you'll need multiple characters to defeat even one.
- Position Jagen armed with his sword to lure and weaken the pirates individually, so they can be defeated by your other units on the following turn. Apply this tactic on the lower bridge as well.
Engaging the Cavaliers with Caeda:
- If possible, place Caeda within a single Cavalier's attack range. This will allow her to eliminate them on the enemy's turn with her Wing Spear.
Dealing with the Remaining Enemies:
- If everything has gone as planned, surround the Hunter using your Fighters, preventing him from acting while you address the other foes.
- Take out the Thieves using your other units, but make sure no vulnerable characters are near them.
- For the other approaching Hunter, surround him with sturdy characters capable of withstanding two hits from the remaining Pirates.
- Use Jagen to damage the Pirates, and finish them off with other units.
- Use the Hand Axe by rotating between Darros and your other Fighters, getting in up to three attacks per turn.
Confronting the Boss:
- Let the boss attack Ogma while equipped with his Iron Sword. Ideally, Ogma evades the blow and reduces the boss's HP to 28 or less.
- On the next turn, engage with Jagen and his Silver Lance.
- Follow up with both Marth and Ogma, slowly whittling down the boss's health.
- Your next move relies heavily on chance. Try engaging with Barst, Cord, or Bord, recognizing that they won't defeat the boss in one move. Afterwards, test your luck with characters having better accuracy, like Gordin or Castor. Remember, even with a 60 HIT, there's a substantial miss rate, and there's no way to boost your accuracy at this point.
Final Preparations:
- Before finishing the level, purchase iron weapons for any characters that need them. These will be invaluable in the upcoming stages.
Etymology and other languages
| Names, etymology, and in other regions | ||
|---|---|---|
| Language | Name | Definition, etymology, and notes |
| English |
The Pirates of Galder |
-- |
| Japanese |
• ガルダのかいぞく |
• Pirates of Garda, used in Shadow Dragon & the Blade of Light; excludes kanji due to Famicom limitations. |
| Spanish |
Piratas de Galder |
Pirates of Galder |
| French |
Les pirates de Galder |
The pirates of Galder |
| German |
Piraten von Galder |
Pirates of Galder |
| Italian |
I pirati di Galder |
The pirates of Galder |
Gallery
Screenshot from Shadow Dragon & the Blade of Light.
CG image displayed during the introduction text in Shadow Dragon.


Notes
- ↑ Not in Mystery of the Emblem.
References
| ← Marth Embarks • | The Pirates of Galder | • A Brush in the Teeth → |
|---|
| Fire Emblem: Mystery of the Emblem | ||||||||||||||||||||||||||||||||||||||
|---|---|---|---|---|---|---|---|---|---|---|---|---|---|---|---|---|---|---|---|---|---|---|---|---|---|---|---|---|---|---|---|---|---|---|---|---|---|---|
| ||||||||||||||||||||||||||||||||||||||
| Fire Emblem: Shadow Dragon | ||||||||||||||||||||
|---|---|---|---|---|---|---|---|---|---|---|---|---|---|---|---|---|---|---|---|---|
|