| Site News |
|---|
| Warning: This wiki contains spoilers. Read at your own risk! Social media: If you would like, please join our Discord server, and/or follow us on Twitter (X) or Tumblr! |
A Brush in the Teeth: Difference between revisions
m (Text replacement - "Super Nintendo Entertainment System games" to "Super Famicom games") Tag: Reverted |
Infernape612 (talk | contribs) m (→Strategy) |
||
| (22 intermediate revisions by 5 users not shown) | |||
| Line 1: | Line 1: | ||
:''This article is about the chapter from ''Shadow Dragon & the Blade of Light'' and its remakes. For the History Mode map in ''Warriors'' | :''This article is about the chapter from ''Shadow Dragon & the Blade of Light'' and its remakes. For the History Mode map in ''Warriors'', see ''[[A Brush in the Teeth (Warriors)|''A Brush in the Teeth (''Warriors'')'']]''.'' | ||
{{Chapter Infobox | {{Chapter Infobox | ||
|image=[[File:Cm fe11 3.png|200px]] | |image=[[File:Cm fe11 3.png|200px]] | ||
| Line 10: | Line 10: | ||
}} | }} | ||
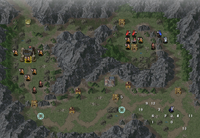
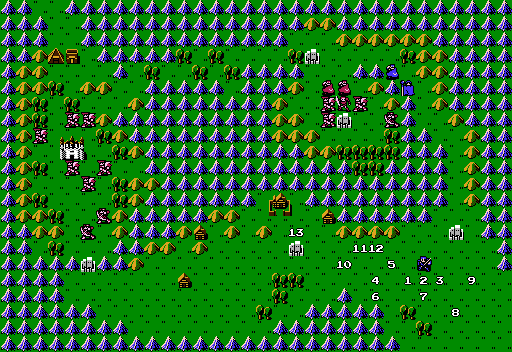
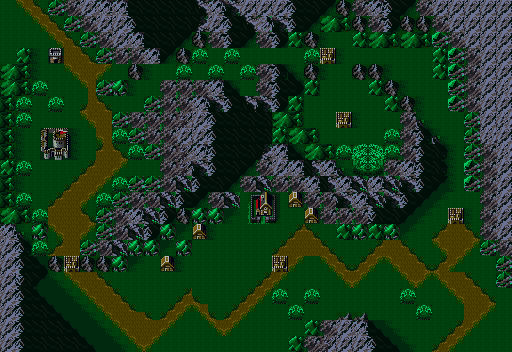
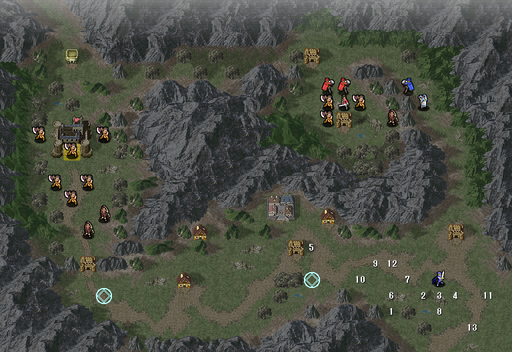
'''A Brush in the Teeth''' (Japanese: {{hl|デビルマウンテン|Debirumaunten}} ''Devil Mountain''), known as '''The Ghoul's Teeth''' in ''Shadow Dragon | '''A Brush in the Teeth''' (Japanese: {{hl|デビルマウンテン|Debirumaunten}} ''Devil Mountain''), known as '''The Ghoul's Teeth''' in {{FE1}}, is the third chapter in ''Shadow Dragon and the Blade of Light'', Book 1 of {{title|Mystery of the Emblem}}, and {{title|Shadow Dragon}}. | ||
==Plot== | ==Plot== | ||
| Line 26: | Line 26: | ||
|defeat=[[Marth]] dies | |defeat=[[Marth]] dies | ||
|ally=16{{h|+1|Upon Navarre being recruited}} | |ally=16{{h|+1|Upon Navarre being recruited}} | ||
|enemy=15{{h| | |enemy=15{{h|−1|Upon Navarre being recruited}} | ||
|map=[[File:Cm fe01 3.png]] | |map=[[File:Cm fe01 3.png]] | ||
|col=30 | |col=30 | ||
| Line 32: | Line 32: | ||
}} | }} | ||
Units are arranged based on their position in deployment order after Marth. If every unit is alive, deployment order is Marth, Jagen, Cain, Abel, Draug, Gordin, Caeda, Wrys, Bord, Cord, Barst, Ogma; Darros and Castor are deployed in the order in which they were recruited. | Units are arranged based on their position in deployment order after Marth. If every unit is alive, deployment order is Marth, Jagen, Cain, Abel, Draug, Gordin, Caeda, Wrys, Bord, Cord, Barst, Ogma; Darros and Castor are deployed in the order in which they were recruited. | ||
|content2={{ChapData | |content2={{ChapData | ||
|victory=Seize | |victory=Seize | ||
|defeat=[[Marth]] dies | |defeat=[[Marth]] dies | ||
|ally= | |ally=1–12{{h|+3|Upon Julian, Lena, and Navarre being recruited}} | ||
|enemy=15{{h| | |enemy=15{{h|−1|Upon Navarre being recruited}} | ||
|map=[[File:Cm fe03 b1 3.png]] | |map=[[File:Cm fe03 b1 3.png]] | ||
|col=30 | |col=30 | ||
| Line 46: | Line 45: | ||
|defeat=[[Marth]] dies | |defeat=[[Marth]] dies | ||
|ally=16{{h|+1|Upon Navarre being recruited}} | |ally=16{{h|+1|Upon Navarre being recruited}} | ||
|enemy=15{{h| | |enemy=15{{h|−1|Upon Navarre being recruited}} | ||
|map=[[File:Cm fe11 3.png|512px]] | |map=[[File:Cm fe11 3.png|512px]] | ||
|col=30 | |col=30 | ||
|row=20 | |row=20 | ||
}} | }} | ||
Units are arranged based on their position in deployment order. If every unit is alive and recruited, the deployment order is: | |||
*In Normal mode: Marth, Abel, Frey, Jagen, Cain, Gordin, Draug, Norne, Caeda, Wrys, Ogma, Barst, Bord, Cord, then Darros and Castor in the order they were recruited | |||
*In Hard mode: Marth, Caeda, Cain, Abel, Draug, Jagen, Gordin, Wrys, Ogma, Barst, Bord, Cord, then Darros and Castor in the order they were recruited | |||
}} | }} | ||
===Character data=== | ===Character data=== | ||
{{Tab | {{Tab | ||
|width=100% | |||
|default=3 | |default=3 | ||
|tab1=''Shadow Dragon & the Blade of Light'' | |tab1=''Shadow Dragon & the Blade of Light'' | ||
| Line 77: | Line 80: | ||
|lv=3 | |lv=3 | ||
|res=0 | |res=0 | ||
|inventory=[[ | |inventory=[[Warp]] | ||
|recruitment method=Automatically from turn 1 | |recruitment method=Automatically from turn 1 | ||
}} | }} | ||
| Line 89: | Line 92: | ||
|recruitment method=Enemy, talk to with [[Caeda]] | |recruitment method=Enemy, talk to with [[Caeda]] | ||
}} | }} | ||
| | |forced1=marth | ||
| | |return1=jagen | ||
| | |return2=cain | ||
| | |return3=abel | ||
| | |return4=draug | ||
| | |return5=gordin | ||
| | |return6=caeda | ||
| | |return7=wrys | ||
| | |return8=bord | ||
| | |return9=cord | ||
| | |return10=barst | ||
| | |return11=ogma | ||
| | |return12=darros | ||
| | |return13=castor | ||
}} | }} | ||
|content2={{ChapChars | |content2={{ChapChars | ||
| Line 121: | Line 124: | ||
|HP=16 | |HP=16 | ||
|lv=3 | |lv=3 | ||
|inventory={{Item|3|Warp | |inventory={{Item|3|Warp}} | ||
|recruitment method=Automatically from turn 1 | |recruitment method=Automatically from turn 1 | ||
}} | }} | ||
| Line 133: | Line 136: | ||
|recruitment method=Enemy, talk to with [[Caeda]] | |recruitment method=Enemy, talk to with [[Caeda]] | ||
}} | }} | ||
| | |forced1=marth 01 | ||
| | |forced1article=Marth | ||
| | |return1=abel | ||
| | |return2=cain | ||
| | |return3=jagen | ||
| | |return4=gordin | ||
| | |return5=draug | ||
| | |return6=caeda 01 | ||
| | |return6article=Caeda | ||
| | |return7=bord | ||
| | |return8=cord | ||
| | |return9=barst | ||
| | |return10=ogma | ||
| | |return11=castor | ||
}} | }} | ||
|content3={{ChapChars | |content3={{ChapChars | ||
| Line 165: | Line 168: | ||
|HP=16 | |HP=16 | ||
|lv=3 | |lv=3 | ||
|inventory={{Item|ds|Warp|image=warp eng | |inventory={{Item|ds|Warp|image=warp eng}} | ||
|recruitment method=Automatically from turn 1 | |recruitment method=Automatically from turn 1 | ||
}} | }} | ||
| Line 177: | Line 180: | ||
|recruitment method=Enemy, talk to with [[Caeda]] | |recruitment method=Enemy, talk to with [[Caeda]] | ||
}} | }} | ||
| | |forced1=marth | ||
| | |return1=abel | ||
| | |return2=frey | ||
| | |return3=jagen | ||
| | |return4=cain | ||
| | |return5=gordin | ||
| | |return6=draug | ||
| | |return7=norne | ||
| | |return8=caeda | ||
| | |return9=wrys | ||
| | |return10=ogma | ||
| | |return11=barst | ||
| | |return12=bord | ||
| | |return13=cord | ||
| | |return14=darros | ||
| | |return15=castor | ||
}} | }} | ||
}} | }} | ||
| Line 208: | Line 211: | ||
|item1image=none | |item1image=none | ||
|obtain1=Visit the [[village]] | |obtain1=Visit the [[village]] | ||
|item2= | |item2=Mend | ||
|item2image=none | |item2image=none | ||
|obtain2=Dropped by | |obtain2=Dropped by [[Hyman]] | ||
|item3= | |item3=Vulnerary | ||
|item3image=none | |item3image=none | ||
|obtain3=Dropped by [[ | |obtain3=Dropped by enemy [[Fighter]] | ||
|itemlast=15,000 G | |itemlast=15,000 G | ||
|itemlastimage=none | |itemlastimage=none | ||
| Line 223: | Line 226: | ||
|item1=Devil Axe | |item1=Devil Axe | ||
|obtain1=Visit the [[village]] | |obtain1=Visit the [[village]] | ||
|item2= | |item2=Mend | ||
|obtain2=Dropped by | |obtain2=Dropped by [[Hyman]] | ||
|item3= | |item3=Vulnerary | ||
|obtain3=Dropped by [[ | |obtain3=Dropped by enemy [[Brigand]] | ||
|itemlast=10,000 G | |itemlast=10,000 G | ||
|itemlastimage=none | |itemlastimage=none | ||
| Line 236: | Line 239: | ||
|item1=Devil Axe | |item1=Devil Axe | ||
|obtain1=Visit the [[village]] | |obtain1=Visit the [[village]] | ||
|item2= | |item2=Mend | ||
|obtain2=Dropped by | |obtain2=Dropped by [[Hyman]] | ||
|item3= | |item3=Vulnerary | ||
|obtain3=Dropped by [[ | |obtain3=Dropped by enemy [[Fighter]] | ||
|itemlast=15,000 G | |itemlast=15,000 G | ||
|itemlastimage=bullion | |itemlastimage=bullion | ||
| Line 260: | Line 263: | ||
|axcost1=300 | |axcost1=300 | ||
|axe2=Axe | |axe2=Axe | ||
|axe2article=Axe ( | |axe2article=Axe (Famicom) | ||
|axcost2=320 | |axcost2=320 | ||
|axe3=Steel Axe | |axe3=Steel Axe | ||
| Line 267: | Line 270: | ||
|axcost4=450 | |axcost4=450 | ||
|bow1=Bow | |bow1=Bow | ||
|bow1article=Bow ( | |bow1article=Bow (Famicom) | ||
|bocost1=400 | |bocost1=400 | ||
}} | }} | ||
| Line 307: | Line 310: | ||
|tab3=''Shadow Dragon'' | |tab3=''Shadow Dragon'' | ||
|content1={{ChapUnitHdr|type=Enemy|platform=nes01}} | |content1={{ChapUnitHdr|type=Enemy|platform=nes01}} | ||
{{ChapUnitCellFE1 | |||
|name=[[Hyman]] | |||
|class=Fighter | |||
|lv=8 | |||
|#=1 | |||
|hp=27 | |||
|str=8 | |||
|skill=4 | |||
|spd=10 | |||
|def=7 | |||
|mov=6 | |||
|inventory=[[Hand Axe]] | |||
|notes=Drops a {{drop|Mend}} upon defeat.<br>Moves onto the [[Terrain/Family Computer games#Fire Emblem: Shadow Dragon & the Blade of Light|gate]] on turn 1, then does not move. | |||
}} | |||
{{ChapUnitCellFE1 | {{ChapUnitCellFE1 | ||
|name=Soothsire | |name=Soothsire | ||
| Line 319: | Line 336: | ||
|mov=6 | |mov=6 | ||
|inventory=[[Steel Axe]] | |inventory=[[Steel Axe]] | ||
|notes=Drops a {{drop|Vulnerary}} upon defeat.<br>Moves east of the [[Terrain/ | |notes=Drops a {{drop|Vulnerary}} upon defeat.<br>Moves east of the [[Terrain/Family Computer games#Fire Emblem: Shadow Dragon & the Blade of Light|gate]] on turn 1, then begins to move a player unit enters his range; ignores healing. | ||
}} | }} | ||
{{ChapUnitCellFE1 | {{ChapUnitCellFE1 | ||
| Line 332: | Line 349: | ||
|def=4 | |def=4 | ||
|mov=6 | |mov=6 | ||
|inventory=[[Axe ( | |inventory=[[Axe (Famicom)|Axe]] | ||
|notes=• The one south of the gate begins to move when a player unit enters his range; ignores healing.<br>• The westernmost one moves to attack any player unit in range, and moves onto the [[Terrain/ | |notes=• The one south of the gate begins to move when a player unit enters his range; ignores healing.<br>• The westernmost one moves to attack any player unit in range, and moves onto the [[Terrain/Family Computer games#Fire Emblem: Shadow Dragon & the Blade of Light|fort]] south of the gate if no one is in range. | ||
}} | }} | ||
{{ChapUnitCellFE1 | {{ChapUnitCellFE1 | ||
| Line 346: | Line 363: | ||
|def=3 | |def=3 | ||
|mov=6 | |mov=6 | ||
|inventory=[[Bow ( | |inventory=[[Bow (Famicom)|Bow]] | ||
|notes=The western two move to attack any player unit in range, and move to north of the [[Terrain/ | |notes=The western two move to attack any player unit in range, and move to north of the [[Terrain/Family Computer games#Fire Emblem: Shadow Dragon & the Blade of Light|gate]] if no one is in range. | ||
}} | }} | ||
{{ChapUnitCellFE1 | {{ChapUnitCellFE1 | ||
| Line 375: | Line 392: | ||
|inventory=[[Iron Sword]] | |inventory=[[Iron Sword]] | ||
|notes=The east one prioritizes raiding [[village]]s. | |notes=The east one prioritizes raiding [[village]]s. | ||
|last=y | |||
}} | }} | ||
{{ | {{ChapUnitFtr}} | ||
|content2={{ChapUnitHdr|type=Enemy|platform=snes01}} | |||
{{ChapUnitCellFE3 | |||
|name=[[Hyman]] | |name=[[Hyman]] | ||
|class= | |class=Brigand | ||
|lv=8 | |lv=8 | ||
|#=1 | |#=1 | ||
|hp= | |hp=30 | ||
|str= | |str=9 | ||
|skill= | |skill=1 | ||
|spd= | |spd=4 | ||
|def=7 | |def=7 | ||
|res=0 | |||
|mov=6 | |mov=6 | ||
|inventory= | |inventory={{Item|3|Hand Axe}} • {{Item|3|Mend|type=drop}} | ||
|notes=Moves onto the [[Terrain/Super Famicom games#Fire Emblem: Mystery of the Emblem|gate]] on turn 1, then does not move. | |||
}} | }} | ||
{{ChapUnitCellFE3 | {{ChapUnitCellFE3 | ||
|name=Soothsire | |name=Soothsire | ||
| Line 498: | Line 516: | ||
|inventory={{Item|3|Iron Sword}} | |inventory={{Item|3|Iron Sword}} | ||
|notes=• Not present during preparations.<br>• Ignores combat and moves to raid the [[village]]. | |notes=• Not present during preparations.<br>• Ignores combat and moves to raid the [[village]]. | ||
|last=y | |last=y | ||
}} | }} | ||
| Line 526: | Line 529: | ||
|tab6=Hard-5 | |tab6=Hard-5 | ||
|content1={{ChapUnitHdr|type=Enemy|platform=ds01}} | |content1={{ChapUnitHdr|type=Enemy|platform=ds01}} | ||
{{ChapUnitCellFE11 | |||
|name=[[Hyman]] | |||
|class=Fighter | |||
|lv=8 | |||
|#=1 | |||
|hp=27 | |||
|str=7 | |||
|mag=0 | |||
|skill=5 | |||
|spd=14 | |||
|lck=0 | |||
|def=5 | |||
|res=0 | |||
|inventory={{Item|ds|Hand Axe}} • {{Item|ds|Mend|type=drop}} | |||
|notes=Stands on a [[Terrain/Nintendo DS games#Fire Emblem: Shadow Dragon|gate]], the chapter's seize point. | |||
}} | |||
{{ChapUnitCellFE11 | {{ChapUnitCellFE11 | ||
|name=Soothsire | |name=Soothsire | ||
| Line 541: | Line 560: | ||
|mov=6 | |mov=6 | ||
|inventory={{Item|ds|Steel Axe}} • {{Item|ds|Vulnerary|type=drop}} | |inventory={{Item|ds|Steel Axe}} • {{Item|ds|Vulnerary|type=drop}} | ||
|notes= | |notes=Moves to attack units he could attack with 1.5 times his movement. | ||
}} | }} | ||
{{ChapUnitCellFE11 | {{ChapUnitCellFE11 | ||
| Line 558: | Line 577: | ||
|mov=6 | |mov=6 | ||
|inventory={{Item|ds|Iron Axe}} | |inventory={{Item|ds|Iron Axe}} | ||
|notes=• All except the furthest northwestern one immediately begin moving unprovoked.<br>• The furthest northwestern one | |notes=• All except the furthest northwestern one immediately begin moving unprovoked.<br>• The furthest northwestern one moves to attack units they could attack with twice their movement. | ||
}} | }} | ||
{{ChapUnitCellFE11 | {{ChapUnitCellFE11 | ||
| Line 610: | Line 629: | ||
|inventory={{Item|ds|Iron Sword}} | |inventory={{Item|ds|Iron Sword}} | ||
|notes=Prioritizes destroying the [[village]]. | |notes=Prioritizes destroying the [[village]]. | ||
|last=y | |||
}} | }} | ||
{{ChapUnitFtr}} | |||
|content2={{ChapUnitHdr|type=Enemy|platform=ds01}} | |||
{{ChapUnitCellFE11 | {{ChapUnitCellFE11 | ||
|name=[[Hyman]] | |name=[[Hyman]] | ||
| Line 616: | Line 638: | ||
|lv=8 | |lv=8 | ||
|#=1 | |#=1 | ||
|hp= | |hp=29.7 | ||
|str= | |str=8.5 | ||
|mag=0 | |mag=0 | ||
|skill=5 | |skill=5.9 | ||
|spd=14 | |spd=14 | ||
|lck=0 | |lck=0 | ||
| Line 626: | Line 648: | ||
|inventory={{Item|ds|Hand Axe}} • {{Item|ds|Mend|type=drop}} | |inventory={{Item|ds|Hand Axe}} • {{Item|ds|Mend|type=drop}} | ||
|notes=Stands on a [[Terrain/Nintendo DS games#Fire Emblem: Shadow Dragon|gate]], the chapter's seize point. | |notes=Stands on a [[Terrain/Nintendo DS games#Fire Emblem: Shadow Dragon|gate]], the chapter's seize point. | ||
}} | }} | ||
{{ChapUnitCellFE11 | {{ChapUnitCellFE11 | ||
|name=Soothsire | |name=Soothsire | ||
| Line 645: | Line 664: | ||
|mov=6 | |mov=6 | ||
|inventory={{Item|ds|Steel Axe}} • {{Item|ds|Vulnerary|type=drop}} | |inventory={{Item|ds|Steel Axe}} • {{Item|ds|Vulnerary|type=drop}} | ||
|notes= | |notes=Moves to attack units he could attack with 1.5 times his movement. | ||
}} | }} | ||
{{ChapUnitCellFE11 | {{ChapUnitCellFE11 | ||
| Line 662: | Line 681: | ||
|mov=6 | |mov=6 | ||
|inventory={{Item|ds|Iron Axe}} | |inventory={{Item|ds|Iron Axe}} | ||
|notes=• All except the furthest northwestern one immediately begin moving unprovoked.<br>• The furthest northwestern one | |notes=• All except the furthest northwestern one immediately begin moving unprovoked.<br>• The furthest northwestern one moves to attack units they could attack with twice their movement. | ||
}} | }} | ||
{{ChapUnitCellFE11 | {{ChapUnitCellFE11 | ||
| Line 714: | Line 733: | ||
|inventory={{Item|ds|Iron Sword}} | |inventory={{Item|ds|Iron Sword}} | ||
|notes=Prioritizes destroying the [[village]]. | |notes=Prioritizes destroying the [[village]]. | ||
|last=y | |||
}} | }} | ||
{{ChapUnitFtr}} | |||
|content3={{ChapUnitHdr|type=Enemy|platform=ds01}} | |||
{{ChapUnitCellFE11 | {{ChapUnitCellFE11 | ||
|name=[[Hyman]] | |name=[[Hyman]] | ||
| Line 720: | Line 742: | ||
|lv=8 | |lv=8 | ||
|#=1 | |#=1 | ||
|hp= | |hp=32.4 | ||
|str= | |str=10 | ||
|mag=0 | |mag=0 | ||
|skill= | |skill=6.8 | ||
|spd=14 | |spd=14 | ||
|lck=0 | |lck=0 | ||
| Line 730: | Line 752: | ||
|inventory={{Item|ds|Hand Axe}} • {{Item|ds|Mend|type=drop}} | |inventory={{Item|ds|Hand Axe}} • {{Item|ds|Mend|type=drop}} | ||
|notes=Stands on a [[Terrain/Nintendo DS games#Fire Emblem: Shadow Dragon|gate]], the chapter's seize point. | |notes=Stands on a [[Terrain/Nintendo DS games#Fire Emblem: Shadow Dragon|gate]], the chapter's seize point. | ||
}} | }} | ||
{{ChapUnitCellFE11 | {{ChapUnitCellFE11 | ||
|name=Soothsire | |name=Soothsire | ||
| Line 749: | Line 768: | ||
|mov=6 | |mov=6 | ||
|inventory={{Item|ds|Steel Axe}} • {{Item|ds|Vulnerary|type=drop}} | |inventory={{Item|ds|Steel Axe}} • {{Item|ds|Vulnerary|type=drop}} | ||
|notes= | |notes=Moves to attack units he could attack with 1.5 times his movement. | ||
}} | }} | ||
{{ChapUnitCellFE11 | {{ChapUnitCellFE11 | ||
| Line 766: | Line 785: | ||
|mov=6 | |mov=6 | ||
|inventory={{Item|ds|Iron Axe}} | |inventory={{Item|ds|Iron Axe}} | ||
|notes=• All except the furthest northwestern one immediately begin moving unprovoked.<br>• The furthest northwestern one | |notes=• All except the furthest northwestern one immediately begin moving unprovoked.<br>• The furthest northwestern one moves to attack units they could attack with twice their movement. | ||
}} | }} | ||
{{ChapUnitCellFE11 | {{ChapUnitCellFE11 | ||
| Line 818: | Line 837: | ||
|inventory={{Item|ds|Iron Sword}} | |inventory={{Item|ds|Iron Sword}} | ||
|notes=Prioritizes destroying the [[village]]. | |notes=Prioritizes destroying the [[village]]. | ||
|last=y | |||
}} | }} | ||
{{ChapUnitFtr}} | |||
|content4={{ChapUnitHdr|type=Enemy|platform=ds01}} | |||
{{ChapUnitCellFE11 | {{ChapUnitCellFE11 | ||
|name=[[Hyman]] | |name=[[Hyman]] | ||
| Line 824: | Line 846: | ||
|lv=8 | |lv=8 | ||
|#=1 | |#=1 | ||
|hp= | |hp=35.1 | ||
|str= | |str=11.5 | ||
|mag=0 | |mag=0 | ||
|skill= | |skill=7.7 | ||
|spd=14 | |spd=14 | ||
|lck=0 | |lck=0 | ||
| Line 834: | Line 856: | ||
|inventory={{Item|ds|Hand Axe}} • {{Item|ds|Mend|type=drop}} | |inventory={{Item|ds|Hand Axe}} • {{Item|ds|Mend|type=drop}} | ||
|notes=Stands on a [[Terrain/Nintendo DS games#Fire Emblem: Shadow Dragon|gate]], the chapter's seize point. | |notes=Stands on a [[Terrain/Nintendo DS games#Fire Emblem: Shadow Dragon|gate]], the chapter's seize point. | ||
}} | }} | ||
{{ChapUnitCellFE11 | {{ChapUnitCellFE11 | ||
|name=Soothsire | |name=Soothsire | ||
| Line 853: | Line 872: | ||
|mov=6 | |mov=6 | ||
|inventory={{Item|ds|Steel Axe}} • {{Item|ds|Vulnerary|type=drop}} | |inventory={{Item|ds|Steel Axe}} • {{Item|ds|Vulnerary|type=drop}} | ||
|notes= | |notes=Moves to attack units he could attack with 1.5 times his movement. | ||
}} | }} | ||
{{ChapUnitCellFE11 | {{ChapUnitCellFE11 | ||
| Line 870: | Line 889: | ||
|mov=6 | |mov=6 | ||
|inventory={{Item|ds|Iron Axe}} | |inventory={{Item|ds|Iron Axe}} | ||
|notes=• All except the furthest northwestern one immediately begin moving unprovoked.<br>• The furthest northwestern one | |notes=• All except the furthest northwestern one immediately begin moving unprovoked.<br>• The furthest northwestern one moves to attack units they could attack with twice their movement. | ||
}} | }} | ||
{{ChapUnitCellFE11 | {{ChapUnitCellFE11 | ||
| Line 922: | Line 941: | ||
|inventory={{Item|ds|Iron Sword}} | |inventory={{Item|ds|Iron Sword}} | ||
|notes=Prioritizes destroying the [[village]]. | |notes=Prioritizes destroying the [[village]]. | ||
|last=y | |||
}} | }} | ||
{{ChapUnitFtr}} | |||
|content5={{ChapUnitHdr|type=Enemy|platform=ds01}} | |||
{{ChapUnitCellFE11 | {{ChapUnitCellFE11 | ||
|name=[[Hyman]] | |name=[[Hyman]] | ||
| Line 928: | Line 950: | ||
|lv=8 | |lv=8 | ||
|#=1 | |#=1 | ||
|hp= | |hp=37.8 | ||
|str= | |str=13 | ||
|mag=0 | |mag=0 | ||
|skill= | |skill=8.6 | ||
|spd=14 | |spd=14 | ||
|lck=0 | |lck=0 | ||
| Line 938: | Line 960: | ||
|inventory={{Item|ds|Hand Axe}} • {{Item|ds|Mend|type=drop}} | |inventory={{Item|ds|Hand Axe}} • {{Item|ds|Mend|type=drop}} | ||
|notes=Stands on a [[Terrain/Nintendo DS games#Fire Emblem: Shadow Dragon|gate]], the chapter's seize point. | |notes=Stands on a [[Terrain/Nintendo DS games#Fire Emblem: Shadow Dragon|gate]], the chapter's seize point. | ||
}} | }} | ||
{{ChapUnitCellFE11 | {{ChapUnitCellFE11 | ||
|name=Soothsire | |name=Soothsire | ||
| Line 957: | Line 976: | ||
|mov=6 | |mov=6 | ||
|inventory={{Item|ds|Steel Axe}} • {{Item|ds|Vulnerary|type=drop}} | |inventory={{Item|ds|Steel Axe}} • {{Item|ds|Vulnerary|type=drop}} | ||
|notes= | |notes=Moves to attack units he could attack with 1.5 times his movement. | ||
}} | }} | ||
{{ChapUnitCellFE11 | {{ChapUnitCellFE11 | ||
| Line 974: | Line 993: | ||
|mov=6 | |mov=6 | ||
|inventory={{Item|ds|Iron Axe}} | |inventory={{Item|ds|Iron Axe}} | ||
|notes=• All except the furthest northwestern one immediately begin moving unprovoked.<br>• The furthest northwestern one | |notes=• All except the furthest northwestern one immediately begin moving unprovoked.<br>• The furthest northwestern one moves to attack units they could attack with twice their movement. | ||
}} | }} | ||
{{ChapUnitCellFE11 | {{ChapUnitCellFE11 | ||
| Line 1,026: | Line 1,045: | ||
|inventory={{Item|ds|Iron Sword}} | |inventory={{Item|ds|Iron Sword}} | ||
|notes=Prioritizes destroying the [[village]]. | |notes=Prioritizes destroying the [[village]]. | ||
|last=y | |||
}} | }} | ||
{{ChapUnitFtr}} | |||
|content6={{ChapUnitHdr|type=Enemy|platform=ds01}} | |||
{{ChapUnitCellFE11 | {{ChapUnitCellFE11 | ||
|name=[[Hyman]] | |name=[[Hyman]] | ||
| Line 1,032: | Line 1,054: | ||
|lv=8 | |lv=8 | ||
|#=1 | |#=1 | ||
|hp= | |hp=40.5 | ||
|str= | |str=14.5 | ||
|mag=0 | |mag=0 | ||
|skill= | |skill=9.5 | ||
|spd=14 | |spd=14 | ||
|lck=0 | |lck=0 | ||
| Line 1,042: | Line 1,064: | ||
|inventory={{Item|ds|Hand Axe}} • {{Item|ds|Mend|type=drop}} | |inventory={{Item|ds|Hand Axe}} • {{Item|ds|Mend|type=drop}} | ||
|notes=Stands on a [[Terrain/Nintendo DS games#Fire Emblem: Shadow Dragon|gate]], the chapter's seize point. | |notes=Stands on a [[Terrain/Nintendo DS games#Fire Emblem: Shadow Dragon|gate]], the chapter's seize point. | ||
}} | }} | ||
{{ChapUnitCellFE11 | {{ChapUnitCellFE11 | ||
|name=Soothsire | |name=Soothsire | ||
| Line 1,061: | Line 1,080: | ||
|mov=6 | |mov=6 | ||
|inventory={{Item|ds|Steel Axe}} • {{Item|ds|Vulnerary|type=drop}} | |inventory={{Item|ds|Steel Axe}} • {{Item|ds|Vulnerary|type=drop}} | ||
|notes= | |notes=Moves to attack units he could attack with 1.5 times his movement. | ||
}} | }} | ||
{{ChapUnitCellFE11 | {{ChapUnitCellFE11 | ||
| Line 1,078: | Line 1,097: | ||
|mov=6 | |mov=6 | ||
|inventory={{Item|ds|Iron Axe}} | |inventory={{Item|ds|Iron Axe}} | ||
|notes=• All except the furthest northwestern one immediately begin moving unprovoked.<br>• The furthest northwestern one | |notes=• All except the furthest northwestern one immediately begin moving unprovoked.<br>• The furthest northwestern one moves to attack units they could attack with twice their movement. | ||
}} | }} | ||
{{ChapUnitCellFE11 | {{ChapUnitCellFE11 | ||
| Line 1,130: | Line 1,149: | ||
|inventory={{Item|ds|Iron Sword}} | |inventory={{Item|ds|Iron Sword}} | ||
|notes=Prioritizes destroying the [[village]]. | |notes=Prioritizes destroying the [[village]]. | ||
|last=y | |last=y | ||
}} | }} | ||
| Line 1,193: | Line 1,196: | ||
|res=0 | |res=0 | ||
|move=6 | |move=6 | ||
| | |inventory={{Item|3|Hand Axe}}<br>{{Item|3|Mend|type=drop}} | ||
|ax=y | |ax=y | ||
}} | }} | ||
| Line 1,206: | Line 1,208: | ||
|tab6=Hard-5 | |tab6=Hard-5 | ||
|content1={{BossStats DS | |content1={{BossStats DS | ||
|portrait=[[File: | |portrait=[[File:Portrait hyman fe11.png]] | ||
|sprite=fighter enemy | |sprite=fighter enemy | ||
|class=Fighter | |class=Fighter | ||
| Line 1,222: | Line 1,224: | ||
}} | }} | ||
|content2={{BossStats DS | |content2={{BossStats DS | ||
|portrait=[[File: | |portrait=[[File:Portrait hyman fe11.png]] | ||
|sprite=fighter enemy | |sprite=fighter enemy | ||
|class=Fighter | |class=Fighter | ||
| Line 1,238: | Line 1,240: | ||
}} | }} | ||
|content3={{BossStats DS | |content3={{BossStats DS | ||
|portrait=[[File: | |portrait=[[File:Portrait hyman fe11.png]] | ||
|sprite=fighter enemy | |sprite=fighter enemy | ||
|class=Fighter | |class=Fighter | ||
| Line 1,254: | Line 1,256: | ||
}} | }} | ||
|content4={{BossStats DS | |content4={{BossStats DS | ||
|portrait=[[File: | |portrait=[[File:Portrait hyman fe11.png]] | ||
|sprite=fighter enemy | |sprite=fighter enemy | ||
|class=Fighter | |class=Fighter | ||
| Line 1,270: | Line 1,272: | ||
}} | }} | ||
|content5={{BossStats DS | |content5={{BossStats DS | ||
|portrait=[[File: | |portrait=[[File:Portrait hyman fe11.png]] | ||
|sprite=fighter enemy | |sprite=fighter enemy | ||
|class=Fighter | |class=Fighter | ||
| Line 1,286: | Line 1,288: | ||
}} | }} | ||
|content6={{BossStats DS | |content6={{BossStats DS | ||
|portrait=[[File: | |portrait=[[File:Portrait hyman fe11.png]] | ||
|sprite=fighter enemy | |sprite=fighter enemy | ||
|class=Fighter | |class=Fighter | ||
| Line 1,306: | Line 1,308: | ||
==Strategy== | ==Strategy== | ||
{{Strategy}} | {{Strategy}} | ||
'''New Unit Overview:''' | |||
In this chapter, you will acquire three new characters: | |||
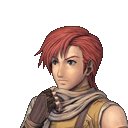
* '''[[Julian]]:''' A standard [[Thief]], boasting impressive speed but lacking in combat prowess. | |||
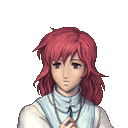
* '''[[Lena]]:''' A [[Cleric]] equipped with a [[Warp]] staff. While she is an improvement over [[Wrys]], her effectiveness varies based on the platform. On the Famicom, her growth is hindered as staff users cannot gain experience unless they survive combat. However, on the DS, her Warp ability and well-rounded growth make her exceptional. | |||
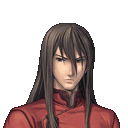
* '''[[Navarre]]:''' A swift but fragile [[Myrmidon]]. His weapon, the [[Killing Edge]], is potent, making him a double-edged sword—threatening as an enemy and invaluable as an ally. | |||
'''Initial Strategy:''' | |||
# Immediately move Julian and Lena towards your main group for protection against enemy attacks. | |||
# Refrain from using Lena's Warp Staff right away. It is especially useful in larger maps with numerous enemies. Although you can eventually get three more, it is best to use it judiciously. | |||
# Position your units at the entrance of the road where Julian and Lena emerge. This aids in their protection once they have moved to safer ground. | |||
# Prepare [[Caeda]] to recruit Navarre, who is aligned with several [[Fighter]]s and thieves at the map's northern end. | |||
# Send a group of characters, including Marth, to the map's southern region. | |||
'''Advanced Strategy:''' | |||
* From this point on, all ''Shadow Dragon'' maps will feature two save points. It is advisable to utilize the first after neutralizing the initial wave of enemies and the second once only the boss remains. | |||
* Use the north mountains as a chokepoint to contain Navarre and his accompanying units. Once you have neutralized Navarre's squad, pivot your attention to the trio of Fighters advancing from the west. If they prove challenging, arrange your units in a vertical line, ensuring each unit can only be confronted once. This tactic helps safeguard your more vulnerable units. | |||
* Once adversaries are defeated, heal your units, save your progress, and advance towards the boss. | |||
'''Boss Battle Tips:''' | |||
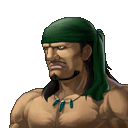
On hard mode, [[Hyman]] is formidable with a strength of 15 and speed of 14. Only [[Ogma]] and Navarre have a plausible chance against him. For optimal outcomes: | |||
* Navarre requires an additional point in either strength or speed to prevent being overpowered by the Killing Edge. | |||
* Similarly, Ogma needs an extra point in strength or speed to withstand attacks from the [[Steel Sword]]. Moreover, a Luck of 4 ensures he evades critical hits from Hyman with a skill of 9. | |||
For the showdown, position either Navarre or Ogma, equipped with the Killing Edge, in front of Hyman. Anticipate a critical hit, and once achieved, press the attack with Navarre, Ogma, and another swordsman to finish him off. | |||
===Strategy for Merciless difficulty=== | |||
'''Understanding Double Attacks:''' | |||
Enemies are likely to double attack most of your characters unless they are equipped with lightweight weapons. Calculate double attacks using this formula: '''speed − (Weapon weight − strength)''' If the outcome is more than 4 above the enemy's speed, a double attack will occur. This rule applies to both your characters and enemies. | |||
'''Defensive Approach:''' | |||
# March towards the castle with characters that are not vulnerable to double attacks. | |||
# Play defensively, luring in [[Archer]]s to eliminate them on the following turn. If possible, try to pull in just the Fighters. But, if Archers move in, take them out first. | |||
'''Charging to the Left:''' | |||
# If plan to move westward first, make sure to leave several strong units behind, including Caeda. | |||
# Use Caeda to recruit Navarre and then eliminate the thieves. The enemies might trap Navarre, preventing his movement. This position allows you to freely engage the Fighters above. | |||
# Without support, Navarre will not withstand two adversaries, especially if you eliminate one during your turn. | |||
'''Engaging the Boss:''' | |||
The boss in this chapter is comparatively easier than the prior two. Ogma alone can tackle him effectively. | |||
'''Village Visit & Item Management:''' | |||
# Do not forget to visit the village. You will get a [[Devil Axe]] which can be useful later on. | |||
# Although this axe has a chance to hurt its user, it can be incredibly effective, especially in harder modes. Fighters like Barst can make good use of it. | |||
# It is recommended to use this axe after saving, so you can reset if things go poorly. | |||
<!-- | <!-- | ||
==Trivia== | ==Trivia== | ||
--> | --> | ||
==Etymology and other languages== | ==Etymology and other languages== | ||
{{Names | {{Names | ||
|eng-name=• A Brush in the Teeth<br>• The Ghoul's Teeth | |eng-name=• A Brush in the Teeth<br>• The Ghoul's Teeth | ||
|eng-mean=• Pun on the nickname given to the Samsooth Mountains, "The Ghoul's Teeth", by villagers. Used in ''Shadow Dragon''.<br>• Used in ''Shadow Dragon & the Blade of Light''. | |eng-mean=• Pun on the nickname given to the Samsooth Mountains, "The Ghoul's Teeth", by villagers. Used in ''Shadow Dragon''.<br>• Used in ''Shadow Dragon & the Blade of Light''. | ||
| | |jpn-name={{h|デビルマウンテン|Debirumaunten}} | ||
| | |jpn-mean=Devil Mountain; the colloquial name of the Samsooth Mountains (Japanese: {{hl|サムスーフ山|Samusūfu-san}} ''Mount Samsoof''). | ||
|span-name=Dientes afilados | |span-name=Dientes afilados | ||
|span-mean=Sharp teeth | |span-mean=Sharp teeth | ||
Revision as of 17:32, 13 November 2023
- This article is about the chapter from Shadow Dragon & the Blade of Light and its remakes. For the History Mode map in Warriors, see A Brush in the Teeth (Warriors).
| ||||||||||
|
A Brush in the Teeth (Japanese: デビルマウンテン Devil Mountain), known as The Ghoul's Teeth in Fire Emblem: Shadow Dragon & the Blade of Light, is the third chapter in Shadow Dragon and the Blade of Light, Book 1 of Mystery of the Emblem, and Shadow Dragon.
Plot
- Main article:
A Brush in the Teeth/Script
Marth makes his way into the Samsooth Mountains, where a cleric named Lena had recently gone in order to tend to the sick. The Soothsires discover and attempt to kill her, but one of their thieves, Julian, falls in love with her, betrays his comrades, and helps her escape. The two discover that Marth is in the area and decide to join his forces. Meanwhile, the fearsome swordsman Navarre attempts to pursue them, but Caeda stops him and gambles her life to recruit him. Navarre, unwilling to turn his sword against a woman, agrees to lend Marth his aid. Marth clears the mountains out and makes off with a stash of gold they were hiding.
Chapter data
Shadow Dragon & the Blade of Light Mystery of the Emblem Shadow Dragon
| ||||||
|
| |||||
| Victory: Seize | Player | Enemy | ||||
|---|---|---|---|---|---|---|
| Defeat: Marth dies | 16+1 | 15−1 | ||||
| ||||||
| Map dimensions: 30 columns by 20 rows | ||||||
Units are arranged based on their position in deployment order. If every unit is alive and recruited, the deployment order is:
- In Normal mode: Marth, Abel, Frey, Jagen, Cain, Gordin, Draug, Norne, Caeda, Wrys, Ogma, Barst, Bord, Cord, then Darros and Castor in the order they were recruited
- In Hard mode: Marth, Caeda, Cain, Abel, Draug, Jagen, Gordin, Wrys, Ogma, Barst, Bord, Cord, then Darros and Castor in the order they were recruited
Character data
Shadow Dragon & the Blade of Light Mystery of the Emblem Shadow Dragon
| Characters | |||||||||||||||||||||||||||||||||
|---|---|---|---|---|---|---|---|---|---|---|---|---|---|---|---|---|---|---|---|---|---|---|---|---|---|---|---|---|---|---|---|---|---|
New units
| |||||||||||||||||||||||||||||||||
| |||||||||||||||||||||||||||||||||
Required characters
| |||||||||||||||||||||||||||||||||

| |||||||||||||||||||||||||||||||||
Available characters
| |||||||||||||||||||||||||||||||||
              
| |||||||||||||||||||||||||||||||||
Item data
Shadow Dragon & the Blade of Light Mystery of the Emblem Shadow Dragon
Shop data
Shadow Dragon & the Blade of Light Mystery of the Emblem Shadow Dragon
Enemy data
Shadow Dragon & the Blade of Light Mystery of the Emblem Shadow Dragon
- Stats with a decimal can vary randomly; the decimal represents the chance for the stat to increase to the nearest integer, or otherwise be truncated.
Normal Hard-1 Hard-2 Hard-3 Hard-4 Hard-5
| |||||||||||||||||||||||||||||||||||||||||||||||||||||||||||||||||||||||||||||||||||||||||||||||||||||||||||||||||||||||||||||||||||||||||||||||||||||||||||||||||||||||||||||||||
| |||||||||||||||||||||||||||||||||||||||||||||||||||||||||||||||||||||||||||||||||||||||||||||||||||||||||||||||||||||||||||||||||||||||||||||||||||||||||||||||||||||||||||||||||
Boss data
- Main article:
Hyman
Shadow Dragon & the Blade of Light Mystery of the Emblem Shadow Dragon
- Stats with a decimal can vary randomly; the decimal represents the chance for the stat to increase to the nearest integer, or otherwise be truncated.
Strategy
| This section details unofficial strategies that may help with completion of the chapter. This may not work for everybody. |
New Unit Overview:
In this chapter, you will acquire three new characters:
- Julian: A standard Thief, boasting impressive speed but lacking in combat prowess.
- Lena: A Cleric equipped with a Warp staff. While she is an improvement over Wrys, her effectiveness varies based on the platform. On the Famicom, her growth is hindered as staff users cannot gain experience unless they survive combat. However, on the DS, her Warp ability and well-rounded growth make her exceptional.
- Navarre: A swift but fragile Myrmidon. His weapon, the Killing Edge, is potent, making him a double-edged sword—threatening as an enemy and invaluable as an ally.
Initial Strategy:
- Immediately move Julian and Lena towards your main group for protection against enemy attacks.
- Refrain from using Lena's Warp Staff right away. It is especially useful in larger maps with numerous enemies. Although you can eventually get three more, it is best to use it judiciously.
- Position your units at the entrance of the road where Julian and Lena emerge. This aids in their protection once they have moved to safer ground.
- Prepare Caeda to recruit Navarre, who is aligned with several Fighters and thieves at the map's northern end.
- Send a group of characters, including Marth, to the map's southern region.
Advanced Strategy:
- From this point on, all Shadow Dragon maps will feature two save points. It is advisable to utilize the first after neutralizing the initial wave of enemies and the second once only the boss remains.
- Use the north mountains as a chokepoint to contain Navarre and his accompanying units. Once you have neutralized Navarre's squad, pivot your attention to the trio of Fighters advancing from the west. If they prove challenging, arrange your units in a vertical line, ensuring each unit can only be confronted once. This tactic helps safeguard your more vulnerable units.
- Once adversaries are defeated, heal your units, save your progress, and advance towards the boss.
Boss Battle Tips:
On hard mode, Hyman is formidable with a strength of 15 and speed of 14. Only Ogma and Navarre have a plausible chance against him. For optimal outcomes:
- Navarre requires an additional point in either strength or speed to prevent being overpowered by the Killing Edge.
- Similarly, Ogma needs an extra point in strength or speed to withstand attacks from the Steel Sword. Moreover, a Luck of 4 ensures he evades critical hits from Hyman with a skill of 9.
For the showdown, position either Navarre or Ogma, equipped with the Killing Edge, in front of Hyman. Anticipate a critical hit, and once achieved, press the attack with Navarre, Ogma, and another swordsman to finish him off.
Strategy for Merciless difficulty
Understanding Double Attacks:
Enemies are likely to double attack most of your characters unless they are equipped with lightweight weapons. Calculate double attacks using this formula: speed − (Weapon weight − strength) If the outcome is more than 4 above the enemy's speed, a double attack will occur. This rule applies to both your characters and enemies.
Defensive Approach:
- March towards the castle with characters that are not vulnerable to double attacks.
- Play defensively, luring in Archers to eliminate them on the following turn. If possible, try to pull in just the Fighters. But, if Archers move in, take them out first.
Charging to the Left:
- If plan to move westward first, make sure to leave several strong units behind, including Caeda.
- Use Caeda to recruit Navarre and then eliminate the thieves. The enemies might trap Navarre, preventing his movement. This position allows you to freely engage the Fighters above.
- Without support, Navarre will not withstand two adversaries, especially if you eliminate one during your turn.
Engaging the Boss:
The boss in this chapter is comparatively easier than the prior two. Ogma alone can tackle him effectively.
Village Visit & Item Management:
- Do not forget to visit the village. You will get a Devil Axe which can be useful later on.
- Although this axe has a chance to hurt its user, it can be incredibly effective, especially in harder modes. Fighters like Barst can make good use of it.
- It is recommended to use this axe after saving, so you can reset if things go poorly.
Etymology and other languages
| Names, etymology, and in other regions | ||
|---|---|---|
| Language | Name | Definition, etymology, and notes |
| English |
• A Brush in the Teeth |
• Pun on the nickname given to the Samsooth Mountains, "The Ghoul's Teeth", by villagers. Used in Shadow Dragon. |
| Japanese |
デビルマウンテン |
Devil Mountain; the colloquial name of the Samsooth Mountains (Japanese: サムスーフ山 Mount Samsoof). |
| Spanish |
Dientes afilados |
Sharp teeth |
| French |
L'assaut des sommets |
The assault of the summits |
| German |
• Teufelsgebirge |
• Devil's mountain range; used in the menus. |
| Italian |
Un ghigno feroce |
A fierce sneer |
Gallery
This section has been marked as a stub. Please help improve the page by adding information.
CG image displayed during the intro for Shadow Dragon
References
| ← The Pirates of Galder • | A Brush in the Teeth | • Battle in the Lea → • Champions of Aurelis (Mystery of the Emblem) → |
|---|
| Fire Emblem: Mystery of the Emblem | ||||||||||||||||||||||||||||||||||||||
|---|---|---|---|---|---|---|---|---|---|---|---|---|---|---|---|---|---|---|---|---|---|---|---|---|---|---|---|---|---|---|---|---|---|---|---|---|---|---|
| ||||||||||||||||||||||||||||||||||||||
| Fire Emblem: Shadow Dragon | ||||||||||||||||||||
|---|---|---|---|---|---|---|---|---|---|---|---|---|---|---|---|---|---|---|---|---|
|
