| Site News |
|---|
| Warning: This wiki contains spoilers. Read at your own risk! Social media: If you would like, please join our Discord server, and/or follow us on X (Twitter) or Tumblr! |
Dark Pontifex: Difference between revisions
Thecornerman (talk | contribs) m (→Boss data) |
mNo edit summary |
||
| Line 2,795: | Line 2,795: | ||
|res=8 | |res=8 | ||
|move=6 | |move=6 | ||
| | |weapons={{Item|3|Imhullu}} | ||
|items={{Item|3|Falchion|link=Falchion (Archanea)|type=drop}} | |||
|to=y | |to=y | ||
|st=y | |st=y | ||
Revision as of 20:43, 7 July 2022
- This article is about the chapter from Shadow Dragon & the Blade of Light and its remakes; for the History Mode map from Fire Emblem Warriors based on this chapter, see The Dark Pontifex.
| ||||||||||
|

Dark Pontifex (Japanese: 悪の司祭ガーネフ Evil Bishop Garnef) is the twenty-third chapter of Fire Emblem: Shadow Dragon & the Blade of Light and Fire Emblem: Shadow Dragon, and the eighteenth chapter in Book I of Fire Emblem: Mystery of the Emblem.
Plot
- Main article:
Dark Pontifex/Script
Marth arrives at Thabes, and is confronted by Gharnef. Gharnef reveals that he planned for Marth to defeat Grust and Macedon so his own conquest of the world would be easier, much to Marth's horror. Marth and his companions battle and defeat Gharnef. Afterwards, Elice arrives, and the Altean royal siblings joyously reunite. Elice explains that Gharnef intended for her to use the Aum Staff, which was discovered in a temple in Dolhr and can be used to bring a single warrior back from the dead. Marth prepares to invade Dolhr and bring an end to the War of Shadows.
Chapter data
Shadow Dragon & the Blade of Light Mystery of the Emblem Shadow Dragon


| ||||||
|
| |||||
| Victory: Seize | Player | Enemy | ||||
|---|---|---|---|---|---|---|
| Defeat: Marth dies | 12 | 21+12 | ||||
| ||||||
Character data
Shadow Dragon & the Blade of Light Mystery of the Emblem Shadow Dragon


Item data
Shadow Dragon & the Blade of Light Mystery of the Emblem Shadow Dragon
| ||||||||||||||||||||||||||||||||||||
|
Shop data
Shadow Dragon & the Blade of Light Shadow Dragon
Swords Lances Axes Bows Tomes Staves Items Secret
None
- ×3 Maximum
- The secret shop is located in the door directly north of the throne.
Enemy data
Shadow Dragon & the Blade of Light Mystery of the Emblem Shadow Dragon
- Stats with a decimal can vary randomly; the decimal represents the chance for the stat to increase to the nearest integer, or otherwise be truncated.
Normal Hard-1 Hard-2 Hard-3 Hard-4 Hard-5
| ||||||||||||||||||||||||||||||||||||||||||||||||||||||||||||||||||||||||||||||||||||||||||||||||||||||||||||||||||||||||||||||||||||||||||||||||||||||||||||||||||||||||||||||||||||||||||||||||||||||||||||||||||||||||||||||||||||||||||||||||||||||||||||||||||||||||||||||||||||||||||||||||||||||||||||||||||||||||||||||||||||||||||||||||||||||||||||||||||||||||||||||||||||||||||||||||||||||||||||||||||||||||||||||||||||
| ||||||||||||||||||||||||||||||||||||||||||||||||||||||||||||||||||||||||||||||||||||||||||||||||||||||||||||||||||||||||||||||||||||||||||||||||||||||||||||||||||||||||||||||||||||||||||||||||||||||||||||||||||||||||||||||||||||||||||||||||||||||||||||||||||||||||||||||||||||||||||||||||||||||||||||||||||||||||||||||||||||||||||||||||||||||||||||||||||||||||||||||||||||||||||||||||||||||||||||||||||||||||||||||||||||
| ||||||||||||||||||||||||||||||||||||||||||||||||||||||||||||||||||||||||||||||||||||||||||||||||||||||||||||||||||||||||||||||||||||||||||||||||||||||||||||||||||||||||||||||||||||||||||||||||||||||||||||||||||||||||||||||||||||||||||||||||||||||||||||||||||||||||||||||||||||||||||||||||||||||||||||||||||||||||||||||||||||||||||||||||||||||||||||||||||||||||||||||||||||||||||||||||||||||||||||||||||||||||||||||||||||
| ||||||||||||||||||||||||||||||||||||||||||||||||||||||||||||||||||||||||||||||||||||||||||||||||||||||||||||||||||||||||||||||||||||||||||||||||||||||||||||||||||||||||||||||||||||||||||||||||||||||||||||||||||||||||||||||||||||||||||||||||||||||||||||||||||||||||||||||||||||||||||||||||||||||||||||||||||||||||||||||||||||||||||||||||||||||||||||||||||||||||||||||||||||||||||||||||||||||||||||||||||||||||||||||||||||
Reinforcements
Shadow Dragon & the Blade of Light
Mystery of the Emblem
- Starting turn 7, continuing until 11 of each have appeared; which ones appear each turn is random
- Note: All reinforcements are halted when Gharnef is defeated.
Shadow Dragon
- Turn 7
- Turn 15
- All reinforcements are halted when Gharnef is defeated.
Boss data
- Main article:
Gharnef
Shadow Dragon & the Blade of Light Mystery of the Emblem Shadow Dragon
- Stats with a decimal can vary randomly; the decimal represents the chance for the stat to increase to the nearest integer, or be otherwise truncated.

Strategy
| This section details unofficial strategies that may help with completion of the chapter. This may not work for everybody. |
In Shadow Dragon, one of the three Gharnefs is the real one, with the other two being fakes; which one is real and which are fakes is determined at random. The fakes can be damaged without Starlight, but only drop a Steel Sword instead of the Falchion, making them simply red herrings. The real one will have the full effects of Imhullu, blocking all damage, period. This fact can be used to your advantage in regards to identifying him—the Geosphere, which deals 13 damage to all units on the map, will not damage the real Gharnef, making it an easy way of distinguishing him from his fakes early on. Should one wish to use the Geosphere to identify him, it is advisable to keep a unit that can use Fortify ready, as the Geosphere will damage playable units as well as enemy units. Should the player not want to use the Geosphere, or not own it, a Ballistician can easily take a potshot at one of the Gharnefs from afar—again, the one that does not take damage from it is the real one.
If you don't have Starlight on you for whatever reason, it might be a good idea to reset until the Gharnef in the northeast corner is a fake; the other two can be ignored with no consequence, but if the northeast one is real you have no choice but to engage a completely invincible enemy in combat on the way to the throne. This chapter is dominated by mages, so the Barrier staff Wendell came with way back in Chapter 5 is going to earn its keep here and this is a relatively good opportunity to train up sword ranks if you really want to. Send someone to nab the chests in the northwest corner early on and start making your way forward. Try not to leave enemies wounded but alive on enemy phase - the enemy spitefully prioritizes using the Fortify staff that can be dropped for your usage. By the time you've cleaned out the southeast corner, the first of two reinforcement waves will have dropped in at the top of the tower. Let them charge you and meet them at the bottom, then push forward, wipe out the rest of the enemies one at a time, and take the throne. The secret shop here is little more than a mildly amusing novelty, since two free Master Seals drop in this chapter and if you really need to buy more in the third-to-last chapter, you should seriously reconsider the state of your army.
Etymology and other languages
| Names, etymology, and in other regions | ||
|---|---|---|
| Language | Name | Definition, etymology, and notes |
| English |
Dark Pontifex |
-- |
| Spanish |
El Pontifice Oscuro |
The Dark Pontifex |
| French |
Le Pontife maléfique |
The Dark Pontifex |
| German |
Dunkler Curateer |
Dark Curate |
| Italian |
Il Pontefice oscuro |
The Dark Pontifex |
Gallery
This section has been marked as a stub. Please help improve the page by adding information.
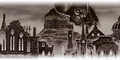
CG image displayed during the intro for Shadow Dragon
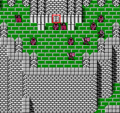
The location of the secret shop in Shadow Dragon & the Blade of Light


References
| ← A Knight-Filled Sky • | Dark Pontifex | • The Dragonkin Realm → |
|---|
| Fire Emblem: Mystery of the Emblem | ||||||||||||||||||||||||||||||||||||||
|---|---|---|---|---|---|---|---|---|---|---|---|---|---|---|---|---|---|---|---|---|---|---|---|---|---|---|---|---|---|---|---|---|---|---|---|---|---|---|
| ||||||||||||||||||||||||||||||||||||||
| Fire Emblem: Shadow Dragon | ||||||||||||||||||||
|---|---|---|---|---|---|---|---|---|---|---|---|---|---|---|---|---|---|---|---|---|
|