| Site News |
|---|
| Warning: This wiki contains spoilers. Read at your own risk! Social media: If you would like, please join our Discord server, and/or follow us on Twitter (X) or Tumblr! |
Zofia's Call/Fleecer's Forest Battle: Difference between revisions
m (→Trivia) |
|||
| (32 intermediate revisions by 10 users not shown) | |||
| Line 1: | Line 1: | ||
{{Chapter Infobox | {{Chapter Infobox | ||
|title=Fleecer's Forest Battle | |title=Fleecer's Forest Battle | ||
|image=[[File:Cm fe02 c1 m02.png|200px]] | |image=[[File:Cm fe02 c1 m02.png|200px]] | ||
|location= | |location=Fleecer's Forest | ||
|boss=[[Brigand]]{{h|*|Not considered a boss in Gaiden}} | |||
|boss=[[Brigand]]{{ | |previous=[[Zofia's Call/Ram Woods Battle|Ram Woods Battle]] | ||
| | |next=*[[Zofia's Call/Storming of Ram Valley|Storming of Ram Valley]] | ||
*[[Zofia's Call/Thieves' Shrine|Thieves' Shrine]] | |||
}} | }} | ||
'''Fleecer's Forest Battle''' is the second map of the first act in {{FE2}} and {{FE15}}. In this map, [[Alm]] continues his journey through southern [[Zofia]]. | |||
'''Fleecer's Forest Battle''' (Japanese: {{hl|盗賊の森の戦い|Tōzoku no mori no tatakai}} ''Thieves' forest battle'') is the second map of the first act in {{FE2}} and {{FE15}}. In this map, [[Alm]] continues his journey through southern [[Zofia]]. | |||
==Map data== | ==Map data== | ||
{{ | {{Tab | ||
|header=Chapter data | |header=Chapter data | ||
|default=2 | |default=2 | ||
|tab1=''Gaiden'' | |tab1=''Gaiden'' | ||
|tab2=''Echoes: Shadows of Valentia'' | |tab2=''Echoes: Shadows of Valentia'' | ||
|content1={{ | |content1={{ChapData | ||
|victory=Rout the enemy | |victory=Rout the enemy | ||
|defeat=[[Alm]] dies | |defeat=[[Alm]] dies | ||
|ally=5 | |ally=5 | ||
|enemy=7 | |enemy=7 | ||
|map=[[File:Cm fe02 c1 m02.png]] | |map=[[File:Cm fe02 c1 m02.png]] | ||
}} | |||
|content2={{ | Units are arranged based on their position in deployment order after Alm. | ||
|content2={{Tab | |||
|tab1=Normal | |tab1=Normal | ||
|tab2=Hard | |tab2=Hard | ||
|content1={{ChapData | |content1={{ChapData | ||
|victory=Rout the enemy | |victory=Rout the enemy | ||
|defeat=[[Alm]] dies | |defeat=[[Alm]] dies | ||
|ally=6 | |ally=6 | ||
|enemy=7 | |enemy=7 | ||
|}} | |col=22 | ||
|row=20 | |||
}} | |||
|content2={{ChapData | |content2={{ChapData | ||
|victory=Rout the enemy | |victory=Rout the enemy | ||
|defeat=[[Alm]] dies | |defeat=[[Alm]] dies | ||
|ally=6 | |ally=6 | ||
|enemy=8 | |enemy=8 | ||
|}} | |col=22 | ||
|row=20 | |||
}} | |||
}} | |||
}} | }} | ||
| Line 50: | Line 54: | ||
|tab2=''Echoes: Shadows of Valentia'' | |tab2=''Echoes: Shadows of Valentia'' | ||
|content1={{ChapChars | |content1={{ChapChars | ||
|game#= 02 | |game#=02 | ||
| | |forced1=alm | ||
| | |return1=lukas | ||
| | |return2=kliff | ||
| | |return3=tobin | ||
| | |return4=gray | ||
}} | }} | ||
|content2={{ChapChars | |content2={{ChapChars | ||
|game#= 15 | |game#=15 | ||
| | |forced1=alm | ||
|return1= | |return1=lukas | ||
|return2= | |return2=gray | ||
|return3= | |return3=tobin | ||
|return4= | |return4=kliff | ||
|return5 | |return5=faye | ||
}} | }} | ||
}} | }} | ||
| Line 72: | Line 75: | ||
{{Tab | {{Tab | ||
|default=2 | |default=2 | ||
|width= | |width=100% | ||
|tab1=''Gaiden'' | |tab1=''Gaiden'' | ||
|tab2=''Echoes: Shadows of Valentia'' Normal | |tab2=''Echoes: Shadows of Valentia'' Normal | ||
|tab3=''Echoes: Shadows of Valentia'' Hard | |tab3=''Echoes: Shadows of Valentia'' Hard | ||
|content1={{ | |content1={{ChapUnitHdr|type=Enemy|platform=nes02}} | ||
|platform=nes02 | {{ChapUnitCellFE2 | ||
| | |name=Brigand | ||
| | |class=Brigand | ||
| | |lv=1 | ||
|#1= | |#=1 | ||
| | |hp=26 | ||
|- | |str=7 | ||
| | |skill=1 | ||
| | |spd=2 | ||
| | |lck=0 | ||
|# | |def=2 | ||
| | |res=0 | ||
|mov=4 | |||
|notes=Moves to attack if a unit is in range; moves to the nearest avoid-boosting terrain otherwise. | |||
}} | |||
{{ChapUnitCellFE2 | |||
|name=Brigand | |||
|class=Brigand | |||
|lv=1 | |||
|#=5 | |||
|hp=26 | |||
|str=7 | |||
|skill=1 | |||
|spd=2 | |||
|lck=0 | |||
|def=2 | |||
|res=0 | |||
|mov=4 | |||
}} | |||
{{ChapUnitCellFE2 | |||
|name=Archer | |||
|class=Archer | |||
|lv=1 | |||
|#=1 | |||
|hp=24 | |||
|str=9 | |||
|skill=1 | |||
|spd=2 | |||
|lck=0 | |||
|def=3 | |||
|res=0 | |||
|mov=4 | |||
|last=y | |||
}} | |||
{{ChapUnitFtr}} | |||
|content2={{ChapUnitHdr|type=Enemy|platform=3ds03}} | |||
{{ChapUnitCellFE15 | |||
|name=Brigands | |||
|class=Brigand | |||
|lv=1 | |||
|#=1 | |||
|hp=26 | |||
|atk=7 | |||
|skill=1 | |||
|spd=2 | |||
|lck=0 | |||
|def=2 | |||
|res=0 | |||
|mov=4 | |||
|inventory=--<br>{{Item|15|Axe|link=Axe (Famicom)|image=axe forecast}} | |||
|notes=• Starts on [[Terrain/Nintendo 3DS games#Fire Emblem Echoes: Shadows of Valentia|supplies]].<br>• Moves to attack if a unit is in range; returns to his starting position otherwise. | |||
}} | |||
{{ChapUnitCellFE15 | |||
|name=Brigands | |||
|class=Brigand | |||
|lv=1 | |||
|#=5 | |||
|hp=26 | |||
|atk=7 | |||
|skill=1 | |||
|spd=2 | |||
|lck=0 | |||
|def=2 | |||
|res=0 | |||
|mov=4 | |||
|inventory=--<br>{{Item|15|Axe|link=Axe (Famicom)|image=axe forecast}} | |||
}} | |||
{{ChapUnitCellFE15 | |||
|name=Brigands | |||
|class=Archer | |||
|lv=1 | |||
|#=1 | |||
|hp=24 | |||
|atk=8 | |||
|skill=1 | |||
|spd=2 | |||
|lck=0 | |||
|def=3 | |||
|res=0 | |||
|mov=4 | |||
|inventory=--<br>{{Item|15|Bow|link=Bow (Famicom)|image=bow forecast}} • {{Item|15|Bowrange +1|image=skill class}} | |||
|last=y | |||
}} | |||
{{ChapUnitFtr}} | |||
|content3={{ChapUnitHdr|type=Enemy|platform=3ds03}} | |||
{{ChapUnitCellFE15 | |||
|name=Brigands | |||
|class=Brigand | |||
|lv=3 | |||
|#=1 | |||
|hp=28 | |||
|atk=8 | |||
|skill=2 | |||
|spd=3 | |||
|lck=0 | |||
|def=3 | |||
|res=0 | |||
|mov=4 | |||
|inventory=--<br>{{Item|15|Axe|link=Axe (Famicom)|image=axe forecast}} | |||
|notes=• Starts on [[Terrain/Nintendo 3DS games#Fire Emblem Echoes: Shadows of Valentia|supplies]].<br>• Moves to attack if a unit is in range; returns to his starting position otherwise. | |||
}} | }} | ||
{{ChapUnitCellFE15 | |||
| | |name=Brigands | ||
|class=Brigand | |||
| | |lv=1 | ||
| | |#=6 | ||
|# | |hp=26 | ||
| | |atk=7 | ||
| | |skill=1 | ||
|spd=2 | |||
| | |lck=0 | ||
| | |def=2 | ||
|res=0 | |||
| | |mov=4 | ||
| | |inventory=--<br>{{Item|15|Axe|link=Axe (Famicom)|image=axe forecast}} | ||
| | |||
| | |||
| | |||
}} | }} | ||
{{ChapUnitCellFE15 | |||
| | |name=Brigands | ||
| | |class=Archer | ||
| | |lv=1 | ||
| | |#=1 | ||
| | |hp=24 | ||
| | |atk=9 | ||
| | |skill=1 | ||
| | |spd=2 | ||
| | |lck=0 | ||
| | |def=3 | ||
| | |res=0 | ||
| | |mov=4 | ||
|inventory=--<br>{{Item|15|Bow|link=Bow (Famicom)|image=bow forecast}} • {{Item|15|Bowrange +1|image=skill class}} | |||
| | |last=y | ||
| | |||
}} | }} | ||
{{ChapUnitFtr}} | |||
}} | }} | ||
===Boss data=== | |||
{{Tab | |||
|tab1=Normal | |||
|tab2=Hard | |||
|content1={{BossStats FE15 | |||
|portrait=[[File:Generic portrait brigand enemy status fe15.png|128px]] | |||
|sprite=brigand enemy | |||
|class=Brigand | |||
|lv=1 | |||
|HP=26 | |||
|str=7 | |||
|skill=1 | |||
|spd=2 | |||
|luck=0 | |||
|def=2 | |||
|res=0 | |||
|move=4 | |||
|ax=y | |||
|skills={{Item|15|Axe|link=Axe (Famicom)|image=axe forecast}} | |||
}} | |||
|content2={{BossStats FE15 | |||
|portrait=[[File:Generic portrait brigand enemy status fe15.png|128px]] | |||
|sprite=brigand enemy | |||
|class=Brigand | |||
|lv=3 | |||
|HP=28 | |||
|str=8 | |||
|skill=2 | |||
|spd=3 | |||
|luck=0 | |||
|def=3 | |||
|res=0 | |||
|move=4 | |||
|ax=y | |||
|skills={{Item|15|Axe|link=Axe (Famicom)|image=axe forecast}} | |||
}} | |||
}} | |||
*<small>Note: This enemy is not classified as a boss in ''Gaiden''.</small> | |||
==Strategy== | ==Strategy== | ||
| Line 142: | Line 274: | ||
===''Echoes: Shadows of Valentia''=== | ===''Echoes: Shadows of Valentia''=== | ||
In {{title|Echoes: Shadows of Valentia}}, you start out only able to attack with Alm, Lukas, and Kliff. On turn 1, move Alm | In {{title|Echoes: Shadows of Valentia}}, you start out only able to attack with Alm, Lukas, and Kliff. On turn 1, move Alm, Tobin, and Faye as far north as possible. Have Lukas injure the Archer from the south, move Kliff one step left, and move Gray up one and right one. On enemy phase, Brigands will attack Alm and Gray while the Archer retreats southwest. | ||
On turn 2, move Alm | On turn 2, move Alm just below the stairs. This cuts off the northern supplies and forces fleeing enemies to go southwest. Lukas should kill the Archer from the north. Move Gray left one and up two, then move Kliff up one and left one. Finally, have Tobin weaken the Brigand who attacked Gray and have Faye finish him off, both from forests. If Tobin got two kills last battle, he should level up here; he can't get Attack. On enemy phase, Alm, Gray, and Kliff come under attack. Kliff levels up, and needs to gain Speed. | ||
On turn 3, have Alm | On turn 3, have Alm finish the boss off. Have Gray weaken the Brigand who attacked Kliff from the north and have Kliff finish him from the west. Then have Tobin weaken the Brigand who attacked Gray from the forest and have Faye finish him from the south. She levels up; if she gets Speed, so much the better. Finally, move Lukas up one and right one so that the last enemies can't go too far west. At this point, the battle is won; on turn 4, Kliff, Faye, and Alm can finish the stragglers. If everything went well, Tobin should be ready to promote; Kliff only needs to survive one more battle and Faye only needs one more kill after bonus experience. | ||
Map Turn Count: 4<br>Game Turn Count: 9 | |||
==Flavor text== | |||
{{DescriptionHdr}} | |||
{{DescriptionCell | |||
|game={{title|Echoes: Shadows of Valentia}} | |||
|english=This gloomy wood<br>has been prowled by<br>brigands recently,<br>making travel along<br>its roads rather risky. | |||
|japanese=鬱蒼とした少し暗い森。<br>近年は盗賊が<br>多く出没するため<br>森の中を抜ける街道の<br>通行には危険が伴う。 | |||
}} | |||
{{DescriptionFtr}} | |||
==Trivia== | ==Trivia== | ||
* This is one of the few maps in {{ | * This is one of the few maps in {{FE15}} where the player unit's deployment positions were changed slightly from {{title|Gaiden}}; Alm's starting position was moved closer to his allies. | ||
==Etymology and other languages== | ==Etymology and other languages== | ||
{{Names | {{Names | ||
|eng-name=Fleecer's Forest Battle | |eng-name=Fleecer's Forest Battle | ||
| | |jpn-name={{h|盗賊の森の戦い|Tōzoku no mori no tatakai}} | ||
|jpn-mean=Thieves' forest battle | |||
|span-name= | |||
|span-mean= | |||
|fren-name=Bataille: Forêt des brigands | |||
|fren-mean=Battle: Brigands' Forest | |||
|ger-name= | |||
|ger-mean= | |||
|ital-name= | |||
|ital-mean= | |||
|dut-name= Strijd: Stropersbos | |||
|dut-mean= Battle: Marauder's Forest | |||
|kor-name={{h|도적의 숲의 전투|dojeog-ui sup-ui jeontu}} | |||
|kor-mean=Bandit forest battle | |||
|ch-simp-name= | |||
|ch-simp-mean= | |||
|ch-trad-name= | |||
|ch-trad-mean= | |||
}} | }} | ||
==Gallery== | ==Gallery== | ||
<gallery> | |||
Mt fe15 fleecer's forest.png|Thumbnail of Fleecer's Forest. | |||
</gallery> | |||
{{ChapterNav | {{ChapterNav | ||
Latest revision as of 04:05, 1 August 2023
| ||||||||
|

Fleecer's Forest Battle (Japanese: 盗賊の森の戦い Thieves' forest battle) is the second map of the first act in Fire Emblem Gaiden and Fire Emblem Echoes: Shadows of Valentia. In this map, Alm continues his journey through southern Zofia.
Map data
Gaiden Echoes: Shadows of Valentia
Normal Hard
| ||||||
|
| |||||
| Victory: Rout the enemy | Player | Enemy | ||||
|---|---|---|---|---|---|---|
| Defeat: Alm dies | 6 | 7 | ||||
| Map dimensions: 22 columns by 20 rows | ||||||
Character data
Gaiden Echoes: Shadows of Valentia
| Characters | |
|---|---|
New units
| |
| |
Required characters
| |

| |
Available characters
| |
    
|
Enemy data
Gaiden Echoes: Shadows of Valentia Normal Echoes: Shadows of Valentia Hard
| |||||||||||||||||||||||||||||||||||||||||||||||||||||||||||||||||||||||||||||||||||||||||
| |||||||||||||||||||||||||||||||||||||||||||||||||||||||||||||||||||||||||||||||||||||||||
Boss data
Normal Hard

- Note: This enemy is not classified as a boss in Gaiden.
Strategy
| This section details unofficial strategies that may help with completion of the chapter. This may not work for everybody. |
Gaiden
In Gaiden, this map is a bit more dangerous than the previous one. As usual, the victory condition is to rout the enemy. It is recommended to have the villagers hold back on tree tiles, and move Alm closer to the middle of the map, as he starts a bit far away. Let the enemies come to the player units, and kill the archer first, though this may prove to be difficult, as more likely than not, they will end their turn on a tree tile, boosting their avoid.
After the archer is killed, and if all the player units are in good condition, push forward and fight the approaching thieves. Any units that are in danger should retreat towards the small fort in the bottom left of the map. It is unlikely that they will be there long enough to restore HP, but if the fight somehow draws on long enough having units healed is useful.
At the very least, Alm should always be in capable condition for this fight due to his stats, so continue to push with Alm and any other units that have not been weakened and kill the rest of the bandits. Due to the number of enemies it is highly recommended to keep player units on the tree tiles.
Echoes: Shadows of Valentia
In Echoes: Shadows of Valentia, you start out only able to attack with Alm, Lukas, and Kliff. On turn 1, move Alm, Tobin, and Faye as far north as possible. Have Lukas injure the Archer from the south, move Kliff one step left, and move Gray up one and right one. On enemy phase, Brigands will attack Alm and Gray while the Archer retreats southwest.
On turn 2, move Alm just below the stairs. This cuts off the northern supplies and forces fleeing enemies to go southwest. Lukas should kill the Archer from the north. Move Gray left one and up two, then move Kliff up one and left one. Finally, have Tobin weaken the Brigand who attacked Gray and have Faye finish him off, both from forests. If Tobin got two kills last battle, he should level up here; he can't get Attack. On enemy phase, Alm, Gray, and Kliff come under attack. Kliff levels up, and needs to gain Speed.
On turn 3, have Alm finish the boss off. Have Gray weaken the Brigand who attacked Kliff from the north and have Kliff finish him from the west. Then have Tobin weaken the Brigand who attacked Gray from the forest and have Faye finish him from the south. She levels up; if she gets Speed, so much the better. Finally, move Lukas up one and right one so that the last enemies can't go too far west. At this point, the battle is won; on turn 4, Kliff, Faye, and Alm can finish the stragglers. If everything went well, Tobin should be ready to promote; Kliff only needs to survive one more battle and Faye only needs one more kill after bonus experience.
Map Turn Count: 4
Game Turn Count: 9
Flavor text
| Game | Text (English) |
Text (Japanese) |
|---|---|---|
| Echoes: Shadows of Valentia | This gloomy wood
has been prowled by brigands recently, making travel along its roads rather risky. |
鬱蒼とした少し暗い森。
近年は盗賊が 多く出没するため 森の中を抜ける街道の 通行には危険が伴う。 |
Trivia
- This is one of the few maps in Fire Emblem Echoes: Shadows of Valentia where the player unit's deployment positions were changed slightly from Gaiden; Alm's starting position was moved closer to his allies.
Etymology and other languages
| Names, etymology, and in other regions | ||
|---|---|---|
| Language | Name | Definition, etymology, and notes |
| English |
Fleecer's Forest Battle |
-- |
| Japanese |
盗賊の森の戦い |
Thieves' forest battle |
| French |
Bataille: Forêt des brigands |
Battle: Brigands' Forest |
| Dutch |
Strijd: Stropersbos |
Battle: Marauder's Forest |
| Korean |
도적의 숲의 전투 |
Bandit forest battle |
Gallery
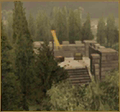
Thumbnail of Fleecer's Forest.

| ← Ram Woods Battle • | Fleecer's Forest Battle | • Storming of Ram Valley → • Thieves' Shrine → |
|---|
| Fire Emblem Echoes: Shadows of Valentia | ||||||||||||||||||||||||||||||||||||||||||||||||||||||||||||||||||||||||||
|---|---|---|---|---|---|---|---|---|---|---|---|---|---|---|---|---|---|---|---|---|---|---|---|---|---|---|---|---|---|---|---|---|---|---|---|---|---|---|---|---|---|---|---|---|---|---|---|---|---|---|---|---|---|---|---|---|---|---|---|---|---|---|---|---|---|---|---|---|---|---|---|---|---|---|
| ||||||||||||||||||||||||||||||||||||||||||||||||||||||||||||||||||||||||||