| Site News |
|---|
| Warning: This wiki contains spoilers. Read at your own risk! Social media: If you would like, please join our Discord server, and/or follow us on Twitter (X) or Tumblr! |
Land of Sorrow (Gaiden)/Fear Mountain Shrine: Difference between revisions
Thecornerman (talk | contribs) m (Text replacement - "\b([Aa])ct (\d+)" to "$1ct $2") |
|||
| (21 intermediate revisions by 5 users not shown) | |||
| Line 5: | Line 5: | ||
|image=[[File:Cm fe02 c4 m04-1 alm.png|200px]] | |image=[[File:Cm fe02 c4 m04-1 alm.png|200px]] | ||
|location=[[Fear Mountain Shrine]] | |location=[[Fear Mountain Shrine]] | ||
|previous=[[Land of Sorrow (Gaiden)/Fear Mountain Battle|Fear Mountain Battle]] | |||
|next=[[Land of Sorrow (Gaiden)/Siege of Nuibaba's Abode|Siege of Nuibaba's Abode]] | |||
}} | }} | ||
| Line 12: | Line 14: | ||
==Map data== | ==Map data== | ||
{{ChapData | {{Tab | ||
|default=2 | |||
|tab1=''Gaiden'' | |||
|tab2=''Echoes: Shadows of Valentia'' | |||
|content1={{ChapData | |||
|victory=Rout the enemy | |victory=Rout the enemy | ||
|defeat=[[Alm]] dies | |defeat=[[Alm]] dies | ||
|ally=10 | |ally=10 | ||
|enemy={{ | |enemy={{h|Varies|The player can avoid fights at their choice, so the number of enemies they face will be different for each playthrough of the dungeon}} | ||
|map=<br>{{Tab | |map=<br>{{Tab | ||
|tab1=First skirmish | |tab1=First skirmish | ||
| Line 22: | Line 28: | ||
|content1=[[File:Cm fe02 c4 m04-1 alm.png|300px]] | |content1=[[File:Cm fe02 c4 m04-1 alm.png|300px]] | ||
|content2=[[File:Cm fe02 c4 m04-2 alm.png|300px]] | |content2=[[File:Cm fe02 c4 m04-2 alm.png|300px]] | ||
}} | |||
}} | |||
|content2={{ChapData | |||
|victory=Rout the enemy | |||
|defeat=[[Alm]] dies | |||
|ally=10 | |||
|enemy={{h|Varies|The player can avoid fights at their choice, so the number of enemies they face will be different for each playthrough of the dungeon}}<br>{{h|5|Duma Idol's trial}}<br>{{h|9|Fixed encounter with Cantor past the Gate of the Living}} | |||
|col=12 | |||
|row=12 | |||
}} | }} | ||
}} | }} | ||
| Line 33: | Line 48: | ||
|content1={{ChapChars | |content1={{ChapChars | ||
|game#=02 | |game#=02 | ||
|return1=alm | |forced1=alm | ||
|return2= | |return1=lukas | ||
|return3= | |return2=gray | ||
|return4= | |return3=tobin | ||
|return5= | |return4=kliff | ||
|return5=silque | |||
|return6=clair | |||
|return7=clive | |||
|return8=forsyth | |||
|return9=python | |||
|return10=luthier | |||
|return11=mathilda | |||
|return12=delthea | |||
}} | |||
|content2={{ChapChars | |||
|game#=15 | |||
|forced1=alm | |||
|return1=lukas | |||
|return2=gray | |||
|return3=tobin | |||
|return4=kliff | |||
|return5=faye | |||
|return6=silque | |return6=silque | ||
|return7=clair | |return7=clair | ||
| Line 46: | Line 78: | ||
|return12=mathilda | |return12=mathilda | ||
|return13=delthea | |return13=delthea | ||
}} | }} | ||
}} | }} | ||
| Line 76: | Line 91: | ||
|item1=Speed Ring | |item1=Speed Ring | ||
|item1image=Ring | |item1image=Ring | ||
|obtain1=Open [[chest]] on the second floor | |obtain1=Open [[chest]] on the second floor<br><small>(must approach chest from the sides as there is a trap directly in front of the chest)</small> | ||
|item2=Blessed Bow | |item2=Blessed Bow | ||
|item2image=Bow | |item2image=Bow | ||
| Line 193: | Line 208: | ||
|res=9 | |res=9 | ||
|mov=4 | |mov=4 | ||
|inventory=--<br>[[Conjure]]{{ | |inventory=--<br>[[Conjure]]{{h|*|Gargoyle variant}} • [[Mire]] | ||
|notes=Does not move. | |notes=Does not move. | ||
|last=y | |last=y | ||
| Line 258: | Line 273: | ||
|res=14 | |res=14 | ||
|mov=4 | |mov=4 | ||
|inventory=--<br>[[ | |inventory=--<br>[[Fire]] | ||
}} | }} | ||
{{ChapUnitCellFE2 | {{ChapUnitCellFE2 | ||
| Line 273: | Line 288: | ||
|res=14 | |res=14 | ||
|mov=4 | |mov=4 | ||
|inventory=--<br>[[ | |inventory=--<br>[[Thunder]] | ||
|last=y | |last=y | ||
}} | }} | ||
| Line 356: | Line 371: | ||
|res=9 | |res=9 | ||
|mov=4 | |mov=4 | ||
|inventory=--<br>[[Conjure]]{{ | |inventory=--<br>[[Conjure]]{{h|*|Revenant variant}} • [[Miasma]] | ||
|notes=Does not move. | |notes=Does not move. | ||
|last=y | |last=y | ||
| Line 384: | Line 399: | ||
The Duma Idol encounter is a fixed encounter that can be fought by interacting with the statue and selecting "Yes". It must be fought in order to progress through the rest of the dungeon, and cannot be re-fought after being defeated. | The Duma Idol encounter is a fixed encounter that can be fought by interacting with the statue and selecting "Yes". It must be fought in order to progress through the rest of the dungeon, and cannot be re-fought after being defeated. | ||
The [[Garuda]] encounter is a rare encounter that only has a 10% chance of appearing after certain requirements have been met. It may appear starting from Act 4. | The [[Garuda]] encounter is a rare encounter that only has a 10% chance of appearing after certain requirements have been met. It may appear starting from Act 4. | ||
{{Tab | {{Tab | ||
|width=100% | |width=100% | ||
| Line 411: | Line 426: | ||
|res=9 | |res=9 | ||
|mov=4 | |mov=4 | ||
|inventory=--<br>{{Item|15|Mire|image=black magic}} • {{Item|15|Conjure|image=white magic}}{{ | |inventory=--<br>{{Item|15|Mire|image=black magic}} • {{Item|15|Conjure|image=white magic}}{{h|*|Gargoyle variant}} • {{Item|15|Incarnation|image=skill class}} | ||
|notes=Does not move. | |notes=Does not move. | ||
|last=y | |last=y | ||
| Line 448: | Line 463: | ||
|res=9 | |res=9 | ||
|mov=4 | |mov=4 | ||
|inventory=--<br>{{Item|15|Mire|image=black magic}} • {{Item|15|Conjure|image=white magic}}{{ | |inventory=--<br>{{Item|15|Mire|image=black magic}} • {{Item|15|Conjure|image=white magic}}{{h|*|Gargoyle variant}} • {{Item|15|Incarnation|image=skill class}} | ||
|notes=Does not move. | |notes=Does not move. | ||
|last=y | |last=y | ||
| Line 589: | Line 604: | ||
{{ChapUnitFtr}} | {{ChapUnitFtr}} | ||
|content7={{ChapUnitHdr|type=Enemy|platform=3ds03}} | |content7={{ChapUnitHdr|type=Enemy|platform=3ds03}} | ||
{{ChapUnitCellFE15 | |||
|name=Specters | |||
|class=Duma's Apostle | |||
|lv=5 | |||
|#=1 | |||
|hp=53 | |||
|atk=20 | |||
|skill=3 | |||
|spd=5 | |||
|lck=1 | |||
|def=16 | |||
|res=10 | |||
|mov=8 | |||
|inventory={{Item|15|Gossamer Hair|type=drop}}<br>{{Item|15|Fangs|image=monster forecast}} • {{Item|15|Nullify Ailments|image=skill personal}} | |||
|notes=Begins moving unprovoked on turn 3, or if it or the [[Sniper]] provoked. | |||
}} | |||
{{ChapUnitCellFE15 | {{ChapUnitCellFE15 | ||
|name=Specters | |name=Specters | ||
| Line 602: | Line 633: | ||
|res=9 | |res=9 | ||
|mov=4 | |mov=4 | ||
|inventory=--<br>{{Item|15|Fire | |inventory=--<br>{{Item|15|Fire|image=black magic}} • {{Item|15|Sagittae|image=black magic}} • {{Item|15|Recover|image=white magic}} • {{Item|15|Discipline|image=skill class}} | ||
|notes=Only moves to attack units in range, or to heal another enemy unit. | |notes=Only moves to attack units in range, or to heal another enemy unit. | ||
}} | }} | ||
| Line 618: | Line 649: | ||
|res=2 | |res=2 | ||
|mov=5 | |mov=5 | ||
|inventory=--<br>{{Item|15|Bow|link=Bow ( | |inventory=--<br>{{Item|15|Bow|link=Bow (Famicom)|image=bow forecast}} • {{Item|15|Bowrange +2|image=skill class}} | ||
|notes=Begins moving unprovoked on turn 3, or if he or the [[Duma's Apostle]] is provoked. | |notes=Begins moving unprovoked on turn 3, or if he or the [[Duma's Apostle]] is provoked. | ||
}} | }} | ||
| Line 634: | Line 665: | ||
|res=1 | |res=1 | ||
|mov=4 | |mov=4 | ||
|inventory=--<br>{{Item|15|Lance|link=Lance ( | |inventory=--<br>{{Item|15|Lance|link=Lance (Famicom)|image=lance forecast}} | ||
|notes=Both begin moving unprovoked on turn 2, or if either is provoked. | |notes=Both begin moving unprovoked on turn 2, or if either is provoked. | ||
|last=y | |||
}} | }} | ||
{{ChapUnitFtr}} | |||
|content8={{ChapUnitHdr|type=Enemy|platform=3ds03}} | |||
{{ChapUnitCellFE15 | {{ChapUnitCellFE15 | ||
|name=Specters | |name=Specters | ||
|class=Duma's Apostle | |class=Duma's Apostle | ||
|lv= | |lv=12 | ||
|#=1 | |#=1 | ||
|hp= | |hp=61 | ||
|atk= | |atk=24 | ||
|skill= | |skill=5 | ||
|spd= | |spd=7 | ||
|lck= | |lck=2 | ||
|def= | |def=20 | ||
|res= | |res=11 | ||
|mov=8 | |mov=8 | ||
|inventory={{Item|15|Gossamer Hair|type=drop}}<br>{{Item|15|Fangs|image=monster forecast}} | |inventory={{Item|15|Gossamer Hair|type=drop}}<br>{{Item|15|Fangs|image=monster forecast}} • {{Item|15|Nullify Ailments|image=skill personal}} | ||
|notes=Begins moving unprovoked on turn 3, or if it or the [[Sniper]] provoked. | |notes=Begins moving unprovoked on turn 3, or if it or the [[Sniper]] provoked. | ||
}} | }} | ||
{{ChapUnitCellFE15 | {{ChapUnitCellFE15 | ||
|name=Specters | |name=Specters | ||
| Line 669: | Line 700: | ||
|res=9 | |res=9 | ||
|mov=4 | |mov=4 | ||
|inventory=--<br>{{Item|15|Fire | |inventory=--<br>{{Item|15|Fire|image=black magic}} • {{Item|15|Sagittae|image=black magic}} • {{Item|15|Recover|image=white magic}} • {{Item|15|Discipline|image=skill class}} | ||
|notes=Only moves to attack units in range, or to heal another enemy unit. | |notes=Only moves to attack units in range, or to heal another enemy unit. | ||
}} | }} | ||
| Line 678: | Line 709: | ||
|#=1 | |#=1 | ||
|hp=41 | |hp=41 | ||
|atk=17{{ | |atk=17{{h|+3|Granted by Steel Bow}} | ||
|skill=11 | |skill=11 | ||
|spd=10{{ | |spd=10{{h|−3|Penalized by Steel Bow}} | ||
|lck=0 | |lck=0 | ||
|def=10 | |def=10 | ||
|res=2 | |res=2 | ||
|mov=5 | |mov=5 | ||
|inventory={{Item|15|Steel Bow}}<br>{{Item|15|Bowrange +2|image=skill class}} • {{Item|15|Anti-Fliers|image=skill bow}}{{ | |inventory={{Item|15|Steel Bow}}<br>{{Item|15|Bowrange +2|image=skill class}} • {{Item|15|Anti-Fliers|image=skill bow}}{{h|*|Granted by Steel Bow}} | ||
|notes=Begins moving unprovoked on turn 3, or if he or the [[Duma's Apostle]] is provoked. | |notes=Begins moving unprovoked on turn 3, or if he or the [[Duma's Apostle]] is provoked. | ||
}} | }} | ||
| Line 694: | Line 725: | ||
|#=2 | |#=2 | ||
|hp=45 | |hp=45 | ||
|atk=24{{ | |atk=24{{h|+4|Granted by Steel Lance}} | ||
|skill=8 | |skill=8 | ||
|spd=5{{ | |spd=5{{h|−1|Penalized by Steel Lance}} | ||
|lck=0 | |lck=0 | ||
|def=20 | |def=20 | ||
| Line 703: | Line 734: | ||
|inventory={{Item|15|Steel Lance}}<br>{{Item|15|Heavy Armor|image=skill class}} | |inventory={{Item|15|Steel Lance}}<br>{{Item|15|Heavy Armor|image=skill class}} | ||
|notes=Both begin moving unprovoked on turn 2, or if either is provoked. | |notes=Both begin moving unprovoked on turn 2, or if either is provoked. | ||
|last=y | |last=y | ||
}} | }} | ||
| Line 821: | Line 836: | ||
=====Gate of the Dead===== | =====Gate of the Dead===== | ||
The [[Titan]] encounter is a rare encounter that only has a 10% chance of appearing after certain requirements have been met. It may appear starting from Act 4. | The [[Titan]] encounter is a rare encounter that only has a 10% chance of appearing after certain requirements have been met. It may appear starting from Act 4. | ||
{{Tab | {{Tab | ||
|width=100% | |width=100% | ||
| Line 873: | Line 888: | ||
|class=Brigand | |class=Brigand | ||
|lv=14 | |lv=14 | ||
| | |#=3 | ||
|hp=42 | |hp=42 | ||
|atk=13 | |atk=13 | ||
| Line 882: | Line 897: | ||
|res=1 | |res=1 | ||
|mov=4 | |mov=4 | ||
|inventory=--<br>{{Item|15|Axe|link=Axe ( | |inventory=--<br>{{Item|15|Axe|link=Axe (Famicom)|image=axe forecast}} | ||
|last=y | |last=y | ||
}} | }} | ||
| Line 893: | Line 908: | ||
|#=1 | |#=1 | ||
|hp=38 | |hp=38 | ||
|atk=16{{ | |atk=16{{h|+4|Granted by Steel Sword}} | ||
|skill=16 | |skill=16 | ||
|spd=19{{ | |spd=19{{h|−1|Penalized by Steel Sword}} | ||
|lck=0 | |lck=0 | ||
|def=10 | |def=10 | ||
| Line 908: | Line 923: | ||
|#=1 | |#=1 | ||
|hp=35 | |hp=35 | ||
|atk=13{{ | |atk=13{{h|+4|Granted by Steel Sword}} | ||
|skill=13 | |skill=13 | ||
|spd=15{{ | |spd=15{{h|−1|Penalized by Steel Sword}} | ||
|lck=0 | |lck=0 | ||
|def=9 | |def=9 | ||
| Line 930: | Line 945: | ||
|res=2 | |res=2 | ||
|mov=4 | |mov=4 | ||
|inventory=--<br>{{Item|15|Axe|link=Axe ( | |inventory=--<br>{{Item|15|Axe|link=Axe (Famicom)|image=axe forecast}} | ||
|last=y | |last=y | ||
}} | }} | ||
| Line 963: | Line 978: | ||
|res=1 | |res=1 | ||
|mov=4 | |mov=4 | ||
|inventory=--<br>{{Item|15|Lance|link=Lance ( | |inventory=--<br>{{Item|15|Lance|link=Lance (Famicom)|image=lance forecast}} | ||
}} | }} | ||
{{ChapUnitCellFE15 | {{ChapUnitCellFE15 | ||
| Line 978: | Line 993: | ||
|res=2 | |res=2 | ||
|mov=7 | |mov=7 | ||
|inventory=--<br>{{Item|15|Lance|link=Lance ( | |inventory=--<br>{{Item|15|Lance|link=Lance (Famicom)|image=lance forecast}} | ||
}} | }} | ||
{{ChapUnitCellFE15 | {{ChapUnitCellFE15 | ||
| Line 993: | Line 1,008: | ||
|res=2 | |res=2 | ||
|mov=5 | |mov=5 | ||
|inventory=--<br>{{Item|15|Bow|link=Bow ( | |inventory=--<br>{{Item|15|Bow|link=Bow (Famicom)|image=bow forecast}} • {{Item|15|Bowrange +2|image=skill class}} | ||
|last=y | |last=y | ||
}} | }} | ||
| Line 1,004: | Line 1,019: | ||
|#=1 | |#=1 | ||
|hp=38 | |hp=38 | ||
|atk=16{{ | |atk=16{{h|+4|Granted by Steel Sword}} | ||
|skill=16 | |skill=16 | ||
|spd=19{{ | |spd=19{{h|−1|Penalized by Steel Sword}} | ||
|lck=0 | |lck=0 | ||
|def=10 | |def=10 | ||
| Line 1,019: | Line 1,034: | ||
|#=2 | |#=2 | ||
|hp=42 | |hp=42 | ||
|atk=20{{ | |atk=20{{h|+4|Granted by Steel Lance}} | ||
|skill=6 | |skill=6 | ||
|spd=5{{ | |spd=5{{h|−1|Penalized by Steel Lance}} | ||
|lck=0 | |lck=0 | ||
|def=16 | |def=16 | ||
| Line 1,034: | Line 1,049: | ||
|#=1 | |#=1 | ||
|hp=30 | |hp=30 | ||
|atk=13{{ | |atk=13{{h|+4|Granted by Steel Lance}} | ||
|skill=6 | |skill=6 | ||
|spd=9{{ | |spd=9{{h|−1|Penalized by Steel Lance}} | ||
|lck=0 | |lck=0 | ||
|def=9 | |def=9 | ||
| Line 1,049: | Line 1,064: | ||
|#=1 | |#=1 | ||
|hp=35 | |hp=35 | ||
|atk=14{{ | |atk=14{{h|+3|Granted by Steel Bow}} | ||
|skill=8 | |skill=8 | ||
|spd=8{{ | |spd=8{{h|−3|Penalized by Steel Bow}} | ||
|lck=0 | |lck=0 | ||
|def=8 | |def=8 | ||
|res=2 | |res=2 | ||
|mov=5 | |mov=5 | ||
|inventory={{Item|15|Steel Bow}}<br>{{Item|15|Bowrange +2|image=skill class}} • {{Item|15|Anti-Fliers|image=skill bow}}{{ | |inventory={{Item|15|Steel Bow}}<br>{{Item|15|Bowrange +2|image=skill class}} • {{Item|15|Anti-Fliers|image=skill bow}}{{h|*|Granted by Steel Bow}} | ||
|last=y | |last=y | ||
}} | }} | ||
| Line 1,191: | Line 1,206: | ||
|res=14 | |res=14 | ||
|mov=4 | |mov=4 | ||
|inventory=--<br>{{Item|15|Thunder | |inventory=--<br>{{Item|15|Thunder|image=black magic}} • {{Item|15|Teleportation|image=skill personal}} | ||
}} | }} | ||
{{ChapUnitCellFE15 | {{ChapUnitCellFE15 | ||
| Line 1,206: | Line 1,221: | ||
|res=14 | |res=14 | ||
|mov=4 | |mov=4 | ||
|inventory=--<br>{{Item|15|Fire | |inventory=--<br>{{Item|15|Fire|image=black magic}} • {{Item|15|Teleportation|image=skill personal}} | ||
|last=y | |last=y | ||
}} | }} | ||
| Line 1,224: | Line 1,239: | ||
|res=14 | |res=14 | ||
|mov=4 | |mov=4 | ||
|inventory=--<br>{{Item|15|Thunder | |inventory=--<br>{{Item|15|Thunder|image=black magic}} • {{Item|15|Teleportation|image=skill personal}} | ||
}} | }} | ||
{{ChapUnitCellFE15 | {{ChapUnitCellFE15 | ||
| Line 1,239: | Line 1,254: | ||
|res=14 | |res=14 | ||
|mov=4 | |mov=4 | ||
|inventory=--<br>{{Item|15|Fire | |inventory=--<br>{{Item|15|Fire|image=black magic}} • {{Item|15|Teleportation|image=skill personal}} | ||
|last=y | |last=y | ||
}} | }} | ||
| Line 1,272: | Line 1,287: | ||
|res=14 | |res=14 | ||
|mov=4 | |mov=4 | ||
|inventory=--<br>{{Item|15|Thunder | |inventory=--<br>{{Item|15|Thunder|image=black magic}} • {{Item|15|Teleportation|image=skill personal}} | ||
}} | }} | ||
{{ChapUnitCellFE15 | {{ChapUnitCellFE15 | ||
| Line 1,287: | Line 1,302: | ||
|res=14 | |res=14 | ||
|mov=4 | |mov=4 | ||
|inventory=--<br>{{Item|15|Fire | |inventory=--<br>{{Item|15|Fire|image=black magic}} • {{Item|15|Teleportation|image=skill personal}} | ||
|last=y | |last=y | ||
}} | }} | ||
| Line 1,320: | Line 1,335: | ||
|res=14 | |res=14 | ||
|mov=4 | |mov=4 | ||
|inventory=--<br>{{Item|15|Thunder | |inventory=--<br>{{Item|15|Thunder|image=black magic}} • {{Item|15|Teleportation|image=skill personal}} | ||
}} | }} | ||
{{ChapUnitCellFE15 | {{ChapUnitCellFE15 | ||
| Line 1,335: | Line 1,350: | ||
|res=14 | |res=14 | ||
|mov=4 | |mov=4 | ||
|inventory=--<br>{{Item|15|Fire | |inventory=--<br>{{Item|15|Fire|image=black magic}} • {{Item|15|Teleportation|image=skill personal}} | ||
|last=y | |last=y | ||
}} | }} | ||
| Line 1,353: | Line 1,368: | ||
|res=8 | |res=8 | ||
|mov=6 | |mov=6 | ||
|inventory={{Item|15|Silver Purse|type=drop}}<br>{{Item|15|Axe|link=Axe ( | |inventory={{Item|15|Silver Purse|type=drop}}<br>{{Item|15|Axe|link=Axe (Famicom)|image=axe forecast}} | ||
}} | }} | ||
{{ChapUnitCellFE15 | {{ChapUnitCellFE15 | ||
| Line 1,386: | Line 1,401: | ||
|res=8 | |res=8 | ||
|mov=6 | |mov=6 | ||
|inventory={{Item|15|Silver Purse|type=drop}}<br>{{Item|15|Axe|link=Axe ( | |inventory={{Item|15|Silver Purse|type=drop}}<br>{{Item|15|Axe|link=Axe (Famicom)|image=axe forecast}} | ||
}} | }} | ||
{{ChapUnitCellFE15 | {{ChapUnitCellFE15 | ||
| Line 1,429: | Line 1,444: | ||
|atk=20 | |atk=20 | ||
|skill=8 | |skill=8 | ||
|spd=7{{ | |spd=7{{h|−2|Penalized by Steel Shield}} | ||
|lck=0 | |lck=0 | ||
|def=14{{ | |def=14{{h|+5|Granted by Steel Shield}} | ||
|res=4 | |res=4 | ||
|mov=5 | |mov=5 | ||
| Line 1,462: | Line 1,477: | ||
|atk=23 | |atk=23 | ||
|skill=11 | |skill=11 | ||
|spd=9{{ | |spd=9{{h|−2|Penalized by Steel Shield}} | ||
|lck=0 | |lck=0 | ||
|def=16{{ | |def=16{{h|+5|Granted by Steel Shield}} | ||
|res=4 | |res=4 | ||
|mov=5 | |mov=5 | ||
| Line 1,493: | Line 1,508: | ||
|#=1 | |#=1 | ||
|hp=47 | |hp=47 | ||
|atk=20{{ | |atk=20{{h|+4|Granted by Steel Sword}} | ||
|skill=9 | |skill=9 | ||
|spd=7{{ | |spd=7{{h|−1|Penalized by Steel Sword}} | ||
|lck=0 | |lck=0 | ||
|def=14 | |def=14 | ||
| Line 1,526: | Line 1,541: | ||
|#=1 | |#=1 | ||
|hp=52 | |hp=52 | ||
|atk=24{{ | |atk=24{{h|+4|Granted by Steel Sword}} | ||
|skill=11 | |skill=11 | ||
|spd=9{{ | |spd=9{{h|−1|Penalized by Steel Sword}} | ||
|lck=0 | |lck=0 | ||
|def=16 | |def=16 | ||
| Line 1,541: | Line 1,556: | ||
|#=3 | |#=3 | ||
|hp=49 | |hp=49 | ||
|atk=21{{ | |atk=21{{h|+2|Granted by Iron Sword}} | ||
|skill=10 | |skill=10 | ||
|spd=8 | |spd=8 | ||
| Line 1,785: | Line 1,800: | ||
The [[Cantor]] encounter is a fixed encounter which must be fought in order to reach the chest containing the [[Hexlock Shield]]. | The [[Cantor]] encounter is a fixed encounter which must be fought in order to reach the chest containing the [[Hexlock Shield]]. | ||
The [[Fafnir (class)|Fafnir]] encounter is a rare encounter that only has a 10% chance of appearing after certain requirements have been met. It may appear starting from Act 4. | The [[Fafnir (class)|Fafnir]] encounter is a rare encounter that only has a 10% chance of appearing after certain requirements have been met. It may appear starting from Act 4. | ||
{{Tab | {{Tab | ||
|width=100% | |width=100% | ||
| Line 1,869: | Line 1,884: | ||
|#=1 | |#=1 | ||
|hp=49 | |hp=49 | ||
|atk=21{{ | |atk=21{{h|+13|Granted by Shadow Sword}} | ||
|skill=10 | |skill=10 | ||
|spd=8{{ | |spd=8{{h|−5|Penalized by Shadow Sword}} | ||
|lck=0 | |lck=0 | ||
|def=15 | |def=15 | ||
|res=4 | |res=4 | ||
|mov=5 | |mov=5 | ||
|inventory={{Item|15|Shadow Sword}}<br>{{Item|15|Bone Sword|image=monster forecast}} • {{Item|15|Lifetaker|image=skill sword}}{{ | |inventory={{Item|15|Shadow Sword}}<br>{{Item|15|Bone Sword|image=monster forecast}} • {{Item|15|Lifetaker|image=skill sword}}{{h|*|Granted by Shadow Sword}} • {{Item|15|Hex|image=skill sword}}{{h|*|Granted by Shadow Sword}} | ||
|last=y | |last=y | ||
}} | }} | ||
| Line 1,917: | Line 1,932: | ||
|#=2 | |#=2 | ||
|hp=52 | |hp=52 | ||
|atk=24{{ | |atk=24{{h|+13|Granted by Shadow Sword}} | ||
|skill=12 | |skill=12 | ||
|spd=9{{ | |spd=9{{h|−5|Penalized by Shadow Sword}} | ||
|lck=0 | |lck=0 | ||
|def=16 | |def=16 | ||
|res=4 | |res=4 | ||
|mov=5 | |mov=5 | ||
|inventory={{Item|15|Shadow Sword}}<br>{{Item|15|Bone Sword|image=monster forecast}} • {{Item|15|Lifetaker|image=skill sword}}{{ | |inventory={{Item|15|Shadow Sword}}<br>{{Item|15|Bone Sword|image=monster forecast}} • {{Item|15|Lifetaker|image=skill sword}}{{h|*|Granted by Shadow Sword}} • {{Item|15|Hex|image=skill sword}}{{h|*|Granted by Shadow Sword}} | ||
|last=y | |last=y | ||
}} | }} | ||
| Line 1,942: | Line 1,957: | ||
|res=9 | |res=9 | ||
|mov=4 | |mov=4 | ||
|inventory=--<br>{{Item|15|Mire|image=black magic}} • {{Item|15|Conjure|image=white magic}}{{ | |inventory=--<br>{{Item|15|Mire|image=black magic}} • {{Item|15|Conjure|image=white magic}}{{h|*|Gargoyle variant}} • {{Item|15|Incarnation|image=skill class}} | ||
|notes=Does not move. | |notes=Does not move. | ||
}} | }} | ||
| Line 1,958: | Line 1,973: | ||
|res=14 | |res=14 | ||
|mov=4 | |mov=4 | ||
|inventory=--<br>{{Item|15|Fire | |inventory=--<br>{{Item|15|Fire|image=black magic}} • {{Item|15|Teleportation|image=skill personal}} | ||
}} | }} | ||
{{ChapUnitCellFE15 | {{ChapUnitCellFE15 | ||
| Line 1,988: | Line 2,003: | ||
|res=1 | |res=1 | ||
|mov=4 | |mov=4 | ||
|inventory=--<br>{{Item|15|Lance|link=Lance ( | |inventory=--<br>{{Item|15|Lance|link=Lance (Famicom)|image=lance forecast}} | ||
}} | }} | ||
{{ChapUnitCellFE15 | {{ChapUnitCellFE15 | ||
| Line 2,069: | Line 2,084: | ||
|res=9 | |res=9 | ||
|mov=4 | |mov=4 | ||
|inventory=--<br>{{Item|15|Mire|image=black magic}} • {{Item|15|Conjure|image=white magic}}{{ | |inventory=--<br>{{Item|15|Mire|image=black magic}} • {{Item|15|Conjure|image=white magic}}{{h|*|Gargoyle variant}} • {{Item|15|Incarnation|image=skill class}} | ||
|notes=Does not move. | |notes=Does not move. | ||
}} | }} | ||
| Line 2,085: | Line 2,100: | ||
|res=14 | |res=14 | ||
|mov=4 | |mov=4 | ||
|inventory=--<br>{{Item|15|Fire | |inventory=--<br>{{Item|15|Fire|image=black magic}} • {{Item|15|Teleportation|image=skill personal}} | ||
}} | }} | ||
{{ChapUnitCellFE15 | {{ChapUnitCellFE15 | ||
| Line 2,098: | Line 2,113: | ||
|lck=0 | |lck=0 | ||
|def=12 | |def=12 | ||
|res=6{{ | |res=6{{h|+5|Granted by Resistance +5}} | ||
|mov=7 | |mov=7 | ||
|inventory=--<br>{{Item|15|Sword|link=Sword (Gaiden)|image=sword forecast}} • {{Item|15|Resistance +5|image=skill class}} • {{Item|15|Apotrope|image=skill class}} | |inventory=--<br>{{Item|15|Sword|link=Sword (Gaiden)|image=sword forecast}} • {{Item|15|Resistance +5|image=skill class}} • {{Item|15|Apotrope|image=skill class}} | ||
| Line 2,115: | Line 2,130: | ||
|res=7 | |res=7 | ||
|mov=4 | |mov=4 | ||
|inventory=--<br>{{Item|15|Lance|link=Lance ( | |inventory=--<br>{{Item|15|Lance|link=Lance (Famicom)|image=lance forecast}} • {{Item|15|Heavy Armor|image=skill class}} | ||
}} | }} | ||
{{ChapUnitCellFE15 | {{ChapUnitCellFE15 | ||
| Line 2,285: | Line 2,300: | ||
==Strategy== | ==Strategy== | ||
{{ | {{strategy}} | ||
More stealth action. The fights with Duma's Apostle and the Cantor are pretty straightforward. You are made to choose between a Silver Shield and a Blessed Shield. The Blessed Shield is better because the Silver Shield is surpassed in brute durability by the Dracoshield while the Blessed Shield has unique utility in its halving damage against Terrors. The Blessed Shield also sells for five more silver marks if you don't like shields. In addition, you find a Blessed Bow in this dungeon. This will come in great handy during the three battle gauntlet leading up to the final boss. | |||
Map Turn Count: 4<br>Game Turn Count: 216 (Duma's Apostle) | |||
Map Turn Count: 3<br>Game Turn Count: 219 (Cantor) | |||
==Flavor text== | |||
{{DescriptionHdr}} | |||
{{DescriptionCell | |||
|game={{title|Echoes: Shadows of Valentia}} | |||
|english=An enigmatic shrine<br>built atop Fear<br>Mountain. It appears<br>to go quite deep,<br>and its halls are<br>rumored to hide<br>wondrous treasures. | |||
|japanese=恐山に造られた<br>謎の多いほこら。<br>かなり深いところまで<br>続いているらしく、<br>数多くの宝が眠って<br>いると言われる。 | |||
}} | |||
{{DescriptionFtr}} | |||
<!-- | <!-- | ||
==Trivia== | ==Trivia== | ||
--> | --> | ||
==Etymology and other languages== | ==Etymology and other languages== | ||
{{Names | {{Names | ||
|eng-name=Fear Mountain Shrine | |eng-name=Fear Mountain Shrine | ||
|eng-fan-name=Fear Shrine | |eng-fan-name=Fear Shrine | ||
|eng-fan-mean=Used in the ''Gaiden'' [[fan translation]], presumably due to space restrictions. | |eng-fan-mean=Used in the ''Gaiden'' [[fan translation]], presumably due to space restrictions. | ||
| | |jpn-name={{h|恐山のほこら|Osorezan no hokora}} | ||
| | |jpn-mean=Fear Mountain Shrine; rendered as {{lang|ja|おそれざんのほこら}} in ''Gaiden''. | ||
|span-name=Santuario del Terror | |span-name=Santuario del Terror | ||
|span-mean=Sanctuary of the Terror | |span-mean=Sanctuary of the Terror | ||
| Line 2,307: | Line 2,336: | ||
|dut-name=Angstbergkapel | |dut-name=Angstbergkapel | ||
|dut-mean=Fear mountain chapel | |dut-mean=Fear mountain chapel | ||
|ch-simp-name={{ | |ch-simp-name={{h|恐山祠堂|Kǒngshān cítáng}} | ||
|ch-simp-mean=Fear mountain | |ch-simp-mean=Fear mountain ancestral shrine | ||
|ch-trad-name={{ | |ch-trad-name={{h|恐山祠堂|Kǒngshān cítáng}} | ||
|ch-trad-mean=Fear mountain | |ch-trad-mean=Fear mountain ancestral shrine | ||
}} | }} | ||
Latest revision as of 21:48, 28 March 2024
- For additional information on the location, see Fear Mountain Shrine.
| ||||||
|

| “ | I can feel an uncomfortably warm breeze pushing back at me, attended by a low rumbling. The voices of the dead, perhaps, calling from the land beyond, hungry again for life. Valentia knows no deeper pit than this, the guts of Fear Mountain. | ” | — Alm |
|---|
Fear Mountain Shrine (Japanese: 恐山のほこら Fear Mountain Shrine) is the fourth map of the fourth act of Alm's route in Fire Emblem Gaiden and Fire Emblem Echoes: Shadows of Valentia.
Map data
Gaiden Echoes: Shadows of Valentia

| ||||||
|
| |||||
| Victory: Rout the enemy | Player | Enemy | ||||
|---|---|---|---|---|---|---|
| Defeat: Alm dies | 10 | Varies 5 9 |
||||
| Map dimensions: 12 columns by 12 rows | ||||||
Character data
Gaiden Echoes: Shadows of Valentia
| Characters | |
|---|---|
New units
| |
| |
Required characters
| |

| |
Available characters
| |
            
|
Item data
Gaiden Echoes: Shadows of Valentia
| ||||||||||||||||||||||||||||||||||||
|
Sacred spring data
| Sacred spring stats | |||
|---|---|---|---|
| Location | Uses | Left lion | Right lion |
| Mila shrine left exit | 3 | Speed | Luck |
| At the end of the Gate of the Dead | 3 | Revival | |
Enemy data
Gaiden
Skirmish #1 Skirmish #2 Skirmish #3 Skirmish #4 Skirmish #5 Skirmish #6
| |||||||||||||||||||||||||||||||||||||||||||||||||||||||||||||||||||||||||||||||||||||||||
| |||||||||||||||||||||||||||||||||||||||||||||||||||||||||||||||||||||||||||||||||||||||||
| |||||||||||||||||||||||||||||||||||||||||||||||||||||||||||||||||||||||||||||||||||||||||
| |||||||||||||||||||||||||||||||||||||||||||||||||||||||||||||||||||||||||||||||||||||||||
Echoes: Shadows of Valentia
Entrance
The Duma Idol encounter is a fixed encounter that can be fought by interacting with the statue and selecting "Yes". It must be fought in order to progress through the rest of the dungeon, and cannot be re-fought after being defeated.
The Garuda encounter is a rare encounter that only has a 10% chance of appearing after certain requirements have been met. It may appear starting from Act 4.
Cantor, Normal Cantor, Hard Arcanist #1, Normal Arcanist #1, Hard Arcanist #2, Normal Arcanist #2, Hard Duma Idol, Normal Duma Idol, Hard Garuda, Normal Garuda, Hard
| |||||||||||||||||||||||||||||||||||||||
| |||||||||||||||||||||||||||||||||||||||
| |||||||||||||||||||||||||||||||||||||||
| |||||||||||||||||||||||||||||||||||||||
Gate of the Dead
The Titan encounter is a rare encounter that only has a 10% chance of appearing after certain requirements have been met. It may appear starting from Act 4.
Myrmidon #1, Normal Myrmidon #1, Hard Myrmidon #2, Normal Myrmidon #2, Hard Arcanist #1, Normal Arcanist #1, Hard Arcanist #2, Normal Arcanist #2, Hard Witch #1, Normal Witch #1, Hard Witch #2, Normal Witch #2, Hard Titan, Normal Titan, Hard
Gate of the Living, Area 1
Bonewalker #1, Normal Bonewalker #1, Hard Bonewalker #2, Normal Bonewalker #2, Hard Revenant #1, Normal Revenant #1, Hard Revenant #2, Normal Revenant #2, Hard Entombed, Normal Entombed, Hard
| ||||||||||||||||||||||||||||||||||||||||||||||||||||||||||||||||
| ||||||||||||||||||||||||||||||||||||||||||||||||||||||||||||||||
Gate of the Living, Area 2
The Cantor encounter is a fixed encounter which must be fought in order to reach the chest containing the Hexlock Shield.
The Fafnir encounter is a rare encounter that only has a 10% chance of appearing after certain requirements have been met. It may appear starting from Act 4.
Gargoyle, Normal Gargoyle, Hard Entombed, Normal Entombed, Hard Cantor, Normal Cantor, Hard Fafnir, Normal Fafnir, Hard
Strategy
| This section details unofficial strategies that may help with completion of the chapter. This may not work for everybody. |
More stealth action. The fights with Duma's Apostle and the Cantor are pretty straightforward. You are made to choose between a Silver Shield and a Blessed Shield. The Blessed Shield is better because the Silver Shield is surpassed in brute durability by the Dracoshield while the Blessed Shield has unique utility in its halving damage against Terrors. The Blessed Shield also sells for five more silver marks if you don't like shields. In addition, you find a Blessed Bow in this dungeon. This will come in great handy during the three battle gauntlet leading up to the final boss.
Map Turn Count: 4
Game Turn Count: 216 (Duma's Apostle)
Map Turn Count: 3
Game Turn Count: 219 (Cantor)
Flavor text
| Game | Text (English) |
Text (Japanese) |
|---|---|---|
| Echoes: Shadows of Valentia | An enigmatic shrine
built atop Fear Mountain. It appears to go quite deep, and its halls are rumored to hide wondrous treasures. |
恐山に造られた
謎の多いほこら。 かなり深いところまで 続いているらしく、 数多くの宝が眠って いると言われる。 |
Etymology and other languages
| Names, etymology, and in other regions | ||
|---|---|---|
| Language | Name | Definition, etymology, and notes |
| English |
Fear Mountain Shrine |
-- |
| English (unofficial) |
Fear Shrine |
Used in the Gaiden fan translation, presumably due to space restrictions. |
| Japanese |
恐山のほこら |
Fear Mountain Shrine; rendered as おそれざんのほこら in Gaiden. |
| Spanish |
Santuario del Terror |
Sanctuary of the Terror |
| French |
Sanctuaire montagne peur |
Fear Mountain Shrine. Abbreviated to Sanct. mont. peur in gameplay due to space restrictions. |
| German |
Bergschrein |
Mountain Shrine |
| Italian |
Tempio del M. Paura |
Temple of Mt. Fear |
| Dutch |
Angstbergkapel |
Fear mountain chapel |
| Simplified Chinese |
恐山祠堂 |
Fear mountain ancestral shrine |
| Traditional Chinese |
恐山祠堂 |
Fear mountain ancestral shrine |
Gallery

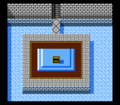
The first floor of Fear Mountain Shrine in Gaiden.

The second floor of Fear Mountain Shrine in Gaiden.

The third floor of Fear Mountain Shrine in Gaiden.
The fourth floor of Fear Mountain Shrine in Gaiden.


| ← Fear Mountain Battle • | Fear Mountain Shrine | • Siege of Nuibaba's Abode → |
|---|
| Fire Emblem Echoes: Shadows of Valentia | ||||||||||||||||||||||||||||||||||||||||||||||||||||||||||||||||||||||||||
|---|---|---|---|---|---|---|---|---|---|---|---|---|---|---|---|---|---|---|---|---|---|---|---|---|---|---|---|---|---|---|---|---|---|---|---|---|---|---|---|---|---|---|---|---|---|---|---|---|---|---|---|---|---|---|---|---|---|---|---|---|---|---|---|---|---|---|---|---|---|---|---|---|---|---|
| ||||||||||||||||||||||||||||||||||||||||||||||||||||||||||||||||||||||||||