| Site News |
|---|
| Warning: This wiki contains spoilers. Read at your own risk! Social media: If you would like, please join our Discord server, and/or follow us on Twitter (X) or Tumblr! |
Land of Sorrow (Gaiden)/Dead Man's Mire Battle: Difference between revisions
m (Text replacement - "|return14=deen" to "|return14=deen |return14article=Deen (Gaiden)") |
Thecornerman (talk | contribs) m (Text replacement - "\b([Aa])ct (\d+)" to "$1ct $2") |
||
| (10 intermediate revisions by 5 users not shown) | |||
| Line 9: | Line 9: | ||
}} | }} | ||
'''Dead Man's Mire Battle''' is the first map of the fourth act of [[Celica]]'s route in {{FE2}} and {{FE15}}. | '''Dead Man's Mire Battle''' (Japanese: {{hl|死人の沼の戦い|Shinin no numa no tatakai}} ''Dead Man's Swamp Battle'') is the first map of the fourth act of [[Celica]]'s route in {{FE2}} and {{FE15}}. | ||
==Map data== | ==Map data== | ||
{{ChapData | {{Tab | ||
|default=2 | |||
|tab1=''Gaiden'' | |||
|tab2=''Echoes: Shadows of Valentia'' | |||
|content1={{ChapData | |||
|victory=Rout the enemy | |victory=Rout the enemy | ||
|defeat=[[Celica]] dies | |defeat=[[Celica]] dies | ||
|ally=15 | |ally=15 | ||
|enemy=10{{ | |enemy=10{{h|+reinforcements|number may vary}} | ||
|map=[[File:Cm fe02 c4 m01 celica.png|200px]] | |map=[[File:Cm fe02 c4 m01 celica.png|200px]] | ||
|col=22 | |||
|row=20 | |||
}} | |||
|content2={{ChapData | |||
|victory=Rout the enemy | |||
|defeat=[[Celica]] dies | |||
|ally=1–15 | |||
|enemy=10{{h|+reinforcements|number may vary}} | |||
|col=22 | |||
|row=20 | |||
}} | |||
}} | }} | ||
| Line 28: | Line 43: | ||
|content1={{ChapChars | |content1={{ChapChars | ||
|game#=02 | |game#=02 | ||
| | |forced1=celica 02 | ||
| | |forced1article=Celica | ||
| | |return1=mae | ||
| | |return2=boey | ||
| | |return3=genny | ||
| | |return4=saber | ||
| | |return5=valbar | ||
| | |return6=kamui | ||
| | |return7=leon | ||
| | |return8=palla | ||
| | |return9=catria | ||
| | |return10=atlas | ||
| | |return11=jesse | ||
| | |return12=sonya | ||
| | |return13=deen | ||
| | |return13article=Deen (Gaiden) | ||
| | |return14=est | ||
| | |return15=nomah | ||
}} | }} | ||
|content2={{ChapChars | |content2={{ChapChars | ||
|game#=15 | |game#=15 | ||
| | |forced1=celica 02 | ||
| | |forced1article=celica | ||
| | |return1=mae | ||
| | |return2=boey | ||
| | |return3=genny | ||
| | |return4=saber | ||
| | |return5=valbar | ||
| | |return6=kamui | ||
| | |return7=leon | ||
| | |return8=palla | ||
| | |return9=catria | ||
| | |return10=atlas | ||
| | |return11=jesse | ||
| | |return12=sonya | ||
| | |return13=deen | ||
| | |return13article=Deen (Gaiden) | ||
| | |return14=est | ||
| | |return15=nomah | ||
}} | }} | ||
}} | }} | ||
| Line 87: | Line 102: | ||
|tab3=''Echoes: Shadows of Valentia'' Hard | |tab3=''Echoes: Shadows of Valentia'' Hard | ||
|content1={{ChapUnitHdr|type=Enemy|platform=nes02}} | |content1={{ChapUnitHdr|type=Enemy|platform=nes02}} | ||
{{ChapUnitCellFE2 | |||
|name=[[Garcia (Gaiden)|Garcia]] | |||
|class=Cantor | |||
|lv=5 | |||
|#=1 | |||
|hp=38 | |||
|str=14 | |||
|skill=10 | |||
|spd=9 | |||
|lck=0 | |||
|def=8 | |||
|res=9 | |||
|mov=4 | |||
|inventory=--<br>[[Conjure]]{{h|*|Gargoyle variant}} • [[Mire]] | |||
|notes=Moves to the nearest avoid-boosting terrain; does not move when casting Conjure. | |||
}} | |||
{{ChapUnitCellFE2 | {{ChapUnitCellFE2 | ||
|name=Cantor | |name=Cantor | ||
| Line 100: | Line 131: | ||
|res=9 | |res=9 | ||
|mov=4 | |mov=4 | ||
|inventory=--<br>[[Conjure]]{{ | |inventory=--<br>[[Conjure]]{{h|*|Bonewalker variant}} • [[Miasma]] | ||
|notes=Moves to the nearest avoid-boosting terrain; does not move when casting Conjure. | |notes=Moves to the nearest avoid-boosting terrain; does not move when casting Conjure. | ||
}} | }} | ||
| Line 116: | Line 147: | ||
|res=9 | |res=9 | ||
|mov=4 | |mov=4 | ||
|inventory=--<br>[[Conjure]]{{ | |inventory=--<br>[[Conjure]]{{h|*|Revenant variant}} • [[Miasma]] | ||
|notes=Moves to the nearest avoid-boosting terrain; does not move when casting Conjure. | |notes=Moves to the nearest avoid-boosting terrain; does not move when casting Conjure. | ||
}} | }} | ||
| Line 164: | Line 195: | ||
|inventory=--<br>[[Recover]] • [[Miasma]] | |inventory=--<br>[[Recover]] • [[Miasma]] | ||
|notes=Moves to attack units in range; moves to the nearest avoid-boosting terrain otherwise. | |notes=Moves to attack units in range; moves to the nearest avoid-boosting terrain otherwise. | ||
|last=y | |||
}} | }} | ||
{{ChapUnitReinf|type=Enemy|platform=nes02}} | |||
{{ChapUnitCellFE2 | {{ChapUnitCellFE2 | ||
|name= | |name=Gargoyle | ||
|class= | |class=Gargoyle | ||
|lv= | |lv=1 | ||
|#= | |#=Varies | ||
|hp= | |hp=26 | ||
|str= | |str=8 | ||
|skill= | |skill=3 | ||
|spd=9 | |spd=9 | ||
|lck=0 | |lck=0 | ||
|def= | |def=7 | ||
|res= | |res=7 | ||
|mov= | |mov=7 | ||
| | |notes=Conjured by [[Garcia (Gaiden)|Garcia]]. | ||
}} | }} | ||
{{ChapUnitCellFE2 | {{ChapUnitCellFE2 | ||
|name=Bonewalker | |name=Bonewalker | ||
| Line 196: | Line 226: | ||
|res=3 | |res=3 | ||
|mov=5 | |mov=5 | ||
|notes=Conjured by the level 3 Cantor. | |notes=Conjured by the level 3 Cantor. | ||
}} | }} | ||
{{ChapUnitCellFE2 | {{ChapUnitCellFE2 | ||
| Line 211: | Line 241: | ||
|res=0 | |res=0 | ||
|mov=4 | |mov=4 | ||
|notes=Conjured by the level 1 Cantor. | |notes=Conjured by the level 1 Cantor. | ||
|last=y | |||
}} | }} | ||
{{ | {{ChapUnitFtr}} | ||
|name= | |content2={{ChapUnitHdr|type=Enemy|platform=3ds03}} | ||
|class= | {{ChapUnitCellFE15 | ||
|lv= | |name=[[Garcia (Gaiden)|Garcia]] | ||
|#= | |class=Cantor | ||
|hp= | |lv=5 | ||
| | |#=1 | ||
|skill= | |hp=36 | ||
|atk=14 | |||
|skill=10 | |||
|spd=9 | |spd=9 | ||
|lck=0 | |lck=0 | ||
|def= | |def=8 | ||
|res= | |res=9 | ||
|mov= | |mov=4 | ||
| | |inventory={{Item|15|Gold Mark|type=drop}}<br>{{Item|15|Mire|image=black magic}} • {{Item|15|Conjure|image=white magic}}{{h|*|Gargoyle variant}} • {{Item|15|Incarnation|image=skill class}} | ||
| | |notes=Does not move. | ||
}} | }} | ||
{{ChapUnitCellFE15 | {{ChapUnitCellFE15 | ||
|name=Duma Faithful | |name=Duma Faithful | ||
| Line 244: | Line 275: | ||
|res=9 | |res=9 | ||
|mov=4 | |mov=4 | ||
|inventory=--<br>{{Item|15|Miasma|image=black magic}} • {{Item|15|Conjure|image=white magic}}{{ | |inventory=--<br>{{Item|15|Miasma|image=black magic}} • {{Item|15|Conjure|image=white magic}}{{h|*|Bonewalker variant}} • {{Item|15|Incarnation|image=skill class}} | ||
|notes=Does not move. | |notes=Does not move. | ||
}} | }} | ||
| Line 260: | Line 291: | ||
|res=9 | |res=9 | ||
|mov=4 | |mov=4 | ||
|inventory=--<br>{{Item|15|Miasma|image=black magic}} • {{Item|15|Conjure|image=white magic}}{{ | |inventory=--<br>{{Item|15|Miasma|image=black magic}} • {{Item|15|Conjure|image=white magic}}{{h|*|Revenant variant}} • {{Item|15|Incarnation|image=skill class}} | ||
|notes=Does not move. | |notes=Does not move. | ||
}} | }} | ||
| Line 274: | Line 305: | ||
|lck=0 | |lck=0 | ||
|def=11 | |def=11 | ||
|res=6{{ | |res=6{{h|+5|Granted by Resistance +5}} | ||
|mov=7 | |mov=7 | ||
|inventory=--<br>{{Item|15|Sword|link=Sword (Gaiden)|image=sword forecast}} • {{Item|15|Resistance +5|image=skill class}} • {{Item|15|Apotrope|image=skill class}} | |inventory=--<br>{{Item|15|Sword|link=Sword (Gaiden)|image=sword forecast}} • {{Item|15|Resistance +5|image=skill class}} • {{Item|15|Apotrope|image=skill class}} | ||
| Line 292: | Line 323: | ||
|res=2 | |res=2 | ||
|mov=5 | |mov=5 | ||
|inventory=--<br>{{Item|15|Bow|link=Bow ( | |inventory=--<br>{{Item|15|Bow|link=Bow (Famicom)|image=bow forecast}} • {{Item|15|Bowrange +2|image=skill class}} | ||
|notes=Only moves to attack units in range. | |notes=Only moves to attack units in range. | ||
}} | }} | ||
| Line 326: | Line 357: | ||
|inventory=--<br>{{Item|15|Miasma|image=black magic}} • {{Item|15|Recover|image=white magic}} | |inventory=--<br>{{Item|15|Miasma|image=black magic}} • {{Item|15|Recover|image=white magic}} | ||
|notes=Only moves to attack units in range, or to heal another enemy unit. | |notes=Only moves to attack units in range, or to heal another enemy unit. | ||
|last=y | |||
}} | }} | ||
{{ChapUnitReinf|type=Enemy|platform=3ds03}} | |||
{{ChapUnitCellFE15 | {{ChapUnitCellFE15 | ||
|name= | |name=Duma Faithful | ||
|class= | |class=Gargoyle | ||
|lv= | |lv=1 | ||
|#= | |#=Varies | ||
|hp= | |hp=26 | ||
|atk= | |atk=8 | ||
|skill= | |skill=3 | ||
|spd=9 | |spd=9 | ||
|lck=0 | |lck=0 | ||
|def= | |def=7 | ||
|res= | |res=7 | ||
|mov= | |mov=7 | ||
|inventory= | |inventory=--<br>{{Item|15|Scythe|image=monster forecast}} | ||
|notes= | |notes=Conjured by [[Garcia (Gaiden)|Garcia]]. | ||
}} | }} | ||
{{ChapUnitCellFE15 | {{ChapUnitCellFE15 | ||
|name=Duma Faithful | |name=Duma Faithful | ||
| Line 359: | Line 390: | ||
|mov=5 | |mov=5 | ||
|inventory=--<br>{{Item|15|Bone Sword|image=monster forecast}} | |inventory=--<br>{{Item|15|Bone Sword|image=monster forecast}} | ||
|notes=Conjured by the level 3 Cantor. | |notes=Conjured by the level 3 Cantor. | ||
}} | }} | ||
{{ChapUnitCellFE15 | {{ChapUnitCellFE15 | ||
| Line 375: | Line 406: | ||
|mov=4 | |mov=4 | ||
|inventory=--<br>{{Item|15|Claws|image=monster forecast}} | |inventory=--<br>{{Item|15|Claws|image=monster forecast}} | ||
|notes=Conjured by the level 1 Cantor. | |notes=Conjured by the level 1 Cantor. | ||
|last=y | |||
}} | }} | ||
{{ChapUnitFtr}} | |||
|content3={{ChapUnitHdr|type=Enemy|platform=3ds03}} | |||
{{ChapUnitCellFE15 | {{ChapUnitCellFE15 | ||
|name= | |name=[[Garcia (Gaiden)|Garcia]] | ||
|class= | |class=Cantor | ||
|lv= | |lv=10 | ||
|#= | |#=1 | ||
|hp= | |hp=42 | ||
|atk= | |atk=17 | ||
|skill= | |skill=12 | ||
|spd= | |spd=12 | ||
|lck=0 | |lck=0 | ||
|def= | |def=10 | ||
|res= | |res=9 | ||
|mov= | |mov=4 | ||
|inventory= | |inventory={{Item|15|Gold Mark|type=drop}}<br>{{Item|15|Mire|image=black magic}} • {{Item|15|Conjure|image=white magic}}{{h|*|Gargoyle variant}} • {{Item|15|Incarnation|image=skill class}} | ||
| | |notes=Does not move. | ||
| | |||
}} | }} | ||
{{ChapUnitCellFE15 | {{ChapUnitCellFE15 | ||
|name=Duma Faithful | |name=Duma Faithful | ||
| Line 409: | Line 440: | ||
|res=9 | |res=9 | ||
|mov=4 | |mov=4 | ||
|inventory=--<br>{{Item|15|Miasma|image=black magic}} • {{Item|15|Conjure|image=white magic}}{{ | |inventory=--<br>{{Item|15|Miasma|image=black magic}} • {{Item|15|Conjure|image=white magic}}{{h|*|Bonewalker variant}} • {{Item|15|Incarnation|image=skill class}} | ||
|notes=Does not move. | |notes=Does not move. | ||
}} | }} | ||
| Line 425: | Line 456: | ||
|res=9 | |res=9 | ||
|mov=4 | |mov=4 | ||
|inventory=--<br>{{Item|15|Miasma|image=black magic}} • {{Item|15|Conjure|image=white magic}}{{ | |inventory=--<br>{{Item|15|Miasma|image=black magic}} • {{Item|15|Conjure|image=white magic}}{{h|*|Revenant variant}} • {{Item|15|Incarnation|image=skill class}} | ||
|notes=Does not move. | |notes=Does not move. | ||
}} | }} | ||
| Line 434: | Line 465: | ||
|#=1 | |#=1 | ||
|hp=39 | |hp=39 | ||
|atk=17{{ | |atk=17{{h|+4|Granted by Steel Sword}} | ||
|skill=18 | |skill=18 | ||
|spd=20{{ | |spd=20{{h|−1|Penalized by Steel Sword}} | ||
|lck=0 | |lck=0 | ||
|def=12 | |def=12 | ||
|res=6{{ | |res=6{{h|+5|Granted by Resistance +5}} | ||
|mov=7 | |mov=7 | ||
|inventory={{Item|15|Steel Sword}}<br>{{Item|15|Resistance +5|image=skill class}} • {{Item|15|Apotrope|image=skill class}} | |inventory={{Item|15|Steel Sword}}<br>{{Item|15|Resistance +5|image=skill class}} • {{Item|15|Apotrope|image=skill class}} | ||
| Line 450: | Line 481: | ||
|#=2 | |#=2 | ||
|hp=35 | |hp=35 | ||
|atk=14{{ | |atk=14{{h|+3|Granted by Steel Bow}} | ||
|skill=8 | |skill=8 | ||
|spd=8{{ | |spd=8{{h|−3|Penalized by Steel Bow}} | ||
|lck=0 | |lck=0 | ||
|def=8 | |def=8 | ||
|res=2 | |res=2 | ||
|mov=5 | |mov=5 | ||
|inventory={{Item|15|Steel Bow}}<br>{{Item|15|Bowrange +2|image=skill class}} • {{Item|15|Anti-Fliers|image=skill bow}}{{ | |inventory={{Item|15|Steel Bow}}<br>{{Item|15|Bowrange +2|image=skill class}} • {{Item|15|Anti-Fliers|image=skill bow}}{{h|*|Granted by Steel Bow}} | ||
|notes=Both begin moving if either of them or the [[Dread Fighter]] is provoked. | |notes=Both begin moving if either of them or the [[Dread Fighter]] is provoked. | ||
}} | }} | ||
| Line 491: | Line 522: | ||
|inventory=--<br>{{Item|15|Mire|image=black magic}} • {{Item|15|Recover|image=white magic}} | |inventory=--<br>{{Item|15|Mire|image=black magic}} • {{Item|15|Recover|image=white magic}} | ||
|notes=All three begin moving if any is provoked. | |notes=All three begin moving if any is provoked. | ||
|last=y | |||
}} | }} | ||
{{ChapUnitReinf|type=Enemy|platform=3ds03}} | |||
{{ChapUnitCellFE15 | {{ChapUnitCellFE15 | ||
|name= | |name=Duma Faithful | ||
|class= | |class=Gargoyle | ||
|lv= | |lv=5 | ||
|#= | |#=Varies | ||
|hp= | |hp=30 | ||
|atk= | |atk=10 | ||
|skill= | |skill=5 | ||
|spd= | |spd=11 | ||
|lck=0 | |lck=0 | ||
|def= | |def=8 | ||
|res= | |res=7 | ||
|mov= | |mov=7 | ||
|inventory= | |inventory=--<br>{{Item|15|Scythe|image=monster forecast}} | ||
|notes= | |notes=Conjured by [[Garcia (Gaiden)|Garcia]]. | ||
}} | }} | ||
{{ChapUnitCellFE15 | {{ChapUnitCellFE15 | ||
|name=Duma Faithful | |name=Duma Faithful | ||
| Line 524: | Line 555: | ||
|mov=5 | |mov=5 | ||
|inventory=--<br>{{Item|15|Bone Sword|image=monster forecast}} | |inventory=--<br>{{Item|15|Bone Sword|image=monster forecast}} | ||
|notes=Conjured by the level 7 Cantor. | |notes=Conjured by the level 7 Cantor. | ||
}} | }} | ||
{{ChapUnitCellFE15 | {{ChapUnitCellFE15 | ||
| Line 540: | Line 571: | ||
|mov=4 | |mov=4 | ||
|inventory=--<br>{{Item|15|Claws|image=monster forecast}} | |inventory=--<br>{{Item|15|Claws|image=monster forecast}} | ||
|notes=Conjured by the level 5 Cantor | |notes=Conjured by the level 5 Cantor. | ||
|last=y | |last=y | ||
}} | }} | ||
| Line 582: | Line 597: | ||
|res=9 | |res=9 | ||
|move=4 | |move=4 | ||
|spells=[[Conjure]]{{h|*|Gargoyle variant}}<br>[[Mire]] | |||
|bm=y | |bm=y | ||
|wm=y | |wm=y | ||
}} | }} | ||
|content2={{BossStats FE15 | |content2={{BossStats FE15 | ||
| Line 599: | Line 614: | ||
|res=9 | |res=9 | ||
|move=4 | |move=4 | ||
|inventory={{Item|15|Gold Mark|type=drop}} | |||
|skills={{Item|15|Mire|image=black magic}}<br>{{Item|15|Conjure|image=white magic}}{{h|*|Gargoyle variant}}<br>{{Item|15|Incarnation|image=skill class}} | |||
|bm=y | |bm=y | ||
|wm=y | |wm=y | ||
}} | }} | ||
|content3={{BossStats FE15 | |content3={{BossStats FE15 | ||
| Line 617: | Line 632: | ||
|res=9 | |res=9 | ||
|move=4 | |move=4 | ||
|inventory={{Item|15|Gold Mark|type=drop}} | |||
|skills={{Item|15|Mire|image=black magic}}<br>{{Item|15|Conjure|image=white magic}}{{h|*|Gargoyle variant}}<br>{{Item|15|Incarnation|image=skill class}} | |||
|bm=y | |bm=y | ||
|wm=y | |wm=y | ||
}} | }} | ||
}} | }} | ||
| Line 626: | Line 641: | ||
==Strategy== | ==Strategy== | ||
{{strategy}} | {{strategy}} | ||
We will be doing Celica's route after Alm kills Nuibaba. Before setting out for Duma Tower, note that the Terrors in the Zofian graveyards will disappear and not respawn during Act 4, so now is a great time to backtrack and mop up any outstanding sidequests. In addition, don't forget to explore the basement of the Temple of Mila, collect the Mage Ring, and recruit Nomah. | We will be doing Celica's route after Alm kills Nuibaba. Before setting out for Duma Tower, note that the Terrors in the Zofian graveyards will disappear and not respawn during Act 4, so now is a great time to backtrack and mop up any outstanding sidequests. In addition, don't forget to explore the basement of the Temple of Mila, collect the Mage Ring, and recruit Nomah. | ||
For the battle itself, you get your first taste of the swamps that plague Celica's Act 4. Send the Whitewings northwest to assassinate Garcia while Saber leads the way clearing out the southwest. Dread Fighters are nearly invincible while in forests. Make sure the Dread Fighter who camps there is yours. | For the battle itself, you get your first taste of the swamps that plague Celica's Act 4. Send the Whitewings northwest to assassinate Garcia while Saber leads the way clearing out the southwest. Dread Fighters are nearly invincible while in forests. Make sure the Dread Fighter who camps there is yours. | ||
Map Turn Count: 6<br>Game Turn Count: 245 | Map Turn Count: 6<br>Game Turn Count: 245 | ||
==Flavor text== | |||
{{DescriptionHdr}} | |||
{{DescriptionCell | |||
|game={{title|Echoes: Shadows of Valentia}} | |||
|english=Covered in toxic mire,<br>this land of death<br>bars all ingress. The<br>fetid stench of decay<br>permeates the air. | |||
|japanese=一面に毒の沼が広がり<br>訪れるものを拒む<br>死の大地。<br>周囲には鼻をつく<br>腐臭がただよう。 | |||
}} | |||
{{DescriptionFtr}} | |||
<!-- | <!-- | ||
==Trivia== | ==Trivia== | ||
| Line 638: | Line 662: | ||
{{Names | {{Names | ||
|eng-name=Dead Man's Mire Battle | |eng-name=Dead Man's Mire Battle | ||
| | |jpn-name={{h|死人の沼の戦い|Shinin no numa no tatakai}} | ||
| | |jpn-mean=Dead Man's Swamp Battle | ||
| | |||
|span-name= | |span-name= | ||
|span-mean= | |span-mean= | ||
| Line 651: | Line 674: | ||
|dut-name= | |dut-name= | ||
|dut-mean= | |dut-mean= | ||
|kor-name={{h|망자의 늪의 전투|mangjaui neup-ui jeontu}} | |||
|kor-mean=Dead man's swamp battle | |||
|ch-simp-name= | |ch-simp-name= | ||
|ch-simp-mean= | |ch-simp-mean= | ||
| Line 658: | Line 683: | ||
==Gallery== | ==Gallery== | ||
<gallery> | |||
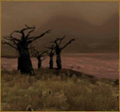
Mt fe15 dead man's mire.png|Thumbnail of Dead Man's Mire. | |||
</gallery> | |||
{{ChapterNav | {{ChapterNav | ||
Latest revision as of 21:33, 28 March 2024
| ||||||||
|

Dead Man's Mire Battle (Japanese: 死人の沼の戦い Dead Man's Swamp Battle) is the first map of the fourth act of Celica's route in Fire Emblem Gaiden and Fire Emblem Echoes: Shadows of Valentia.
Map data
Gaiden Echoes: Shadows of Valentia
| ||||||
|
| |||||
| Victory: Rout the enemy | Player | Enemy | ||||
|---|---|---|---|---|---|---|
| Defeat: Celica dies | 1–15 | 10+reinforcements | ||||
| Map dimensions: 22 columns by 20 rows | ||||||
Character data
Gaiden Echoes: Shadows of Valentia
| Characters | |
|---|---|
New units
| |
| |
Required characters
| |

| |
Available characters
| |
              
|
Item data
| ||||||
|
- Note: There are no items to be found in the original Gaiden. The item list above is for Echoes: Shadows of Valentia.
Enemy data
Gaiden Echoes: Shadows of Valentia Normal Echoes: Shadows of Valentia Hard
| |||||||||||||||||||||||||||||||||||||||||||||||||||||||||||||||||||||||||||||||||||||||||||||||||||||||||||||||||||||||||||||||||||||||||||||||||||||||||||||||||||||||||||||||||||||||||||||
| |||||||||||||||||||||||||||||||||||||||||||||||||||||||||||||||||||||||||||||||||||||||||||||||||||||||||||||||||||||||||||||||||||||||||||||||||||||||||||||||||||||||||||||||||||||||||||||
| |||||||||||||||||||||||||||||||||||||||||||||||||||||||||||||||||||||||||||||||||||||||||||||||||||||||||||||||||||||||||||||||||||||||||||||||||||||||||||||||||||||||||||||||||||||||||||||
| |||||||||||||||||||||||||||||||||||||||||||||||||||||||||||||||||||||||||||||||||||||||||||||||||||||||||||||||||||||||||||||||||||||||||||||||||||||||||||||||||||||||||||||||||||||||||||||
Boss data
- Main article:
Garcia
Gaiden Echoes: Shadows of Valentia Normal Echoes: Shadows of Valentia Hard

Strategy
| This section details unofficial strategies that may help with completion of the chapter. This may not work for everybody. |
We will be doing Celica's route after Alm kills Nuibaba. Before setting out for Duma Tower, note that the Terrors in the Zofian graveyards will disappear and not respawn during Act 4, so now is a great time to backtrack and mop up any outstanding sidequests. In addition, don't forget to explore the basement of the Temple of Mila, collect the Mage Ring, and recruit Nomah.
For the battle itself, you get your first taste of the swamps that plague Celica's Act 4. Send the Whitewings northwest to assassinate Garcia while Saber leads the way clearing out the southwest. Dread Fighters are nearly invincible while in forests. Make sure the Dread Fighter who camps there is yours.
Map Turn Count: 6
Game Turn Count: 245
Flavor text
| Game | Text (English) |
Text (Japanese) |
|---|---|---|
| Echoes: Shadows of Valentia | Covered in toxic mire,
this land of death bars all ingress. The fetid stench of decay permeates the air. |
一面に毒の沼が広がり
訪れるものを拒む 死の大地。 周囲には鼻をつく 腐臭がただよう。 |
Etymology and other languages
| Names, etymology, and in other regions | ||
|---|---|---|
| Language | Name | Definition, etymology, and notes |
| English |
Dead Man's Mire Battle |
-- |
| Japanese |
死人の沼の戦い |
Dead Man's Swamp Battle |
| French |
Bataille: Marais du mort |
Dead Man's Swamp Battle |
| Korean |
망자의 늪의 전투 |
Dead man's swamp battle |
Gallery
Thumbnail of Dead Man's Mire.

| ← Liberation of the Temple of Mila • | Dead Man's Mire Battle | • Skirmish → |
|---|
| Fire Emblem Echoes: Shadows of Valentia | ||||||||||||||||||||||||||||||||||||||||||||||||||||||||||||||||||||||||||
|---|---|---|---|---|---|---|---|---|---|---|---|---|---|---|---|---|---|---|---|---|---|---|---|---|---|---|---|---|---|---|---|---|---|---|---|---|---|---|---|---|---|---|---|---|---|---|---|---|---|---|---|---|---|---|---|---|---|---|---|---|---|---|---|---|---|---|---|---|---|---|---|---|---|---|
| ||||||||||||||||||||||||||||||||||||||||||||||||||||||||||||||||||||||||||