| Site News |
|---|
| Warning: This wiki contains spoilers. Read at your own risk! Social media: If you would like, please join our Discord server, and/or follow us on X (Twitter) or Tumblr! |
Zofia's Call: Difference between revisions
Infernape612 (talk | contribs) |
Anferensis (talk | contribs) No edit summary |
||
| Line 6: | Line 6: | ||
* {{title|Echoes: Shadows of Valentia}} | * {{title|Echoes: Shadows of Valentia}} | ||
|location=[[Valentia]] <small>(Southern [[Zofia]])</small> | |location=[[Valentia]] <small>(Southern [[Zofia]])</small> | ||
|new units=[[Alm]], [[Lukas]], [[Gray]], [[Tobin]], [[Kliff]], [[Faye]], [[Silque]], [[Clair]], [[Forsyth]], [[Python]], [[Clive]] | |new units=[[Alm]], [[Lukas]], [[Gray]], [[Tobin]], [[Kliff]], [[Faye]]{{hover|*|Echoes: Shadows of Valentia only}}, [[Silque]], [[Clair]], [[Forsyth]], [[Python]], [[Clive]] | ||
|boss=[[Desaix]], [[Slayde]] | |boss=[[Desaix]], [[Slayde]] | ||
}} | }} | ||
| Line 12: | Line 12: | ||
{{quote|[[Alm|You'll]] come in General [[Mycen]]'s stead? Thank you. My comrades will definitely be pleased as well. Well then, let's go together to the Deliverance's secret base.|Lukas}} | {{quote|[[Alm|You'll]] come in General [[Mycen]]'s stead? Thank you. My comrades will definitely be pleased as well. Well then, let's go together to the Deliverance's secret base.|Lukas}} | ||
'''Zofia's Call''' (Japanese: {{hover|ソフィアへ!|Sofia e!}} ''To | '''Zofia's Call''' (Japanese: {{hover|ソフィアへ!|Sofia e!}} ''To Zofia!'') is the first Act of {{FE2}} and its remake, {{title|Echoes: Shadows of Valentia}}. [[Alm]] begins his journey across [[Zofia]] to save the country from [[Desaix]]'s tyranny. In this chapter Alm only has access to the southern portion of Zofia on the world map. | ||
==Plot== | ==Plot== | ||
| Line 24: | Line 24: | ||
Having joined forces, and with Alm now the leader, the Deliverance marches towards Zofia castle to engage Desaix and his subordinate [[Slayde]]. The Deliverance is unable to kill Desaix, as he flees before being in any danger, having left a double behind to stall Alm's forces. Regardless, Zofia Castle is liberated from Desaix's control. | Having joined forces, and with Alm now the leader, the Deliverance marches towards Zofia castle to engage Desaix and his subordinate [[Slayde]]. The Deliverance is unable to kill Desaix, as he flees before being in any danger, having left a double behind to stall Alm's forces. Regardless, Zofia Castle is liberated from Desaix's control. | ||
==Character | ==Character data== | ||
{{Tab | |||
{{Tab | |width=1000px | ||
|tab1=''Gaiden'' | |tab1=''Gaiden'' | ||
|tab2=''Echoes: Shadows of Valentia'' | |tab2=''Echoes: Shadows of Valentia'' | ||
|content1={{ChapChars | |content1={{ChapChars | ||
|game#= 02 | |game#=02 | ||
|newunits= | |newunits=10 | ||
|newunit1= | |newunit1={{NewUnit | ||
{{NewUnit | |name=Alm | ||
|name= Alm | |portrait=[[File:Portrait alm fe02.png]] | ||
|portrait= [[File:Portrait alm fe02.png]] | |class=Fighter | ||
|class= Fighter | |HP=28 | ||
|HP= 28 | |lv=1 | ||
|lv= 1 | |recruitment method=Automatically from the start | ||
|recruitment method= Automatically from the start}} | }} | ||
|newunit2= | |newunit2={{NewUnit | ||
{{NewUnit | |name=Lukas | ||
|name= Lukas | |portrait=[[File:Portrait lukas fe02.png]] | ||
|portrait= [[File:Portrait lukas fe02.png]] | |class=Soldier | ||
|class= Soldier | |HP=22 | ||
|HP= 22 | |lv=2 | ||
|lv= 2 | |recruitment method=Talk to him at Ram Village (needed to progress) | ||
|recruitment method= Talk to him at Ram Village}} | }} | ||
|newunit3= | |newunit3={{NewUnit | ||
{{NewUnit | |name=Gray | ||
|name= Gray | |portrait=[[File:Portrait gray fe02.png]] | ||
|portrait= [[File:Portrait gray fe02.png]] | |class=Villager | ||
|class= Villager | |HP=24 | ||
|HP= 24 | |lv=5 | ||
|lv= 5 | |recruitment method=Talk to him at Ram Village (needed to progress) | ||
|recruitment method= Talk to him at Ram Village}} | }} | ||
|newunit4= | |newunit4={{NewUnit | ||
{{NewUnit | |name=Tobin | ||
|name= Tobin | |portrait=[[File:Portrait tobin fe02.png]] | ||
|portrait= [[File:Portrait tobin fe02.png]] | |class=Villager | ||
|class= Villager | |HP=22 | ||
|HP= 22 | |lv=2 | ||
|lv= 2 | |recruitment method=Talk to him at Ram Village | ||
|recruitment method= Talk to him at Ram Village}} | }} | ||
|newunit5= | |newunit5={{NewUnit | ||
{{NewUnit | |name=Kliff | ||
|name= Kliff | |portrait=[[File:Portrait kliff fe02.png]] | ||
|portrait= [[File:Portrait kliff fe02.png]] | |class=Villager | ||
|class= Villager | |HP=20 | ||
|HP= 20 | |lv=1 | ||
|lv= 1 | |recruitment method=Talk to him at Ram Village | ||
|recruitment method= Talk to him at Ram Village}} | }} | ||
|newunit6= | |newunit6={{NewUnit | ||
{{NewUnit | |name=Silque | ||
|name= Silque | |portrait=[[File:Portrait silque fe02.png]] | ||
|portrait= [[File:Portrait silque fe02.png]] | |class=Cleric | ||
|class= Cleric | |HP=18 | ||
|HP= 18 | |lv=1 | ||
|lv= 1 | |recruitment method=Talk to her at the Thieves' Shrine | ||
|recruitment method= Talk to her at the Thieves' Shrine}}}} | }} | ||
|content2={{ChapChars | |newunit7={{NewUnit | ||
|game#= 15 | |name=Clair | ||
|newunits= | |portrait=[[File:Portrait clair fe02.png]] | ||
|newunit1= | |class=Pegasus Knight | ||
{{NewUnit | |HP=20 | ||
|name= Alm | |lv=1 | ||
|portrait= [[File:Portrait alm status fe15.png|128px]] | |recruitment method=Talk to her at the Southern Outpost | ||
|class= Fighter | }} | ||
|HP= 28 | |newunit8={{NewUnit | ||
|lv= 1 | |name=Clive | ||
|recruitment method= Automatically from the start}} | |portrait=[[File:Portrait clive fe02.png]] | ||
|newunit2= | |class=Cavalier | ||
{{NewUnit | |HP=26 | ||
|name= Lukas | |lv=6 | ||
|portrait= [[File:Portrait lukas status fe15.png|128px]] | |recruitment method=Talk to him at the Deliverance Hideout | ||
|class= Soldier | }} | ||
|HP= 22 | |newunit9={{NewUnit | ||
|lv= 2 | |name=Forsyth | ||
|recruitment method= Automatically | |portrait=[[File:Portrait forsyth fe02.png]] | ||
|newunit3= | |class=Soldier | ||
{{NewUnit | |HP=28 | ||
|name= Gray | |lv=4 | ||
|portrait= [[File:Portrait gray status fe15.png|128px]] | |recruitment method=Talk to him at the Deliverance Hideout | ||
|class= Villager | }} | ||
|HP= 24 | |newunit10={{NewUnit | ||
|lv= 5 | |name=Python | ||
|recruitment method= Automatically | |portrait=[[File:Portrait python fe02.png]] | ||
|newunit4= | |class=Archer | ||
{{NewUnit | |HP=24 | ||
|name= Tobin | |lv=3 | ||
|portrait= [[File:Portrait tobin status fe15.png|128px]] | |recruitment method=Talk to him at the Deliverance Hideout Entrance after [[Clive]] joins | ||
|class= Villager | }} | ||
|HP= 22 | }} | ||
|lv= 2 | |content2={{ChapChars | ||
|recruitment method= Automatically | |game#=15 | ||
|newunit5= | |newunits=11 | ||
{{NewUnit | |newunit1={{NewUnit | ||
|name= Kliff | |name=Alm | ||
|portrait= [[File:Portrait kliff status fe15.png|128px]] | |portrait=[[File:Portrait alm status fe15.png|128px]] | ||
|class= Villager | |class=Fighter | ||
|HP= 20 | |HP=28 | ||
|lv= 1 | |lv=1 | ||
|recruitment method= | |recruitment method=Automatically from the start | ||
|newunit6= | }} | ||
{{NewUnit | |newunit2={{NewUnit | ||
|name= Faye | |name=Lukas | ||
|portrait= [[File:Portrait faye status fe15.png|128px]] | |portrait=[[File:Portrait lukas status fe15.png|128px]] | ||
|class= Villager | |class=Soldier | ||
|HP= 19 | |HP=22 | ||
|lv= 1 | |lv=2 | ||
|recruitment method= Talk to her at the | |recruitment method=Automatically before leaving Ram Village | ||
|newunit7= | }} | ||
{{NewUnit | |newunit3={{NewUnit | ||
|name= Silque | |name=Gray | ||
|portrait= [[File:Portrait silque status fe15.png|128px]] | |portrait=[[File:Portrait gray status fe15.png|128px]] | ||
|class= Cleric | |class=Villager | ||
|HP= 18 | |HP=24 | ||
|lv= 1 | |lv=5 | ||
|recruitment method= Talk to her at the | |recruitment method=Automatically before leaving Ram Village | ||
}}}} | }} | ||
|newunit4={{NewUnit | |||
|name=Tobin | |||
|portrait=[[File:Portrait tobin status fe15.png|128px]] | |||
|class=Villager | |||
|HP=22 | |||
|lv=2 | |||
|recruitment method=Automatically before leaving Ram Village | |||
}} | |||
|newunit5={{NewUnit | |||
|name=Kliff | |||
|portrait=[[File:Portrait kliff status fe15.png|128px]] | |||
|class=Villager | |||
|HP=20 | |||
|lv=1 | |||
|recruitment method=Automatically before leaving Ram Village | |||
}} | |||
|newunit6={{NewUnit | |||
|name=Faye | |||
|portrait=[[File:Portrait faye status fe15.png|128px]] | |||
|class=Villager | |||
|HP=19 | |||
|lv=1 | |||
|recruitment method=Talk to her at the Ram Village Entrance once you can leave | |||
}} | |||
|newunit7={{NewUnit | |||
|name=Silque | |||
|portrait=[[File:Portrait silque status fe15.png|128px]] | |||
|class=Cleric | |||
|HP=18 | |||
|lv=1 | |||
|recruitment method=Talk to her at the Mila Shrine in the Thieves’ Shrine | |||
}} | |||
|newunit8={{NewUnit | |||
|name=Clair | |||
|portrait=[[File:Portrait clair status fe15.png|128px]] | |||
|class=Pegasus Knight | |||
|HP=20 | |||
|lv=1 | |||
|recruitment method=Automatically at the dungeon cell in the Southern Outpost | |||
}} | |||
|newunit9={{NewUnit | |||
|name=Clive | |||
|portrait=[[File:Portrait clive status fe15.png|128px]] | |||
|class=Cavalier | |||
|HP=26 | |||
|lv=6 | |||
|recruitment method=Automatically at the end of the Deliverance Hideout | |||
}} | |||
|newunit10={{NewUnit | |||
|name=Forsyth | |||
|portrait=[[File:Portrait forsyth status fe15.png|128px]] | |||
|class=Soldier | |||
|HP=28 | |||
|lv=4 | |||
|recruitment method=Talk to him at the Mila Shrine in the Deliverance Hideout after [[Clive]] joins | |||
}} | |||
|newunit11={{NewUnit | |||
|name=Python | |||
|portrait=[[File:Portrait python status fe15.png|128px]] | |||
|class=Archer | |||
|HP=24 | |||
|lv=3 | |||
|recruitment method=Talk to him at the Deliverance Hideout Entrance after [[Clive]] joins | |||
}} | |||
}} | |||
}} | |||
==Map | ==Map data== | ||
There are nine combat maps in Act 1 of ''Gaiden''. Each one is detailed below, with what character is recruited on what map and so on. | There are nine combat maps in Act 1 of ''Gaiden''. Each one is detailed below, with what character is recruited on what map and so on. | ||
Two of these maps | Two of these maps, the Thieves' Shrine and Deliverance Hideout, are dungeons which contain replayable skirmishes. | ||
<!--Make this a proper table--> | <!--Make this a proper table--> | ||
{| | {| | ||
| Line 182: | Line 248: | ||
====Item data==== | ====Item data==== | ||
{{ChapItems | {{ChapItems | ||
|platform=3ds03 | |platform=3ds03 | ||
| Line 205: | Line 269: | ||
|obtain9=Complete "The Sommelier". | |obtain9=Complete "The Sommelier". | ||
|itemlast=Fruit of Life | |itemlast=Fruit of Life | ||
|obtainlast=Complete "The Wages of Sin".}} | |obtainlast=Complete "The Wages of Sin". | ||
}} | |||
*<small>Note: There are no items to be found in Ram Village in the original {{title|Gaiden}}. The following item list is for {{title|Echoes: Shadows of Valentia}}.</small> | |||
===Thieves' Shrine=== | ===Thieves' Shrine=== | ||
| Line 238: | Line 304: | ||
====Item data==== | ====Item data==== | ||
{{ChapItems | {{ChapItems | ||
|platform=3ds03 | |platform=3ds03 | ||
| Line 250: | Line 314: | ||
|obtain3=Talk to Silque. | |obtain3=Talk to Silque. | ||
|itemlast=Mila Carving | |itemlast=Mila Carving | ||
|obtainlast=Behind a set of jars in the alcove. Appears after completing "The Sommelier" and talking to the Greedy Old Man again.}} | |obtainlast=Behind a set of jars in the alcove. Appears after completing "The Sommelier" and talking to the Greedy Old Man again. | ||
}} | |||
*<small>Note: There are no items to be found in the Thieves' Shrine in the original {{title|Gaiden}}. The following item list is for {{title|Echoes: Shadows of Valentia}}.</small> | |||
====Shrine | ====Shrine data==== | ||
Your first Sacred Spring is a rather simple decision, as Speed is far more valuable than HP. However, deciding who to give it to could be problematic. Brigands and Archers have 2-3 Speed, Soldiers have 4-5, and Cavaliers have 6-7, so those are the benchmarks you want to hit. Alm and Tobin start out with 6 Speed each, so one use of the Spring lets them avoid being doubled and 2 lets them double everything. Silque and Cleric Faye have 3 Speed each, so giving them one use prevents enemy Archers from doubling them. Giving Lukas one use or Archer Kliff two allows them to double weaker Soldiers, allowing them to snowball more easily. Cavalier Kliff and Faye start with 5 Speed, and can use one boost to double all soldiers. Mercenaries never need Speed. | Your first Sacred Spring is a rather simple decision, as Speed is far more valuable than HP. However, deciding who to give it to could be problematic. Brigands and Archers have 2-3 Speed, Soldiers have 4-5, and Cavaliers have 6-7, so those are the benchmarks you want to hit. Alm and Tobin start out with 6 Speed each, so one use of the Spring lets them avoid being doubled and 2 lets them double everything. Silque and Cleric Faye have 3 Speed each, so giving them one use prevents enemy Archers from doubling them. Giving Lukas one use or Archer Kliff two allows them to double weaker Soldiers, allowing them to snowball more easily. Cavalier Kliff and Faye start with 5 Speed, and can use one boost to double all soldiers. Mercenaries never need Speed. | ||
Revision as of 06:23, 24 December 2017
| This page has been marked as a stub. Please help improve the page by adding information. |
| ||||||
|
| “ | You'll come in General Mycen's stead? Thank you. My comrades will definitely be pleased as well. Well then, let's go together to the Deliverance's secret base. | ” | — Lukas |
|---|
Zofia's Call (Japanese: ソフィアへ! To Zofia!) is the first Act of Fire Emblem Gaiden and its remake, Echoes: Shadows of Valentia. Alm begins his journey across Zofia to save the country from Desaix's tyranny. In this chapter Alm only has access to the southern portion of Zofia on the world map.
Plot
- Main article:
Zofia's Call/Script
Seven years later, in Flostym 401 V.C., Alm has become a fine swordsman under Mycen's tutelage. Although Alm wants to set out into the outside world and help protect innocent people from the bandit raids and Rigelian invasions that have been recurring lately, Mycen adamantly refuses to let him leave.
One day, a man named Lukas arrives in Ram. He explains that King Lima IV has been assassinated by Chancellor Desaix, who has seized control of Zofia and sold it out to Rigel. Lukas is hoping to recruit Mycen to serve the Deliverance, a rebellion group dedicated to overthrowing Desaix. Mycen refuses, however, so Alm, Gray, and Tobin join in his stead. Kliff and Faye can also be convinced to join. The group leaves to battle Desaix. Along the way, they rescue a cleric named Silque.
After rescuing Silque, Alm's group begins to encounter Desaix's forces, engaging them at some forts. In one of the strongholds he finds Clair, a pegasus knight that had been captured by Desaix's forces. Alm then makes it to the Deliverance's hideout, killing some monsters along the way and meeting the other Deliverance members: Forsyth and Python, and their leader, Clive.
Having joined forces, and with Alm now the leader, the Deliverance marches towards Zofia castle to engage Desaix and his subordinate Slayde. The Deliverance is unable to kill Desaix, as he flees before being in any danger, having left a double behind to stall Alm's forces. Regardless, Zofia Castle is liberated from Desaix's control.
Character data
Gaiden Echoes: Shadows of Valentia
| Characters | ||||||||||||||||||||||||||||||||||||||||||||||||||||||||||||||||||||||||||||||||||||||||||||||||||||||||||||||
|---|---|---|---|---|---|---|---|---|---|---|---|---|---|---|---|---|---|---|---|---|---|---|---|---|---|---|---|---|---|---|---|---|---|---|---|---|---|---|---|---|---|---|---|---|---|---|---|---|---|---|---|---|---|---|---|---|---|---|---|---|---|---|---|---|---|---|---|---|---|---|---|---|---|---|---|---|---|---|---|---|---|---|---|---|---|---|---|---|---|---|---|---|---|---|---|---|---|---|---|---|---|---|---|---|---|---|---|---|---|---|
New units
| ||||||||||||||||||||||||||||||||||||||||||||||||||||||||||||||||||||||||||||||||||||||||||||||||||||||||||||||
| ||||||||||||||||||||||||||||||||||||||||||||||||||||||||||||||||||||||||||||||||||||||||||||||||||||||||||||||
Available characters
| ||||||||||||||||||||||||||||||||||||||||||||||||||||||||||||||||||||||||||||||||||||||||||||||||||||||||||||||
| None | ||||||||||||||||||||||||||||||||||||||||||||||||||||||||||||||||||||||||||||||||||||||||||||||||||||||||||||||


Map data
There are nine combat maps in Act 1 of Gaiden. Each one is detailed below, with what character is recruited on what map and so on.
Two of these maps, the Thieves' Shrine and Deliverance Hideout, are dungeons which contain replayable skirmishes.
Exploration sections
Ram
This is the game's starting area, it also demonstrates Gaiden's free movement, like a traditional RPG. There is no battle to be had here, but this is where the game's story starts off.
Gaiden opens with Alm sparring with Mycen; after a moment Mycen will tell Alm to take a break. This is where the player is given control to move Alm around the map as they please. To progress speak to Lukas, the red-clad man blocking the village's exit, then speak to Mycen again. Alm may now leave the village, but be sure to talk to Lukas and the other villagers again first; Kliff, Tobin, and Gray will not be present in the coming battle unless Alm speaks to them again before leaving.
In Echoes, when you take control of Alm, you may speak to a Greedy Old Man in the Square to start your first sidequest, "The Sommelier". He wants a bottle of Ram Wine. Afterwards, talk to Lukas at the Entrance to advance the plot. Afterwards, return to Mycen's House, then return to the Entrance. Lukas, Gray, and Tobin will automatically join you, and you can recruit Kliff and Faye if you desire. You can also leave them in Ram and later recruit them into Celica's party, but there they will be underpowered and unlikely to reach their full potential.
Among your starting characters, Alm is naturally one of the most powerful characters in the game. He has solid growths across the board and exclusive access to two powerful weapons, so take care of him and he will take care of you. Gray is widely considered to be a one-trick pony, unable to excel anywhere except as a Mercenary. However, he makes a very good Mercenary, since his Attack growth is good and his lackluster Skill and Speed are repaired by the Mercenary line's high bases. Tobin and Kliff both do well as an Archer or Mage. Mage Tobin gets very early access to the powerful Excalibur spell and has Physic to keep him viable later on; however, Tobin's growths suit him better as an Archer for post-game purposes. Kliff has lots of Speed to make up for the heavy weight of bows and +15 accuracy from his support with Tobin to fix their low hit, but in the post-game his Speed is wasted since Archers can use the Killer Bow to get a guaranteed double attack. As a Mage, his spell pool is only rivaled by Celica in the sheer amount of ways he can kill the enemy. Cavalier is also a popular choice for Kliff, although he faces competition from Mathilda and Zeke in that role later down the line. Faye makes for an amazing Cleric, as she gets early access to Physic, and later grabs Rescue and Anew for more utility. Lukas is your basic Knight - high Attack and Defense, poor Speed. The wide maps in Echoes will prove problematic for him, although he can make great use of the DLC Villager's Fork to become an amazing Mercenary with high stats all around.
After returning from the Thieves' Shrine, you can complete "The Sommelier" and receive some Blue Cheese as a reward. If you talk to the Greedy Old Man again afterwards, a Mila Carving will appear in the Thieves' Shrine. You can also start the next quest, "The Wages of Sin", by talking to an Indignant Woman. She wants you to defeat 20 Brigands in the Thieves' Shrine. This rewards you with a valuable Fruit of Life, but it will take enough turns on a Blitzkrieg run that you're better off saving it until the post-game.
Item data
| |||||||||||||||||||||||||||||||||
|
- Note: There are no items to be found in Ram Village in the original Gaiden. The following item list is for Echoes: Shadows of Valentia.
Thieves' Shrine
This is located at the world map location called Thieves' Shrine (Japanese: 盗賊のほこら, Thieves' Shrine). This location is accessible after the completion of map 2. Map 3 takes place at this location. In Gaiden, the Thieves' Shrine has two free movement sections. This is the first, to proceed through the entrance area, simply walk straight through to the exit on the other side of the room.
In Echoes, the Thieves' Shrine has been expanded into a full-blown dungeon in the vein of classic RPGs such as Final Fantasy. The enemies here indefinitely respawn, so you may repeatedly challenge them for experience if you so desire. If you want the Blitzkreig achievement, stealth is the order of the day. Try to avoid unnecessary combat at all costs to avoid inflating your turn count. You can also destroy objects in the environment such as crates, jars, and even grass for a chance to get some easy Silver Marks or food items. On the west side of the shrine, there is a treasure chest containing an Iron Sword, which is best given to Alm. When you're ready to progress to the third major battle, cross the bridge to the north.
If you return to the Thieves' Shrine after completing "The Sommelier" and talking to the Greedy Old Man again, you can find a Mila Carving behind a set of jars in the room with the Iron Sword.
Thieves' Shrine Interior
At the back of the Thieves' Shrine there is a Mila Shrine. This is the first opportunity that the player has to promote their units. Silque is also here, so be sure to have Alm speak to her so she joins their group. Silque is a valuable Cleric who gets Warp early on at level 7, and she and Cleric Faye work very well together. In Echoes, she also gives you Mila's Turnwheel, an extremely valuable item that lets you undo tactical errors and avoid getting RNG-screwed.
As noted above, Gray should promote to Mercenary at this point while Faye should become a Cleric. Tobin wants to be a Mage for speedruns and an Archer for post-game content; Kliff wants to be an Archer or Cavalier for speedruns and a Mage for post-game content. You absolutely need to have someone be a Mage, though, as there is a particularly threatening Mercenary in the next battle whose Leather Shield gives him lots of Defense. When you leave the Shrine, make sure to stop by Ram Village to turn in the Ram Wine and complete "The Sommelier".
Item data
| |||||||||||||||
|
- Note: There are no items to be found in the Thieves' Shrine in the original Gaiden. The following item list is for Echoes: Shadows of Valentia.
Shrine data
Your first Sacred Spring is a rather simple decision, as Speed is far more valuable than HP. However, deciding who to give it to could be problematic. Brigands and Archers have 2-3 Speed, Soldiers have 4-5, and Cavaliers have 6-7, so those are the benchmarks you want to hit. Alm and Tobin start out with 6 Speed each, so one use of the Spring lets them avoid being doubled and 2 lets them double everything. Silque and Cleric Faye have 3 Speed each, so giving them one use prevents enemy Archers from doubling them. Giving Lukas one use or Archer Kliff two allows them to double weaker Soldiers, allowing them to snowball more easily. Cavalier Kliff and Faye start with 5 Speed, and can use one boost to double all soldiers. Mercenaries never need Speed.
| style="Template:Roundtl; border:none" width="100%" colspan="2"|Mila shrine stats | ||||||||
|---|---|---|---|---|---|---|---|---|
|
Trivia
- In Gaiden, if the player resets the game while in Ram, Gray's position will change, meaning that he is not required to talk to in order to leave the village.
- There is an oversight regarding the villagers in Gaiden: Kliff, Tobin, and Gray. If the player purposely avoids talking to them with Alm, they will not accompany him. It the player refrains from having Alm speak to them until Act 2, when they have control of Celica, Celica can recruit the villagers. When Celica gets to the mainland, have her ignore and go past castle Zofia and have her go to Ram. This is clearly an oversight, as the villagers have the exact same dialogue, and then end up calling Celica "Alm". Regardless, they will be added to Celica's party instead of Alm's. In Shadows of Valentia, Tobin and Gray will instead join Alm's party automatically alongside Lukas; however, Kliff and Faye may be left behind and recruited by Celica in Act 2. Unlike in Gaiden, the game accounts for this possibility, giving them unique dialogue with Celica if she recruits them.
Etymology and other languages
| Names, etymology, and in other regions | ||
|---|---|---|
| Language | Name | Definition, etymology, and notes |
| English (unofficial) |
To Zofia! |
|
| Spanish (Latin America) |
Rumbo a Zofia |
|
| French (Canada) |
L'appel de Zofia |
The call of Zofia |
| German |
Zofia ruft |
Zofia calls |
Gallery
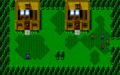
- Cm fe02 C1 Wm.png
Portion of the world map that Act 1 takes place on.
Ram village.
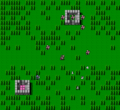
- Cm fe02 C1 M01.png
The first battle map of Act 1.
The second battle map of Act 1.
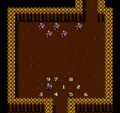
- Cm fe02 thief shrine entrance.png
Entrance to the Thieves' Shrine.
Thieves' Shrine, third battle map, and skirmish area of Act 1.
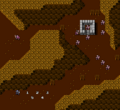
Ram valley, fourth battle map of Act 1.


| ← Alm and Celica • | Zofia's Call | • The Pilgrimage → |
|---|
| Fire Emblem Echoes: Shadows of Valentia | ||||||||||||||||||||||||||||||||||||||||||||||||||||||||||||||||||||||||||
|---|---|---|---|---|---|---|---|---|---|---|---|---|---|---|---|---|---|---|---|---|---|---|---|---|---|---|---|---|---|---|---|---|---|---|---|---|---|---|---|---|---|---|---|---|---|---|---|---|---|---|---|---|---|---|---|---|---|---|---|---|---|---|---|---|---|---|---|---|---|---|---|---|---|---|
| ||||||||||||||||||||||||||||||||||||||||||||||||||||||||||||||||||||||||||