| Site News |
|---|
| Warning: This wiki contains spoilers. Read at your own risk! Social media: If you would like, please join our Discord server, and/or follow us on Twitter (X) or Tumblr! |
Ocean's Parting: Difference between revisions
m (Text replacement - "Unused_content_in_Fire_Emblem_(GBA)#The_Binding_Blade_data_transfer_leftove" to "Unused content in Fire Emblem: The Blazing Blade#The Binding Blade data transfer leftove") |
Thecornerman (talk | contribs) m (→Trivia) |
||
| (48 intermediate revisions by 15 users not shown) | |||
| Line 1: | Line 1: | ||
{{Chapter Infobox | |||
{{Chapter Infobox | |||
|image=[[File:Cm fe06 17A.png|200px]] | |image=[[File:Cm fe06 17A.png|200px]] | ||
|location= | |location=Remi | ||
|boss=[[Arcardo]] | |boss=[[Arcardo]] | ||
| | |previous=*[[Storming the Capital]] | ||
*[[The Glorious Ascension]] <small>(side quest)</small> | |||
|next=[[The Frozen River]] | |||
}} | }} | ||
In order to play this chapter, the combined [[experience]] of [[Shanna]] and [[Thea]] must | {{Quote|This land of Remi... At a certain time of the day, the sea level drops, exposing a sand bar that can be crossed.|[[Yoder]] to [[Roy]]}} | ||
'''Ocean's Parting''' (Japanese: {{hl|海の道|Umi no michi}} ''Ocean path'') is Chapter 17A of {{FE6}}. In order to play this chapter (and the rest of the Ilia route for Chapters 18, 19, 20, and 20x), the combined [[experience]] of [[Shanna]] and [[Thea]] must be higher than or equal to the combined experience of [[Sue]] and [[Sin]] by the end of Chapter [[Storming the Capital|16]] or [[The Glorious Ascension|16x]]. Otherwise, [[The Bishop's Teachings]] and the Sacae route will be played instead. | |||
==Plot== | ==Plot== | ||
{{main|Ocean's Parting/Script}} | {{main|Ocean's Parting/Script}} | ||
After [[Roy]] captures Aquileia, the revolutionary forces, including their leaders [[Roartz]] and [[Arcardo]], are chased out of [[Etruria]]. They join with [[Bern]]'s army and flee to [[Ilia]]. Roartz and Murdock meet with the [[Wyvern Generals]] [[Galle]] and [[Murdock]]. Murdock puts Roartz in charge of Castle Edessa, deeper within the country, and leaves Arcardo in charge of Castle Remi at the Etrurian border. Galle expects the two Etrurians to die in battle should he and Murdock leave them alone, but Murdock says it would only be their own incompetence. Before the two depart, Murdock wishes to cross blades with Roy. | |||
After [[Roy]] | |||
Meanwhile, the [[Lycian Army]] has reformed together with the Etrurian forces into the newly named Etrurian Army, though it remains under Roy's leadership. With both Etruria and the [[Elimine Church]] on his side, Roy's forces head to Ilia to finally defeat the revolutionaries' leaders. Shortly before they reach Castle Remi, [[Yoder]] talks to Roy. He asks Roy to report to him if Roy discovers new information about Bern's [[Dragon#In Elibe|dragons]], and Roy promises to do so. After warning Roy to be careful, Yoder bids farewell to the Etrurian Army. | |||
As Galle predicted, Arcardo falls in battle against Roy. Merlinus pities Arcardo's death, and then notices Roy carrying the Fire Emblem. Roy says Princess [[Guinivere]] entrusted it to him with the hope to end the war through diplomacy. At that, Merlinus muses that she must have some faith in her brother, despite the rumors that [[Zephiel]] killed his own [[Desmond|father]]. This is shocking news to Roy, and he ponders asking Guinivere for more information. | |||
==Chapter data== | ==Chapter data== | ||
{{ | {{Tab | ||
|victory=Seize the | |tab1=Normal | ||
|tab2=Hard | |||
|content1={{ChapData | |||
|victory=Seize the castle gate | |||
|defeat=[[Roy]] dies | |||
|ally=1–14 | |||
|enemy=28{{h|+24|Reinforcements}} | |||
|map={{Tab | |||
|tab1=Initial | |||
|tab2=Turn 6 | |||
|content1=<div>[[File:Cm fe06 17A.png]]</div> | |||
|content2=<div>[[File:Cm fe06 17A turn 6.png]]</div> | |||
}} | |||
}} | |||
|content2={{ChapData | |||
|victory=Seize the castle gate | |||
|defeat=[[Roy]] dies | |defeat=[[Roy]] dies | ||
|ally= | |ally=1–14 | ||
|enemy=28{{h|+40|Reinforcements}} | |||
|enemy=28{{ | |map={{Tab | ||
|map=[[File:Cm fe06 17A.png]] | |tab1=Initial | ||
|tab2=Turn 6 | |||
|content1=<div>[[File:Cm fe06 17A.png]]</div> | |||
|content2=<div>[[File:Cm fe06 17A turn 6.png]]</div> | |||
}} | |||
}} | |||
}} | }} | ||
===Character data=== | At the start of turn 6, a sandbar in the sea will appear east of the armory, directly connecting the west to the north. | ||
{{ChapChars | |||
|game#=06 | ===Character data=== | ||
|return1= | {{ChapChars | ||
|return2= | |game#=06 | ||
|return3= | |forced1=roy | ||
|return4=lance | |return1=marcus | ||
| | |return2=alen | ||
| | |return3=bors | ||
| | |return4=wolt | ||
| | |return5=lance | ||
| | |return5article=Lance (character) | ||
|return9= | |return6=merlinus | ||
|return10= | |return7=elen | ||
|return11= | |return8=ward | ||
|return12= | |return8article=Ward (character) | ||
|return13= | |return9=lot | ||
|return14= | |return10=dieck | ||
|return15= | |return11=shanna | ||
|return16= | |return12=chad | ||
|return17= | |return13=lugh | ||
|return18= | |return14=clarine | ||
|return19= | |return15=rutger | ||
|return20= | |return16=saul | ||
|return21= | |return17=dorothy | ||
|return22= | |return18=sue | ||
|return23= | |return19=zelot | ||
|return24= | |return20=trec | ||
|return25= | |return21=noah | ||
|return26= | |return22=astolfo | ||
|return27= | |return23=lilina | ||
|return28= | |return24=gwendolyn | ||
|return29= | |return25=barthe | ||
|return30= | |return26=ogier | ||
|return31= | |return27=fir | ||
|return32= | |return28=sin | ||
|return33= | |return29=gonzalez | ||
|return34= | |return30=klein | ||
|return35= | |return31=thea | ||
|return36= | |return32=larum | ||
|return37= | |return33=echidna | ||
|return38= | |return34=elffin | ||
|return39= | |return35=bartre | ||
|return40= | |return36=geese | ||
|return41= | |return37=raigh | ||
|return38=cath | |||
|return39=melady | |||
|return40=perceval | |||
|return41=cecilia | |||
|return42=sophia | |return42=sophia | ||
|return43= | |return43=igrene | ||
|return44= | |return44=garret | ||
|return45= | |return45=fae | ||
|return46= | |return46=hugh | ||
|return47=zeiss | |return47=zeiss | ||
|return48 | |return48=douglas | ||
}} | |||
}} | |||
===Item data=== | ===Item data=== | ||
{{ChapItems | {{ChapItems | ||
|platform=gba | |platform=gba | ||
|item1= | |item1=Elixir | ||
|obtain1= | |obtain1=Steal from enemy [[Paladin]] | ||
|item2=Elixir | |item2=Elixir | ||
|obtain2=Steal from [[ | |obtain2=Steal from enemy [[Paladin]] | ||
|item3=Elixir | |item3=Elixir | ||
|obtain3=Steal from [[ | |obtain3=Steal from enemy [[Paladin]] | ||
|item4= | |item4=Vulnerary | ||
|obtain4=Steal from [[ | |obtain4=Steal from enemy [[Cavalier]] | ||
|item5=Vulnerary | |item5=Vulnerary | ||
|obtain5=Steal from [[ | |obtain5=Steal from enemy [[Cavalier]] | ||
|item6=Vulnerary | |item6=Vulnerary | ||
|obtain6=Steal from [[ | |obtain6=Steal from enemy [[Cavalier]] | ||
|item7=Vulnerary | |item7=Vulnerary | ||
|obtain7=Steal from [[ | |obtain7=Steal from enemy [[Archer]] | ||
|item8=Vulnerary | |item8=Vulnerary | ||
|obtain8=Steal from [[ | |obtain8=Steal from enemy [[Archer]] | ||
|item9=Vulnerary | |item9=Vulnerary | ||
|obtain9=Steal from [[ | |obtain9=Steal from enemy [[Archer]] | ||
| | |item10=Vulnerary | ||
| | |obtain10=Steal from enemy [[Cavalier]] (reinforcement; up to 8 <small>(Normal)</small> or 16 <small>(Hard)</small>) | ||
|item11=Vulnerary | |||
|obtain11=Steal from enemy [[Pegasus Knight]] (reinforcement; up to 12 <small>(Normal)</small> or 16 <small>(Hard)</small>) | |||
|itemlast=Tiena's Staff | |||
|obtainlast=Visit the [[village]] | |||
}} | }} | ||
===Shop data=== | ===Shop data=== | ||
{ | {{ChapShop GBA | ||
|sword1=Slim Sword | |||
|swcost1=480 | |||
|sword2=Iron Sword | |||
|swcost2=460 | |||
|sword3=Killing Edge | |||
|swcost3=1,300 | |||
|sword4=Iron Blade | |||
|swcost4=980 | |||
|lance1=Slim Lance | |||
|lacost1=450 | |||
|lance2=Iron Lance | |||
|lacost2=360 | |||
|lance3=Killer Lance | |||
|lacost3=1,200 | |||
|lance4=Javelin | |||
|lacost4=400 | |||
|axe1=Iron Axe | |||
|axcost1=270 | |||
|axe2=Killer Axe | |||
|axcost2=1,000 | |||
|axe3=Hand Axe | |||
|axcost3=300 | |||
|bow1=Iron Bow | |||
|bocost1=540 | |||
|bow2=Killer Bow | |||
|bocost2=1,400 | |||
}} | |||
===Enemy data=== | ===Enemy data=== | ||
{{ | :''Stats with two figures separated by a ~ are presented as a range, representing stats that vary due to random growths. The figures to the left and right of the ~ are the stat's minimum and maximum possible values respectively.'' | ||
|platform=gba | {{Tab | ||
| | |width=100% | ||
| | |tab1=Normal | ||
| | |tab2=Hard | ||
|#1= | |content1={{ChapUnitHdr|type=Enemy|platform=gba}} | ||
| | {{ChapUnitCellGBA | ||
|name=Etruria | |||
| | |class=Knight | ||
| | |lv=16 | ||
| | |#=1 | ||
| | |hp=27~31 | ||
| | |str=10~12 | ||
| | |skill=6~8 | ||
| | |spd=1~3 | ||
| | |lck=3~5 | ||
| | |def=12~14 | ||
| | |res=0~1 | ||
| | |con=13 | ||
|mov=4 | |||
| | |inventory={{Item|6|Horseslayer}} | ||
| | |notes=Moves to attack units in range. | ||
| | }} | ||
{{ChapUnitCellGBA | |||
| | |name=Etruria | ||
| | |class=Knight | ||
| | |lv=16 | ||
| | |#=1 | ||
| | |hp=27~31 | ||
|# | |str=10~12 | ||
| | |skill=6~8 | ||
| | |spd=1~3 | ||
| | |lck=3~5 | ||
| | |def=12~14 | ||
| | |res=0~1 | ||
| | |con=13 | ||
| | |mov=4 | ||
| | |inventory={{Item|6|Axereaver}} | ||
| | |notes=Moves to attack units in range. | ||
| | }} | ||
| | {{ChapUnitCellGBA | ||
|#7=2 | |name=Etruria | ||
| | |class=Mage | ||
| | |lv=17 | ||
| | |#=1 | ||
| | |hp=23~26 | ||
| | |str=8~11 | ||
|# | |skill=7~10 | ||
| | |spd=7~10 | ||
| | |lck=2~4 | ||
| | |def=3~4 | ||
| | |res=7~10 | ||
| | |con=6 | ||
| | |mov=5 | ||
| | |inventory={{Item|6|Elfire}} | ||
| | }} | ||
| | {{ChapUnitCellGBA | ||
| | |name=Etruria | ||
| | |class=Mage | ||
|# | |lv=17 | ||
| | |#=1 | ||
| | |hp=23~26 | ||
| | |str=8~11 | ||
| | |skill=7~10 | ||
| | |spd=7~10 | ||
| | |lck=2~4 | ||
| | |def=3~4 | ||
| | |res=7~10 | ||
| | |con=6 | ||
| | |mov=5 | ||
| | |inventory={{Item|6|Fimbulvetr}} | ||
| | }} | ||
| | {{ChapUnitCellGBA | ||
| | |name=Etruria | ||
| | |class=Mage | ||
| | |lv=16 | ||
| | |#=1 | ||
| | |hp=23~26 | ||
| | |str=8~11 | ||
| | |skill=7~9 | ||
| | |spd=7~9 | ||
| | |lck=2~4 | ||
| | |def=3~4 | ||
| | |res=7~9 | ||
| | |con=6 | ||
|mov=5 | |||
| | |inventory={{Item|6|Thunder}} | ||
| | }} | ||
| | {{ChapUnitCellGBA | ||
|# | |name=Etruria | ||
| | |class=Mage | ||
| | |lv=15 | ||
| | |#=1 | ||
| | |hp=22~25 | ||
| | |str=7~10 | ||
| | |skill=6~9 | ||
| | |spd=7~9 | ||
| | |lck=2~4 | ||
| | |def=3~4 | ||
| | |res=7~9 | ||
| | |con=6 | ||
| | |mov=5 | ||
| | |inventory={{Item|6|Thunder}} | ||
| | |notes=Does not move, except to heal. | ||
| | }} | ||
| | {{ChapUnitCellGBA | ||
| | |name=Etruria | ||
| | |class=Paladin | ||
| | |lv=5 | ||
| | |#=3 | ||
| | |hp=36~42 | ||
| | |str=11~15 | ||
| | |skill=9~13 | ||
| | |spd=9~12 | ||
| | |lck=4~8 | ||
| | |def=9~12 | ||
| | |res=5~8 | ||
| | |con=11 | ||
| | |mov=8 | ||
| | |inventory={{Item|6|Silver Lance}} • {{Item|6|Elixir}} | ||
| | |notes=• The southeast one moves to attack units in range.<br>• The northern one begins moving unprovoked when he can attack a unit within two turns. | ||
| | }} | ||
| | {{ChapUnitCellGBA | ||
| | |name=Etruria | ||
| | |class=Cavalier | ||
| | |lv=17 | ||
| | |#=1 | ||
| | |hp=30~34 | ||
| | |str=9~12 | ||
| | |skill=7~10 | ||
| | |spd=8~11 | ||
|lck=4~6 | |||
|def=8~9 | |||
| | |res=1~3 | ||
| | |con=9 | ||
| | |mov=7 | ||
|# | |inventory={{Item|6|Killer Lance}} | ||
| | |notes=Moves to attack units in range. | ||
| | }} | ||
| | {{ChapUnitCellGBA | ||
| | |name=Etruria | ||
| | |class=Cavalier | ||
| | |lv=17 | ||
| | |#=2 | ||
|hp=30~34 | |||
|str=9~12 | |||
|skill=7~10 | |||
|spd=8~11 | |||
|lck=4~6 | |||
|def=8~9 | |||
|res=1~3 | |||
|con=9 | |||
|mov=7 | |||
|inventory={{Item|6|Steel Lance}} • {{Item|6|Javelin}} | |||
|notes=The southeast one moves to attack units in range. | |||
}} | |||
{{ChapUnitCellGBA | |||
|name=Etruria | |||
|class=Cavalier | |||
|lv=16 | |||
|#=2 | |||
|hp=29~33 | |||
|str=9~11 | |||
|skill=7~9 | |||
|spd=8~10 | |||
|lck=3~6 | |||
|def=7~9 | |||
|res=1~3 | |||
|con=9 | |||
|mov=7 | |||
|inventory={{Item|6|Steel Lance}} • {{Item|6|Javelin}} | |||
|notes=• The southeast one moves to attack units in range.<br>• The northern one begins moving unprovoked when he can attack a unit within two turns. | |||
}} | |||
{{ChapUnitCellGBA | |||
|name=Etruria | |||
|class=Cavalier | |||
|lv=16 | |||
|#=1 | |||
|hp=29~33 | |||
|str=9~11 | |||
|skill=7~9 | |||
|spd=8~10 | |||
|lck=3~6 | |||
|def=7~9 | |||
|res=1~3 | |||
|con=9 | |||
|mov=7 | |||
|inventory={{Item|6|Steel Lance}} • {{Item|6|Vulnerary}} | |||
|notes=Moves to attack units in range. | |||
}} | |||
{{ChapUnitCellGBA | |||
|name=Etruria | |||
|class=Cavalier | |||
|lv=15 | |||
|#=1 | |||
|hp=29~32 | |||
|str=9~11 | |||
|skill=6~9 | |||
|spd=8~10 | |||
|lck=3~5 | |||
|def=7~9 | |||
|res=1~2 | |||
|con=9 | |||
|mov=7 | |||
|inventory={{Item|6|Killer Lance}} | |||
}} | |||
{{ChapUnitCellGBA | |||
|name=Etruria | |||
|class=Cavalier | |||
|lv=15 | |||
|#=2 | |||
|hp=29~32 | |||
|str=9~11 | |||
|skill=6~9 | |||
|spd=8~10 | |||
|lck=3~5 | |||
|def=7~9 | |||
|res=1~2 | |||
|con=9 | |||
|mov=7 | |||
|inventory={{Item|6|Steel Lance}} • {{Item|6|Javelin}} | |||
|notes=The northern one begins moving unprovoked when he can attack a unit within two turns. | |||
}} | |||
{{ChapUnitCellGBA | |||
|name=Etruria | |||
|class=Cavalier | |||
|lv=15 | |||
|#=2 | |||
|hp=29~32 | |||
|str=9~11 | |||
|skill=6~9 | |||
|spd=8~10 | |||
|lck=3~5 | |||
|def=7~9 | |||
|res=1~2 | |||
|con=9 | |||
|mov=7 | |||
|inventory={{Item|6|Steel Lance}} • {{Item|6|Vulnerary}} | |||
|notes=The northern one begins moving unprovoked when he can attack a unit within two turns. | |||
}} | |||
{{ChapUnitCellGBA | |||
|name=Etruria | |||
|class=Cavalier | |||
|lv=15 | |||
|#=1 | |||
|hp=29~32 | |||
|str=9~11 | |||
|skill=6~9 | |||
|spd=8~10 | |||
|lck=3~5 | |||
|def=7~9 | |||
|res=1~2 | |||
|con=9 | |||
|mov=7 | |||
|inventory={{Item|6|Axereaver}} | |||
|notes=Begins moving unprovoked when he can attack a unit within two turns. | |||
}} | |||
{{ChapUnitCellGBA | |||
|name=Etruria | |||
|class=Bishop | |||
|lv=6 | |||
|#=1 | |||
|hp=29~34 | |||
|str=10~14 | |||
|skill=9~12 | |||
|spd=7~11 | |||
|lck=7~12 | |||
|def=4~6 | |||
|res=15~20 | |||
|con=6 | |||
|mov=6 | |||
|inventory={{Item|6|Physic}} • {{Item|6|Purge}} | |||
}} | |||
{{ChapUnitCellGBA | |||
|name=Etruria | |||
|class=Bishop | |||
|lv=5 | |||
|#=1 | |||
|hp=29~34 | |||
|str=10~14 | |||
|skill=8~12 | |||
|spd=7~10 | |||
|lck=7~11 | |||
|def=4~6 | |||
|res=15~19 | |||
|con=6 | |||
|mov=6 | |||
|inventory={{Item|6|Physic}} • {{Item|6|Divine}} • {{Item|6|Sleep|link=Sleep (staff)}} | |||
|notes=Does not move. | |||
}} | |||
{{ChapUnitCellGBA | |||
|name=Etruria | |||
|class=Archer | |||
|lv=17 | |||
|#=3 | |||
|hp=27~31 | |||
|str=8~11 | |||
|skill=8~11 | |||
|spd=7~9 | |||
|lck=4~7 | |||
|def=5~6 | |||
|res=1~2 | |||
|con=7 | |||
|mov=5 | |||
|inventory={{Item|6|Steel Bow}} • {{Item|6|Vulnerary}} | |||
|notes=The two on islands move to attack units in range, and operate [[Ballista (weapon)|Ballista]]e. | |||
}} | |||
{{ChapUnitCellGBA | |||
|name=Etruria | |||
|class=Fighter | |||
|lv=17 | |||
|#=1 | |||
|hp=31~36 | |||
|str=12~15 | |||
|skill=6~9 | |||
|spd=8~10 | |||
|lck=2~3 | |||
|def=4~5 | |||
|res=1~2 | |||
|con=11 | |||
|mov=5 | |||
|inventory={{Item|6|Steel Axe}} | |||
}} | |||
{{ChapUnitCellGBA | |||
|name=[[Arcardo]] | |||
|class=Paladin | |||
|lv=10 | |||
|#=1 | |||
|hp=48 | |||
|str=20 | |||
|skill=14 | |||
|spd=13 | |||
|lck=13 | |||
|def=16 | |||
|res=10 | |||
|con=11 | |||
|mov=8 | |||
|inventory={{Item|6|Silver Lance}} • {{Item|6|Javelin}} | |||
|notes=Does not move; stands on the [[Terrain/Game Boy Advance games#Fire Emblem: The Binding Blade|gate]], the chapter's seize point. | |||
|last=y | |||
}} | |||
{{ChapUnitReinf|type=Enemy|platform=gba}} | |||
{{ChapUnitCellGBA | |||
|name=Etruria | |||
|class=Cavalier | |||
|lv=16 | |||
|#=4 | |||
|hp=29~33 | |||
|str=9~11 | |||
|skill=7~9 | |||
|spd=8~10 | |||
|lck=3~6 | |||
|def=7~9 | |||
|res=1~3 | |||
|con=9 | |||
|mov=7 | |||
|inventory={{Item|6|Steel Sword}} • {{Item|6|Vulnerary}} | |||
}} | |||
{{ChapUnitCellGBA | |||
|name=Etruria | |||
|class=Cavalier | |||
|lv=15 | |||
|#=4 | |||
|hp=29~32 | |||
|str=9~11 | |||
|skill=6~9 | |||
|spd=8~10 | |||
|lck=3~5 | |||
|def=7~9 | |||
|res=1~2 | |||
|con=9 | |||
|mov=7 | |||
|inventory={{Item|6|Steel Lance}} • {{Item|6|Vulnerary}} | |||
}} | |||
{{ChapUnitCellGBA | |||
|name=Etruria | |||
|class=Archer | |||
|lv=17 | |||
|#=4 | |||
|hp=27~31 | |||
|str=8~11 | |||
|skill=8~11 | |||
|spd=7~9 | |||
|lck=4~7 | |||
|def=5~6 | |||
|res=1~2 | |||
|con=7 | |||
|mov=5 | |||
|inventory={{Item|6|Steel Bow}} | |||
}} | |||
{{ChapUnitCellGBA | |||
|name=Etruria | |||
|class=Pegasus Knight | |||
|lv=13 | |||
|#=12 | |||
|hp=20~23 | |||
|str=7~9 | |||
|skill=9~11 | |||
|spd=9~11 | |||
|lck=3~5 | |||
|def=4~5 | |||
|res=4~6 | |||
|con=5 | |||
|mov=7 | |||
|inventory={{Item|6|Steel Lance}} • {{Item|6|Vulnerary}} | |||
|last=y | |||
}} | |||
{{ChapUnitFtr}} | |||
|content2={{ChapUnitHdr|type=Enemy|platform=gba}} | |||
{{ChapUnitCellGBA | |||
|name=Etruria | |||
|class=Knight | |||
|lv=16 | |||
|#=1 | |||
|hp=35~42 | |||
|str=14~18 | |||
|skill=9~13 | |||
|spd=2~6 | |||
|lck=5~9 | |||
|def=14~18 | |||
|res=0~2 | |||
|con=13 | |||
|mov=4 | |||
|inventory={{Item|6|Horseslayer}} | |||
|notes=Moves to attack units in range. | |||
}} | |||
{{ChapUnitCellGBA | |||
|name=Etruria | |||
|class=Knight | |||
|lv=16 | |||
|#=1 | |||
|hp=35~42 | |||
|str=14~18 | |||
|skill=9~13 | |||
|spd=2~6 | |||
|lck=5~9 | |||
|def=14~18 | |||
|res=0~2 | |||
|con=13 | |||
|mov=4 | |||
|inventory={{Item|6|Axereaver}} | |||
|notes=Moves to attack units in range. | |||
}} | |||
{{ChapUnitCellGBA | |||
|name=Etruria | |||
|class=Mage | |||
|lv=17 | |||
|#=1 | |||
|hp=28~34 | |||
|str=13~19 | |||
|skill=11~16 | |||
|spd=10~15 | |||
|lck=4~7 | |||
|def=3~5 | |||
|res=10~15 | |||
|con=6 | |||
|mov=5 | |||
|inventory={{Item|6|Elfire}} | |||
}} | |||
{{ChapUnitCellGBA | |||
|name=Etruria | |||
|class=Mage | |||
|lv=17 | |||
|#=1 | |||
|hp=28~34 | |||
|str=13~19 | |||
|skill=11~16 | |||
|spd=10~15 | |||
|lck=4~7 | |||
|def=3~5 | |||
|res=10~15 | |||
|con=6 | |||
|mov=5 | |||
|inventory={{Item|6|Fimbulvetr}} | |||
}} | |||
{{ChapUnitCellGBA | |||
|name=Etruria | |||
|class=Mage | |||
|lv=16 | |||
|#=1 | |||
|hp=28~34 | |||
|str=13~19 | |||
|skill=11~15 | |||
|spd=10~14 | |||
|lck=4~7 | |||
|def=3~5 | |||
|res=10~14 | |||
|con=6 | |||
|mov=5 | |||
|inventory={{Item|6|Thunder}} | |||
}} | |||
{{ChapUnitCellGBA | |||
|name=Etruria | |||
|class=Mage | |||
|lv=15 | |||
|#=1 | |||
|hp=27~33 | |||
|str=12~18 | |||
|skill=10~15 | |||
|spd=10~14 | |||
|lck=4~7 | |||
|def=3~5 | |||
|res=10~14 | |||
|con=6 | |||
|mov=5 | |||
|inventory={{Item|6|Thunder}} | |||
|notes=Does not move, except to heal. | |||
}} | |||
{{ChapUnitCellGBA | |||
|name=Etruria | |||
|class=Paladin | |||
|lv=5 | |||
|#=3 | |||
|hp=43~52 | |||
|str=13~19 | |||
|skill=12~18 | |||
|spd=10~15 | |||
|lck=6~12 | |||
|def=10~14 | |||
|res=6~11 | |||
|con=11 | |||
|mov=8 | |||
|inventory={{Item|6|Silver Lance}} • {{Item|6|Elixir}} | |||
|notes=• The southeast one moves to attack units in range.<br>• The northern one begins moving unprovoked when he can attack a unit within two turns. | |||
}} | |||
{{ChapUnitCellGBA | |||
|name=Etruria | |||
|class=Cavalier | |||
|lv=17 | |||
|#=1 | |||
|hp=37~45 | |||
|str=12~17 | |||
|skill=11~16 | |||
|spd=10~15 | |||
|lck=7~11 | |||
|def=9~12 | |||
|res=2~5 | |||
|con=9 | |||
|mov=7 | |||
|inventory={{Item|6|Killer Lance}} | |||
|notes=Moves to attack units in range. | |||
}} | |||
{{ChapUnitCellGBA | |||
|name=Etruria | |||
|class=Cavalier | |||
|lv=17 | |||
|#=2 | |||
|hp=37~45 | |||
|str=12~17 | |||
|skill=11~16 | |||
|spd=10~15 | |||
|lck=7~11 | |||
|def=9~12 | |||
|res=2~5 | |||
|con=9 | |||
|mov=7 | |||
|inventory={{Item|6|Steel Lance}} • {{Item|6|Javelin}} | |||
|notes=The southeast one moves to attack units in range. | |||
}} | |||
{{ChapUnitCellGBA | |||
|name=Etruria | |||
|class=Cavalier | |||
|lv=16 | |||
|#=2 | |||
|hp=36~44 | |||
|str=12~16 | |||
|skill=11~15 | |||
|spd=10~14 | |||
|lck=6~11 | |||
|def=8~12 | |||
|res=2~5 | |||
|con=9 | |||
|mov=7 | |||
|inventory={{Item|6|Steel Lance}} • {{Item|6|Javelin}} | |||
|notes=• The southeast one moves to attack units in range.<br>• The northern one begins moving unprovoked when he can attack a unit within two turns. | |||
}} | |||
{{ChapUnitCellGBA | |||
|name=Etruria | |||
|class=Cavalier | |||
|lv=16 | |||
|#=1 | |||
|hp=36~44 | |||
|str=12~16 | |||
|skill=11~15 | |||
|spd=10~14 | |||
|lck=6~11 | |||
|def=8~12 | |||
|res=2~5 | |||
|con=9 | |||
|mov=7 | |||
|inventory={{Item|6|Steel Lance}} • {{Item|6|Vulnerary}} | |||
|notes=Moves to attack units in range. | |||
}} | |||
{{ChapUnitCellGBA | |||
|name=Etruria | |||
|class=Cavalier | |||
|lv=15 | |||
|#=1 | |||
|hp=36~43 | |||
|str=12~16 | |||
|skill=10~15 | |||
|spd=10~14 | |||
|lck=6~10 | |||
|def=8~12 | |||
|res=2~4 | |||
|con=9 | |||
|mov=7 | |||
|inventory={{Item|6|Killer Lance}} | |||
}} | |||
{{ChapUnitCellGBA | |||
|name=Etruria | |||
|class=Cavalier | |||
|lv=15 | |||
|#=2 | |||
|hp=36~43 | |||
|str=12~16 | |||
|skill=10~15 | |||
|spd=10~14 | |||
|lck=6~10 | |||
|def=8~12 | |||
|res=2~4 | |||
|con=9 | |||
|mov=7 | |||
|inventory={{Item|6|Steel Lance}} • {{Item|6|Javelin}} | |||
|notes=The northern one begins moving unprovoked when he can attack a unit within two turns. | |||
}} | |||
{{ChapUnitCellGBA | |||
|name=Etruria | |||
|class=Cavalier | |||
|lv=15 | |||
|#=2 | |||
|hp=36~43 | |||
|str=12~16 | |||
|skill=10~15 | |||
|spd=10~14 | |||
|lck=6~10 | |||
|def=8~12 | |||
|res=2~4 | |||
|con=9 | |||
|mov=7 | |||
|inventory={{Item|6|Steel Lance}} • {{Item|6|Vulnerary}} | |||
|notes=The northern one begins moving unprovoked when he can attack a unit within two turns. | |||
}} | |||
{{ChapUnitCellGBA | |||
|name=Etruria | |||
|class=Cavalier | |||
|lv=15 | |||
|#=1 | |||
|hp=36~43 | |||
|str=12~16 | |||
|skill=10~15 | |||
|spd=10~14 | |||
|lck=6~10 | |||
|def=8~12 | |||
|res=2~4 | |||
|con=9 | |||
|mov=7 | |||
|inventory={{Item|6|Axereaver}} | |||
|notes=Begins moving unprovoked when he can attack a unit within two turns. | |||
}} | |||
{{ChapUnitCellGBA | |||
|name=Etruria | |||
|class=Bishop | |||
|lv=6 | |||
|#=1 | |||
|hp=33~41 | |||
|str=13~19 | |||
|skill=11~16 | |||
|spd=9~14 | |||
|lck=11~18 | |||
|def=4~8 | |||
|res=19~26 | |||
|con=6 | |||
|mov=6 | |||
|inventory={{Item|6|Physic}} • {{Item|6|Purge}} | |||
}} | |||
{{ChapUnitCellGBA | |||
|name=Etruria | |||
|class=Bishop | |||
|lv=5 | |||
|#=1 | |||
|hp=33~41 | |||
|str=13~19 | |||
|skill=10~16 | |||
|spd=9~13 | |||
|lck=11~17 | |||
|def=4~8 | |||
|res=19~25 | |||
|con=6 | |||
|mov=6 | |||
|inventory={{Item|6|Physic}} • {{Item|6|Divine}} • {{Item|6|Sleep|link=Sleep (staff)}} | |||
|notes=Does not move. | |||
}} | |||
{{ChapUnitCellGBA | |||
|name=Etruria | |||
|class=Archer | |||
|lv=17 | |||
|#=3 | |||
|hp=34~41 | |||
|str=11~16 | |||
|skill=12~17 | |||
|spd=10~14 | |||
|lck=7~12 | |||
|def=6~9 | |||
|res=2~4 | |||
|con=7 | |||
|mov=5 | |||
|inventory={{Item|6|Steel Bow}} • {{Item|6|Vulnerary}} | |||
|notes=The two on islands move to attack units in range, and operate [[Ballista (weapon)|Ballista]]e. | |||
}} | |||
{{ChapUnitCellGBA | |||
|name=Etruria | |||
|class=Fighter | |||
|lv=17 | |||
|#=1 | |||
|hp=39~48 | |||
|str=17~20 | |||
|skill=9~14 | |||
|spd=11~15 | |||
|lck=3~6 | |||
|def=5~8 | |||
|res=2~4 | |||
|con=11 | |||
|mov=5 | |||
|inventory={{Item|6|Steel Axe}} | |||
}} | |||
{{ChapUnitCellGBA | |||
|name=[[Arcardo]] | |||
|class=Paladin | |||
|lv=10 | |||
|#=1 | |||
|hp=55~58 | |||
|str=22~24 | |||
|skill=17~19 | |||
|spd=14~16 | |||
|lck=15~17 | |||
|def=17~18 | |||
|res=11~13 | |||
|con=11 | |||
|mov=8 | |||
|inventory={{Item|6|Silver Lance}} • {{Item|6|Javelin}} | |||
|notes=Does not move; stands on the [[Terrain/Game Boy Advance games#Fire Emblem: The Binding Blade|gate]], the chapter's seize point. | |||
|last=y | |||
}} | |||
{{ChapUnitReinf|type=Enemy|platform=gba}} | |||
{{ChapUnitCellGBA | |||
|name=Etruria | |||
|class=Cavalier | |||
|lv=16 | |||
|#=8 | |||
|hp=36~44 | |||
|str=12~16 | |||
|skill=11~15 | |||
|spd=10~14 | |||
|lck=6~11 | |||
|def=8~12 | |||
|res=2~5 | |||
|con=9 | |||
|mov=7 | |||
|inventory={{Item|6|Steel Sword}} • {{Item|6|Vulnerary}} | |||
}} | |||
{{ChapUnitCellGBA | |||
|name=Etruria | |||
|class=Cavalier | |||
|lv=15 | |||
|#=8 | |||
|hp=36~43 | |||
|str=12~16 | |||
|skill=10~15 | |||
|spd=10~14 | |||
|lck=6~10 | |||
|def=8~12 | |||
|res=2~4 | |||
|con=9 | |||
|mov=7 | |||
|inventory={{Item|6|Steel Lance}} • {{Item|6|Vulnerary}} | |||
}} | |||
{{ChapUnitCellGBA | |||
|name=Etruria | |||
|class=Archer | |||
|lv=17 | |||
|#=8 | |||
|hp=34~41 | |||
|str=11~16 | |||
|skill=12~17 | |||
|spd=10~14 | |||
|lck=7~12 | |||
|def=6~9 | |||
|res=2~4 | |||
|con=7 | |||
|mov=5 | |||
|inventory={{Item|6|Steel Bow}} | |||
}} | |||
{{ChapUnitCellGBA | |||
|name=Etruria | |||
|class=Pegasus Knight | |||
|lv=13 | |||
|#=16 | |||
|hp=26~32 | |||
|str=10~14 | |||
|skill=13~17 | |||
|spd=13~17 | |||
|lck=6~10 | |||
|def=5~7 | |||
|res=6~10 | |||
|con=5 | |||
|mov=7 | |||
|inventory={{Item|6|Steel Lance}} • {{Item|6|Vulnerary}} | |||
|last=y | |||
}} | |||
{{ChapUnitFtr}} | |||
}} | }} | ||
====Reinforcements==== | |||
*Enemy phase of turns 8 – 11 <small>(Normal Mode)</small>/15 <small>(Hard Mode)</small> | |||
**1 [[Cavalier]] with a [[Steel Sword]] from the upper fort south of the gate | |||
**1 Cavalier with a [[Steel Lance]] from the northernmost fort | |||
**1 [[Archer]] from the lower fort south of the gate | |||
*Enemy phase of turns 8 <small>(Hard Mode)</small>/10 <small>(Normal Mode)</small> – 15 | |||
**2 [[Pegasus Knight]]s from the southeast forts | |||
===Boss data=== | ===Boss data=== | ||
{{Main|Arcardo}} | {{Main|Arcardo}} | ||
:''Stats with two figures separated by a ~ are presented as a range, representing stats that vary due to random growths. The figures to the left and right of the ~ are the stat's minimum and maximum possible values respectively.''<ref>{{cite web|url=https://fe6.triangleattack.com/chapters/oceans_parting|title=Ocean's Parting|site=triangleattack.com|retrieved=December 24, 2020}}</ref> | |||
{{Tab | {{Tab | ||
|tab1=Normal | |tab1=Normal | ||
| Line 328: | Line 998: | ||
|content1={{BossStats FE6 | |content1={{BossStats FE6 | ||
|portrait=[[File:Portrait arcardo fe06.png]] | |portrait=[[File:Portrait arcardo fe06.png]] | ||
|sprite=paladin enemy | |||
|class=Paladin | |class=Paladin | ||
|lv=10 | |lv=10 | ||
|HP=48 | |HP=48 | ||
| Line 341: | Line 1,011: | ||
|con=11 | |con=11 | ||
|aid=14 | |aid=14 | ||
|inventory= | |inventory={{Item|6|Silver Axe}}<br>{{Item|6|Javelin}} | ||
|sw=y | |||
|la= | |la=y | ||
|ax= | |ax=y | ||
}} | }} | ||
|content2={{BossStats FE6 | |content2={{BossStats FE6 | ||
|portrait=[[File:Portrait arcardo fe06.png]] | |portrait=[[File:Portrait arcardo fe06.png]] | ||
|sprite=paladin enemy | |||
|class=Paladin | |class=Paladin | ||
|lv=10 | |lv=10 | ||
|HP= | |HP=55~58 | ||
|str= | |str=22~24 | ||
|skill= | |skill=17~19 | ||
|spd= | |spd=14~16 | ||
|luck= | |luck=15~17 | ||
|def=17 | |def=17~18 | ||
|res= | |res=11~13 | ||
|move=8 | |move=8 | ||
|con=11 | |con=11 | ||
|aid=14 | |aid=14 | ||
|inventory= | |inventory={{Item|6|Silver Axe}}<br>{{Item|6|Javelin}} | ||
|sw=y | |||
|la= | |la=y | ||
|ax= | |ax=y | ||
}} | }} | ||
}} | }} | ||
==Strategy== | |||
{{strategy}} | |||
This map features [[Ballista (weapon)|Ballista]]e, so avoid using flying units. However, if you possess the [[Delphi Shield]]—stolen from [[Narcian]] in an earlier chapter—it can offer protection. With that shield, you can target the [[Archer]]s on the isles. | |||
By turn 6 though, the tide will recede, revealing a passage as shown on the map above. Focus on moving your units towards this path as it is easier than navigating through the forest to reach the boss. Position your strongest, fastest, and most defensively robust, units at the forefront. They will shield your team from the onslaught of enemy [[Cavalier]]s and [[Paladin]]s. In fact, you can effectively block the emerging path with just a single unit. | |||
Remember to also set up a defense at the rear. Most enemies, excluding two groups of cavaliers, a paladin, and those near the boss, will advance from below. | |||
As you wait for the path to appear, visit the town. Purchase several "Killer" weapons. This shop is unique, offering these weapons earlier than most other locations in the game. These weapons can significantly boost your combat capabilities. Equipping a [[Swordmaster]] with a [[Killing Edge]] or a [[Berserker]] with a [[Killer Axe]] usually results in critical hits. | |||
Key pointers to keep in mind: | |||
* Monitor the [[Mage]]s' attack ranges. They pose a greater threat to your non-magical units. | |||
* The enemy [[Bishop]] wields a [[Sleep (staff)|Sleep]] staff. Bring a [[Restore]] staff to counteract this. | |||
* If you are willing to forgo some experience, station your units in forts to prevent enemy reinforcements. | |||
Lastly, when confronting the boss, either deploy a potent mage or use the killer weapons you purchased. | |||
==Trivia== | ==Trivia== | ||
* This chapter | *This chapter has a generic mage wielding [[Fimbulvetr]], a rare and powerful tome whose only other user is [[Brunnya]]. | ||
*In the DTN fan translation, this chapter's name consists of a bunch of glitchy tiles. | |||
==Etymology and other languages== | ==Etymology and other languages== | ||
{{Names | {{Names | ||
|eng-name=Ocean Road | |eng-name=Ocean Road | ||
|eng-mean=Used in [[Unused content in Fire Emblem: The Blazing Blade#The Binding Blade data transfer leftovers|leftover text from the data transfer menu]] in the English version of {{FE7}}. | |eng-mean=Used in [[Unused content in Fire Emblem: The Blazing Blade#The Binding Blade data transfer leftovers|leftover text from the data transfer menu]] in the English version of {{FE7}}. | ||
|eng-fan-name=Ocean's Parting | |eng-fan-name=Ocean's Parting | ||
| | |jpn-name={{h|海の道|Umi no michi}} | ||
|jpn-mean=Ocean Path | |||
| | |||
}} | }} | ||
==Gallery== | ==Gallery== | ||
<gallery> | <gallery> | ||
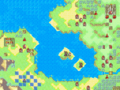
Cm fe06 17A.png|Map of the chapter | |||
Ci fe06 17 ilia dtn.png|The chapter's intro screen from the DTN version of the [[fan translation]] patch, showing this chapter's "name" in that version to be a bunch of glitchy tiles. | Ci fe06 17 ilia dtn.png|The chapter's intro screen from the DTN version of the [[fan translation]] patch, showing this chapter's "name" in that version to be a bunch of glitchy tiles. | ||
</gallery> | </gallery> | ||
{{refbar}} | |||
{{ChapterNav | {{ChapterNav | ||
|prechapter=Storming the Capital | |prechapter=Storming the Capital | ||
|prealternate=The Glorious Ascension | |prealternate=The Glorious Ascension{{!}}The Glorious Ascension <small>(side quest)</small> | ||
|nextchapter=The Frozen River | |nextchapter=The Frozen River | ||
}} | }} | ||
Revision as of 23:11, 22 January 2024
| ||||||||
|

| “ | This land of Remi... At a certain time of the day, the sea level drops, exposing a sand bar that can be crossed. | ” | — Yoder to Roy |
|---|
Ocean's Parting (Japanese: 海の道 Ocean path) is Chapter 17A of Fire Emblem: The Binding Blade. In order to play this chapter (and the rest of the Ilia route for Chapters 18, 19, 20, and 20x), the combined experience of Shanna and Thea must be higher than or equal to the combined experience of Sue and Sin by the end of Chapter 16 or 16x. Otherwise, The Bishop's Teachings and the Sacae route will be played instead.
Plot
- Main article:
Ocean's Parting/Script
After Roy captures Aquileia, the revolutionary forces, including their leaders Roartz and Arcardo, are chased out of Etruria. They join with Bern's army and flee to Ilia. Roartz and Murdock meet with the Wyvern Generals Galle and Murdock. Murdock puts Roartz in charge of Castle Edessa, deeper within the country, and leaves Arcardo in charge of Castle Remi at the Etrurian border. Galle expects the two Etrurians to die in battle should he and Murdock leave them alone, but Murdock says it would only be their own incompetence. Before the two depart, Murdock wishes to cross blades with Roy.
Meanwhile, the Lycian Army has reformed together with the Etrurian forces into the newly named Etrurian Army, though it remains under Roy's leadership. With both Etruria and the Elimine Church on his side, Roy's forces head to Ilia to finally defeat the revolutionaries' leaders. Shortly before they reach Castle Remi, Yoder talks to Roy. He asks Roy to report to him if Roy discovers new information about Bern's dragons, and Roy promises to do so. After warning Roy to be careful, Yoder bids farewell to the Etrurian Army.
As Galle predicted, Arcardo falls in battle against Roy. Merlinus pities Arcardo's death, and then notices Roy carrying the Fire Emblem. Roy says Princess Guinivere entrusted it to him with the hope to end the war through diplomacy. At that, Merlinus muses that she must have some faith in her brother, despite the rumors that Zephiel killed his own father. This is shocking news to Roy, and he ponders asking Guinivere for more information.
Chapter data
Normal Hard
| ||||||
|
| |||||
| Victory: Seize the castle gate | Player | Enemy | ||||
|---|---|---|---|---|---|---|
| Defeat: Roy dies | 1–14 | 28+24 | ||||
| ||||||

At the start of turn 6, a sandbar in the sea will appear east of the armory, directly connecting the west to the north.
Character data
| Characters | |
|---|---|
New units
| |
| |
Required characters
| |
Available characters
| |
Item data
| |||||||||||||||||||||||||||||||||||||||
|
Shop data
Swords Lances Axes Bows Anima Light Dark Staves Items Secret
| Name | Cost | |
|---|---|---|
| Slim Sword | 480 | |
| Iron Sword | 460 | |
| Killing Edge | 1,300 | |
| Iron Blade | 980 |
Enemy data
- Stats with two figures separated by a ~ are presented as a range, representing stats that vary due to random growths. The figures to the left and right of the ~ are the stat's minimum and maximum possible values respectively.
Normal Hard
| |||||||||||||||||||||||||||||||||||||||||||||||||||||||||||||||||||||||||||||||||||||||||||||||||||||||||||||||||||||||||||||||||||||||||||||||||||||||||||||||||||||||||||||||||||||||||||||||||||||||||||||||||||||||||||||||||||||||||||||||||||||||||||||||||||||||||||||||||||||||||||||||||||||||||||||||||||||||||||||||||||||||||||||||||||||||||||||||||||||||||||||||||||||||||||||||||||||||||||||||||||||||||||||||||||||||||||||||||||||||||||||||||||||||||||||||||||||||||||||||||||||||||||||||||||||||||||||||||||||||||||||||||||||||||||||||||||||||||||
| |||||||||||||||||||||||||||||||||||||||||||||||||||||||||||||||||||||||||||||||||||||||||||||||||||||||||||||||||||||||||||||||||||||||||||||||||||||||||||||||||||||||||||||||||||||||||||||||||||||||||||||||||||||||||||||||||||||||||||||||||||||||||||||||||||||||||||||||||||||||||||||||||||||||||||||||||||||||||||||||||||||||||||||||||||||||||||||||||||||||||||||||||||||||||||||||||||||||||||||||||||||||||||||||||||||||||||||||||||||||||||||||||||||||||||||||||||||||||||||||||||||||||||||||||||||||||||||||||||||||||||||||||||||||||||||||||||||||||||
| |||||||||||||||||||||||||||||||||||||||||||||||||||||||||||||||||||||||||||||||||||||||||||||||||||||||||||||||||||||||||||||||||||||||||||||||||||||||||||||||||||||||||||||||||||||||||||||||||||||||||||||||||||||||||||||||||||||||||||||||||||||||||||||||||||||||||||||||||||||||||||||||||||||||||||||||||||||||||||||||||||||||||||||||||||||||||||||||||||||||||||||||||||||||||||||||||||||||||||||||||||||||||||||||||||||||||||||||||||||||||||||||||||||||||||||||||||||||||||||||||||||||||||||||||||||||||||||||||||||||||||||||||||||||||||||||||||||||||||
| |||||||||||||||||||||||||||||||||||||||||||||||||||||||||||||||||||||||||||||||||||||||||||||||||||||||||||||||||||||||||||||||||||||||||||||||||||||||||||||||||||||||||||||||||||||||||||||||||||||||||||||||||||||||||||||||||||||||||||||||||||||||||||||||||||||||||||||||||||||||||||||||||||||||||||||||||||||||||||||||||||||||||||||||||||||||||||||||||||||||||||||||||||||||||||||||||||||||||||||||||||||||||||||||||||||||||||||||||||||||||||||||||||||||||||||||||||||||||||||||||||||||||||||||||||||||||||||||||||||||||||||||||||||||||||||||||||||||||||
Reinforcements
- Enemy phase of turns 8 – 11 (Normal Mode)/15 (Hard Mode)
- 1 Cavalier with a Steel Sword from the upper fort south of the gate
- 1 Cavalier with a Steel Lance from the northernmost fort
- 1 Archer from the lower fort south of the gate
- Enemy phase of turns 8 (Hard Mode)/10 (Normal Mode) – 15
- 2 Pegasus Knights from the southeast forts
Boss data
- Main article:
Arcardo - Stats with two figures separated by a ~ are presented as a range, representing stats that vary due to random growths. The figures to the left and right of the ~ are the stat's minimum and maximum possible values respectively.[1]
Normal Hard
|
|
| |||||||||||||||||||||||||||||||||||||||||||||||||

Strategy
| This section details unofficial strategies that may help with completion of the chapter. This may not work for everybody. |
This map features Ballistae, so avoid using flying units. However, if you possess the Delphi Shield—stolen from Narcian in an earlier chapter—it can offer protection. With that shield, you can target the Archers on the isles.
By turn 6 though, the tide will recede, revealing a passage as shown on the map above. Focus on moving your units towards this path as it is easier than navigating through the forest to reach the boss. Position your strongest, fastest, and most defensively robust, units at the forefront. They will shield your team from the onslaught of enemy Cavaliers and Paladins. In fact, you can effectively block the emerging path with just a single unit.
Remember to also set up a defense at the rear. Most enemies, excluding two groups of cavaliers, a paladin, and those near the boss, will advance from below.
As you wait for the path to appear, visit the town. Purchase several "Killer" weapons. This shop is unique, offering these weapons earlier than most other locations in the game. These weapons can significantly boost your combat capabilities. Equipping a Swordmaster with a Killing Edge or a Berserker with a Killer Axe usually results in critical hits.
Key pointers to keep in mind:
- Monitor the Mages' attack ranges. They pose a greater threat to your non-magical units.
- The enemy Bishop wields a Sleep staff. Bring a Restore staff to counteract this.
- If you are willing to forgo some experience, station your units in forts to prevent enemy reinforcements.
Lastly, when confronting the boss, either deploy a potent mage or use the killer weapons you purchased.
Trivia
- This chapter has a generic mage wielding Fimbulvetr, a rare and powerful tome whose only other user is Brunnya.
- In the DTN fan translation, this chapter's name consists of a bunch of glitchy tiles.
Etymology and other languages
| Names, etymology, and in other regions | ||
|---|---|---|
| Language | Name | Definition, etymology, and notes |
| English |
Ocean Road |
Used in leftover text from the data transfer menu in the English version of Fire Emblem: The Blazing Blade. |
| English (unofficial) |
Ocean's Parting |
-- |
| Japanese |
海の道 |
Ocean Path |
Gallery
Map of the chapter
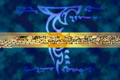
The chapter's intro screen from the DTN version of the fan translation patch, showing this chapter's "name" in that version to be a bunch of glitchy tiles.

References
- ↑ Ocean's Parting, triangleattack.com, Retrieved: December 24, 2020
| ← Storming the Capital • ← The Glorious Ascension (side quest) • |
Ocean's Parting | • The Frozen River → |
|---|