| Site News |
|---|
| Warning: This wiki contains spoilers. Read at your own risk! Social media: If you would like, please join our Discord server, and/or follow us on Twitter (X) or Tumblr! |
Land of Sorrow (Gaiden)/Fight at the Dragon's Maw: Difference between revisions
(FE15 data) |
|||
| (24 intermediate revisions by 9 users not shown) | |||
| Line 1: | Line 1: | ||
{{ | {{DISPLAYTITLE:Land of Sorrow (''Gaiden'')/Fight at the Dragon's Maw}} | ||
{{Chapter Infobox | {{Chapter Infobox | ||
|title=Fight at the Dragon's Maw | |title=Fight at the Dragon's Maw | ||
|image=[[File:Cm fe02 c4 m07 alm.png|200px]] | |image=[[File:Cm fe02 c4 m07 alm.png|200px]] | ||
|location=The | |location=The Dragon's Maw | ||
| | |previous=[[Land of Sorrow (Gaiden)/Rigel Plains Battle|Rigel Plains Battle]] | ||
| | |next=[[Land of Sorrow (Gaiden)/Rigel Falls Battle|Rigel Falls Battle]] | ||
}} | }} | ||
'''Fight at the Dragon's Maw''' (Japanese: {{ | |||
'''Fight at the Dragon's Maw''' (Japanese: {{hl|竜の火口迎撃戦|Ryū no kakō geigekisen}} ''Counter-attack at the Dragon Crater'') is the seventh map of the fourth act of [[Alm]]'s route in {{FE2}} and {{FE15}}. | |||
==Map data== | ==Map data== | ||
{{ | {{Tab | ||
|default=2 | |||
|tab1=''Gaiden'' | |||
|tab2=''Echoes: Shadows of Valentia'' | |||
|content1={{ChapData | |||
|victory=Rout the enemy | |victory=Rout the enemy | ||
|defeat=[[Alm]] dies | |defeat=[[Alm]] dies | ||
|ally= | |ally=15 | ||
|enemy=Varies | |enemy=Varies | ||
|map=[[File:Cm fe02 c4 m07 alm.png|200px]] | |map=[[File:Cm fe02 c4 m07 alm.png|200px]] | ||
}} | |||
|content2={{ChapData | |||
|victory=Rout the enemy | |||
|defeat=[[Alm]] dies | |||
|ally=1–16 | |||
|enemy=Varies | |||
|col=30 | |||
|row=20 | |||
}} | |||
}} | }} | ||
===Character data=== | ===Character data=== | ||
{{Tab | {{Tab | ||
|width=100% | |default=2 | ||
|width=100% | |||
|tab1=''Gaiden'' | |tab1=''Gaiden'' | ||
|tab2=''Echoes: Shadows of Valentia'' | |tab2=''Echoes: Shadows of Valentia'' | ||
|content1={{ChapChars | |content1={{ChapChars | ||
|game#=02 | |game#=02 | ||
|return1=alm | |forced1=alm | ||
|return2= | |return1=lukas | ||
|return3= | |return2=gray | ||
|return4= | |return3=tobin | ||
|return5= | |return4=kliff | ||
|return5=silque | |||
|return6=clair | |||
|return7=clive | |||
|return8=forsyth | |||
|return9=python | |||
|return10=luthier | |||
|return11=mathilda | |||
|return12=delthea | |||
|return13=tatiana | |||
|return14=zeke | |||
}} | |||
|content2={{ChapChars | |||
|game#=15 | |||
|forced1=alm | |||
|return1=lukas | |||
|return2=gray | |||
|return3=tobin | |||
|return4=kliff | |||
|return5=faye | |||
|return6=silque | |return6=silque | ||
|return7=clair | |return7=clair | ||
| Line 41: | Line 74: | ||
|return14=tatiana | |return14=tatiana | ||
|return15=zeke | |return15=zeke | ||
}} | |||
}} | |||
}} | |||
}} | |||
===Enemy data=== | ===Enemy data=== | ||
| Line 72: | Line 86: | ||
|tab4=Battle #4 | |tab4=Battle #4 | ||
|tab5=Battle #5 | |tab5=Battle #5 | ||
|tab6=Battle #6{{ | |tab6=Battle #6 onward | ||
| | |content1={{ChapUnitHdr|type=Enemy|platform=nes02}} | ||
| | {{ChapUnitCellFE2 | ||
| | |name=Necrodragon | ||
| | |class=Necrodragon | ||
| | |lv=7 | ||
|# | |#=1 | ||
| | |hp=49 | ||
| | |str=18 | ||
| | |skill=4 | ||
| | |spd=8 | ||
| | |lck=0 | ||
|# | |def=15 | ||
| | |res=12 | ||
|mov=8 | |||
}} | |||
{{ChapUnitCellFE2 | |||
|name=Necrodragon | |||
|class=Necrodragon | |||
|lv=5 | |||
|#=4 | |||
|hp=46 | |||
|str=17 | |||
|skill=3 | |||
|spd=7 | |||
|lck=0 | |||
|def=14 | |||
|res=12 | |||
|mov=8 | |||
|last=y | |||
}} | |||
{{ChapUnitFtr}} | |||
|content2={{ChapUnitHdr|type=Enemy|platform=nes02}} | |||
{{ChapUnitCellFE2 | |||
|name=Necrodragon | |||
|class=Necrodragon | |||
|lv=8 | |||
|#=1 | |||
|hp=49 | |||
|str=18 | |||
|skill=4 | |||
|spd=8 | |||
|lck=0 | |||
|def=15 | |||
|res=12 | |||
|mov=8 | |||
}} | }} | ||
{{ChapUnitCellFE2 | |||
| | |name=Necrodragon | ||
|class=Necrodragon | |||
| | |lv=5 | ||
| | |#=6 | ||
|# | |hp=46 | ||
| | |str=17 | ||
| | |skill=3 | ||
| | |spd=7 | ||
| | |lck=0 | ||
| | |def=14 | ||
| | |res=12 | ||
| | |mov=8 | ||
|last=y | |||
}} | }} | ||
|content3={{ | {{ChapUnitFtr}} | ||
|platform=nes02 | |content3={{ChapUnitHdr|type=Enemy|platform=nes02}} | ||
| | {{ChapUnitCellFE2 | ||
| | |name=Necrodragon | ||
| | |class=Necrodragon | ||
|#1= | |lv=9 | ||
| | |#=1 | ||
| | |hp=52 | ||
| | |str=19 | ||
| | |skill=5 | ||
| | |spd=9 | ||
| | |lck=0 | ||
| | |def=16 | ||
|res=12 | |||
|mov=8 | |||
}} | }} | ||
{{ChapUnitCellFE2 | |||
| | |name=Necrodragon | ||
| | |class=Necrodragon | ||
| | |lv=5 | ||
| | |#=9 | ||
| | |hp=46 | ||
| | |str=17 | ||
| | |skill=3 | ||
| | |spd=7 | ||
| | |lck=0 | ||
| | |def=14 | ||
| | |res=12 | ||
| | |mov=8 | ||
|last=y | |||
}} | }} | ||
| | {{ChapUnitFtr}} | ||
|platform=nes02 | |content4={{ChapUnitHdr|type=Enemy|platform=nes02}} | ||
| | {{ChapUnitCellFE2 | ||
| | |name=Necrodragon | ||
| | |class=Necrodragon | ||
|#1= | |lv=10 | ||
| | |#=1 | ||
| | |hp=52 | ||
| | |str=19 | ||
| | |skill=5 | ||
| | |spd=9 | ||
| | |lck=0 | ||
| | |def=16 | ||
|res=12 | |||
|mov=8 | |||
}} | }} | ||
{{ChapUnitCellFE2 | |||
| | |name=Necrodragon | ||
| | |class=Necrodragon | ||
| | |lv=5 | ||
| | |#=12 | ||
| | |hp=46 | ||
| | |str=17 | ||
| | |skill=3 | ||
| | |spd=7 | ||
| | |lck=0 | ||
| | |def=14 | ||
| | |res=12 | ||
| | |mov=8 | ||
|last=y | |||
}} | }} | ||
{{ChapUnitFtr}} | |||
|content5={{ChapUnitHdr|type=Enemy|platform=nes02}} | |||
{{ChapUnitCellFE2 | |||
|name=Necrodragon | |||
|class=Necrodragon | |||
|lv=10 | |||
|#=1 | |||
|hp=52 | |||
|str=19 | |||
|skill=5 | |||
|spd=9 | |||
|lck=0 | |||
|def=16 | |||
|res=12 | |||
|mov=8 | |||
}} | |||
{{ChapUnitCellFE2 | |||
|name=Necrodragon | |||
|class=Necrodragon | |||
|lv=5 | |||
|#=15 | |||
|hp=46 | |||
|str=17 | |||
|skill=3 | |||
|spd=7 | |||
|lck=0 | |||
|def=14 | |||
|res=12 | |||
|mov=8 | |||
|last=y | |||
}} | |||
{{ChapUnitFtr}} | |||
|content6={{ChapUnitHdr|type=Enemy|platform=nes02}} | |||
{{ChapUnitCellFE2 | |||
|name=Necrodragon | |||
|class=Necrodragon | |||
|lv=10 | |||
|#=1 | |||
|hp=52 | |||
|str=19 | |||
|skill=5 | |||
|spd=9 | |||
|lck=0 | |||
|def=16 | |||
|res=12 | |||
|mov=8 | |||
}} | |||
{{ChapUnitCellFE2 | |||
|name=Necrodragon | |||
|class=Necrodragon | |||
|lv=5 | |||
|#=19 | |||
|hp=46 | |||
|str=17 | |||
|skill=3 | |||
|spd=7 | |||
|lck=0 | |||
|def=14 | |||
|res=12 | |||
|mov=8 | |||
|last=y | |||
}} | |||
{{ChapUnitFtr}} | |||
}} | }} | ||
| Line 162: | Line 278: | ||
{{Tab | {{Tab | ||
|width=100% | |width=100% | ||
|tab1=Battle #1 | |tab1=Battle #1, Normal | ||
|tab2=Battle #2 | |tab2=Battle #1, Hard | ||
| | |tab3=Battle #2, Normal | ||
| | |tab4=Battle #2, Hard | ||
| | |tab5=Battle #3, Normal | ||
| | |tab6=Battle #3, Hard | ||
| | |tab7=Battle #4, Normal | ||
|platform=3ds03 | |tab8=Battle #4, Hard | ||
| | |tab9=Battle #5, Normal | ||
| | |tab10=Battle #5, Hard | ||
| | |tab11=Battle #6 onward, Normal | ||
|#1=4 | |tab12=Battle #6 onward, Hard | ||
| | |content1={{ChapUnitHdr|type=Enemy|platform=3ds03}} | ||
|- | {{ChapUnitCellFE15 | ||
| | |name=Terrors | ||
| | |class=Necrodragon | ||
| | |lv=7 | ||
|# | |#=1 | ||
| | |hp=47 | ||
|atk=18 | |||
|skill=3 | |||
|spd=7 | |||
|lck=0 | |||
|def=15 | |||
|res=13 | |||
|mov=8 | |||
|inventory=--<br>{{Item|15|Fangs|image=monster forecast}} | |||
}} | |||
{{ChapUnitCellFE15 | |||
|name=Terrors | |||
|class=Necrodragon | |||
|lv=5 | |||
|#=4 | |||
|hp=45 | |||
|atk=17 | |||
|skill=2 | |||
|spd=6 | |||
|lck=0 | |||
|def=14 | |||
|res=13 | |||
|mov=8 | |||
|inventory=--<br>{{Item|15|Fangs|image=monster forecast}} | |||
|last=y | |||
}} | |||
{{ChapUnitFtr}} | |||
|content2={{ChapUnitHdr|type=Enemy|platform=3ds03}} | |||
{{ChapUnitCellFE15 | |||
|name=Terrors | |||
|class=Necrodragon | |||
|lv=10 | |||
|#=1 | |||
|hp=51 | |||
|atk=20 | |||
|skill=4 | |||
|spd=8 | |||
|lck=0 | |||
|def=16 | |||
|res=14 | |||
|mov=8 | |||
|inventory=--<br>{{Item|15|Fangs|image=monster forecast}} | |||
}} | |||
{{ChapUnitCellFE15 | |||
|name=Terrors | |||
|class=Necrodragon | |||
|lv=7 | |||
|#=4 | |||
|hp=47 | |||
|atk=18 | |||
|skill=3 | |||
|spd=7 | |||
|lck=0 | |||
|def=15 | |||
|res=13 | |||
|mov=8 | |||
|inventory=--<br>{{Item|15|Fangs|image=monster forecast}} | |||
|last=y | |||
}} | |||
{{ChapUnitFtr}} | |||
|content3={{ChapUnitHdr|type=Enemy|platform=3ds03}} | |||
{{ChapUnitCellFE15 | |||
|name=Terrors | |||
|class=Necrodragon | |||
|lv=8 | |||
|#=1 | |||
|hp=48 | |||
|atk=19 | |||
|skill=3 | |||
|spd=7 | |||
|lck=0 | |||
|def=15 | |||
|res=13 | |||
|mov=8 | |||
|inventory=--<br>{{Item|15|Fangs|image=monster forecast}} | |||
}} | |||
{{ChapUnitCellFE15 | |||
|name=Terrors | |||
|class=Necrodragon | |||
|lv=5 | |||
|#=6 | |||
|hp=45 | |||
|atk=17 | |||
|skill=2 | |||
|spd=6 | |||
|lck=0 | |||
|def=14 | |||
|res=13 | |||
|mov=8 | |||
|inventory=--<br>{{Item|15|Fangs|image=monster forecast}} | |||
|last=y | |||
}} | |||
{{ChapUnitFtr}} | |||
|content4={{ChapUnitHdr|type=Enemy|platform=3ds03}} | |||
{{ChapUnitCellFE15 | |||
|name=Terrors | |||
|class=Necrodragon | |||
|lv=12 | |||
|#=1 | |||
|hp=53 | |||
|atk=21 | |||
|skill=4 | |||
|spd=8 | |||
|lck=0 | |||
|def=17 | |||
|res=14 | |||
|mov=8 | |||
|inventory=--<br>{{Item|15|Fangs|image=monster forecast}} | |||
}} | |||
{{ChapUnitCellFE15 | |||
|name=Terrors | |||
|class=Necrodragon | |||
|lv=7 | |||
|#=6 | |||
|hp=47 | |||
|atk=18 | |||
|skill=3 | |||
|spd=7 | |||
|lck=0 | |||
|def=15 | |||
|res=13 | |||
|mov=8 | |||
|inventory=--<br>{{Item|15|Fangs|image=monster forecast}} | |||
|last=y | |||
}} | |||
{{ChapUnitFtr}} | |||
|content5={{ChapUnitHdr|type=Enemy|platform=3ds03}} | |||
{{ChapUnitCellFE15 | |||
|name=Terrors | |||
|class=Necrodragon | |||
|lv=9 | |||
|#=1 | |||
|hp=50 | |||
|atk=19 | |||
|skill=3 | |||
|spd=7 | |||
|lck=0 | |||
|def=16 | |||
|res=14 | |||
|mov=8 | |||
|inventory=--<br>{{Item|15|Fangs|image=monster forecast}} | |||
}} | |||
{{ChapUnitCellFE15 | |||
|name=Terrors | |||
|class=Necrodragon | |||
|lv=5 | |||
|#=9 | |||
|hp=45 | |||
|atk=17 | |||
|skill=2 | |||
|spd=6 | |||
|lck=0 | |||
|def=14 | |||
|res=13 | |||
|mov=8 | |||
|inventory=--<br>{{Item|15|Fangs|image=monster forecast}} | |||
|last=y | |||
}} | |||
{{ChapUnitFtr}} | |||
|content6={{ChapUnitHdr|type=Enemy|platform=3ds03}} | |||
{{ChapUnitCellFE15 | |||
|name=Terrors | |||
|class=Necrodragon | |||
|lv=14 | |||
|#=1 | |||
|hp=56 | |||
|atk=22 | |||
|skill=5 | |||
|spd=9 | |||
|lck=0 | |||
|def=18 | |||
|res=15 | |||
|mov=8 | |||
|inventory=--<br>{{Item|15|Fangs|image=monster forecast}} | |||
}} | |||
{{ChapUnitCellFE15 | |||
|name=Terrors | |||
|class=Necrodragon | |||
|lv=7 | |||
|#=9 | |||
|hp=47 | |||
|atk=18 | |||
|skill=3 | |||
|spd=7 | |||
|lck=0 | |||
|def=15 | |||
|res=13 | |||
|mov=8 | |||
|inventory=--<br>{{Item|15|Fangs|image=monster forecast}} | |||
|last=y | |||
}} | |||
{{ChapUnitFtr}} | |||
|content7={{ChapUnitHdr|type=Enemy|platform=3ds03}} | |||
{{ChapUnitCellFE15 | |||
|name=Terrors | |||
|class=Necrodragon | |||
|lv=10 | |||
|#=1 | |||
|hp=51 | |||
|atk=20 | |||
|skill=4 | |||
|spd=8 | |||
|lck=0 | |||
|def=16 | |||
|res=14 | |||
|mov=8 | |||
|inventory=--<br>{{Item|15|Fangs|image=monster forecast}} | |||
}} | |||
{{ChapUnitCellFE15 | |||
|name=Terrors | |||
|class=Necrodragon | |||
|lv=5 | |||
|#=12 | |||
|hp=45 | |||
|atk=17 | |||
|skill=2 | |||
|spd=6 | |||
|lck=0 | |||
|def=14 | |||
|res=13 | |||
|mov=8 | |||
|inventory=--<br>{{Item|15|Fangs|image=monster forecast}} | |||
|last=y | |||
}} | |||
{{ChapUnitFtr}} | |||
|content8={{ChapUnitHdr|type=Enemy|platform=3ds03}} | |||
{{ChapUnitCellFE15 | |||
|name=Terrors | |||
|class=Necrodragon | |||
|lv=16 | |||
|#=1 | |||
|hp=58 | |||
|atk=23 | |||
|skill=6 | |||
|spd=10 | |||
|lck=0 | |||
|def=19 | |||
|res=15 | |||
|mov=8 | |||
|inventory=--<br>{{Item|15|Fangs|image=monster forecast}} | |||
}} | |||
{{ChapUnitCellFE15 | |||
|name=Terrors | |||
|class=Necrodragon | |||
|lv=7 | |||
|#=12 | |||
|hp=47 | |||
|atk=18 | |||
|skill=3 | |||
|spd=7 | |||
|lck=0 | |||
|def=15 | |||
|res=13 | |||
|mov=8 | |||
|inventory=--<br>{{Item|15|Fangs|image=monster forecast}} | |||
|last=y | |||
}} | |||
{{ChapUnitFtr}} | |||
|content9={{ChapUnitHdr|type=Enemy|platform=3ds03}} | |||
{{ChapUnitCellFE15 | |||
|name=Terrors | |||
|class=Necrodragon | |||
|lv=10 | |||
|#=1 | |||
|hp=51 | |||
|atk=20 | |||
|skill=4 | |||
|spd=8 | |||
|lck=0 | |||
|def=16 | |||
|res=14 | |||
|mov=8 | |||
|inventory=--<br>{{Item|15|Fangs|image=monster forecast}} | |||
}} | |||
{{ChapUnitCellFE15 | |||
|name=Terrors | |||
|class=Necrodragon | |||
|lv=5 | |||
|#=15 | |||
|hp=45 | |||
|atk=17 | |||
|skill=2 | |||
|spd=6 | |||
|lck=0 | |||
|def=14 | |||
|res=13 | |||
|mov=8 | |||
|inventory=--<br>{{Item|15|Fangs|image=monster forecast}} | |||
|last=y | |||
}} | |||
{{ChapUnitFtr}} | |||
|content10={{ChapUnitHdr|type=Enemy|platform=3ds03}} | |||
{{ChapUnitCellFE15 | |||
|name=Terrors | |||
|class=Necrodragon | |||
|lv=16 | |||
|#=1 | |||
|hp=58 | |||
|atk=23 | |||
|skill=6 | |||
|spd=10 | |||
|lck=0 | |||
|def=19 | |||
|res=15 | |||
|mov=8 | |||
|inventory=--<br>{{Item|15|Fangs|image=monster forecast}} | |||
}} | }} | ||
{{ChapUnitCellFE15 | |||
|name=Terrors | |||
| | |class=Necrodragon | ||
| | |lv=7 | ||
| | |#=15 | ||
|# | |hp=47 | ||
| | |atk=18 | ||
| | |skill=3 | ||
| | |spd=7 | ||
| | |lck=0 | ||
| | |def=15 | ||
| | |res=13 | ||
| | |mov=8 | ||
|inventory=--<br>{{Item|15|Fangs|image=monster forecast}} | |||
|last=y | |||
}} | }} | ||
| | {{ChapUnitFtr}} | ||
|platform=3ds03 | |content11={{ChapUnitHdr|type=Enemy|platform=3ds03}} | ||
| | {{ChapUnitCellFE15 | ||
| | |name=Terrors | ||
| | |class=Necrodragon | ||
|#1= | |lv=10 | ||
| | |#=1 | ||
| | |hp=51 | ||
| | |atk=20 | ||
| | |skill=4 | ||
| | |spd=8 | ||
| | |lck=0 | ||
| | |def=16 | ||
|res=14 | |||
|mov=8 | |||
|inventory=--<br>{{Item|15|Fangs|image=monster forecast}} | |||
}} | }} | ||
{{ChapUnitCellFE15 | |||
|name=Terrors | |||
| | |class=Necrodragon | ||
| | |lv=5 | ||
| | |#=19 | ||
|# | |hp=45 | ||
| | |atk=17 | ||
| | |skill=2 | ||
| | |spd=6 | ||
| | |lck=0 | ||
| | |def=14 | ||
| | |res=13 | ||
| | |mov=8 | ||
|inventory=--<br>{{Item|15|Fangs|image=monster forecast}} | |||
|last=y | |||
}} | }} | ||
| | {{ChapUnitFtr}} | ||
|platform=3ds03 | |content12={{ChapUnitHdr|type=Enemy|platform=3ds03}} | ||
| | {{ChapUnitCellFE15 | ||
| | |name=Terrors | ||
| | |class=Necrodragon | ||
|#1= | |lv=18 | ||
| | |#=1 | ||
| | |hp=60 | ||
| | |atk=24 | ||
| | |skill=6 | ||
| | |spd=10 | ||
| | |lck=0 | ||
| | |def=20 | ||
|res=15 | |||
|mov=8 | |||
|inventory=--<br>{{Item|15|Fangs|image=monster forecast}} | |||
}} | }} | ||
{{ChapUnitCellFE15 | |||
|name=Terrors | |||
| | |class=Necrodragon | ||
| | |lv=7 | ||
| | |#=19 | ||
|# | |hp=47 | ||
| | |atk=18 | ||
| | |skill=3 | ||
| | |spd=7 | ||
| | |lck=0 | ||
| | |def=15 | ||
| | |res=13 | ||
| | |mov=8 | ||
|inventory=--<br>{{Item|15|Fangs|image=monster forecast}} | |||
|last=y | |||
}} | }} | ||
{{ChapUnitFtr}} | |||
}} | }} | ||
==Strategy== | ==Strategy== | ||
{{ | {{strategy}} | ||
Should the player choose to complete [[Land of Sorrow (Gaiden)/Duma Tower|Duma Tower]] before reaching the Dragon's Maw, no necrodragons will appear on the world map, making all skirmishes on this map completely optional. However, in ''Gaiden'', three skirmishes must be defeated. | |||
It should be noted that in the original ''Gaiden'' it is impossible for [[Alm]]'s party to leave this world map location, if entered, until [[Celica]] reaches the peak of Duma Tower and three skirmishes have been defeated. As Celica's party makes her way through western Rigel, Alm's trapped party will be forced into [[skirmish]]es that cannot be retreated from. This does not occur in the remake, as Alm may leave the crater through the south entrance regardless of Celica's progress. | |||
As for the battle itself, the terrain favors fliers. Your bowmen will prove very valuable here—Clair too, if she's promoted. | |||
==Flavor text== | |||
{{DescriptionHdr}} | |||
{{DescriptionCell | |||
|game={{title|Echoes: Shadows of Valentia}} | |||
|english=A volcanic region in<br>the Rigelian Empire's<br>west. Also called<br>Mount Dragonsblight,<br>the locals fear and<br>avoid it. | |||
|japanese=リゲル帝国領の西部に<br>位置する火山地帯。<br>呪われた竜の山とも<br>言われ地元の人間から<br>恐れられている。 | |||
}} | |||
{{DescriptionFtr}} | |||
<!-- | |||
==Trivia== | ==Trivia== | ||
--> | |||
==Etymology and other languages== | ==Etymology and other languages== | ||
{{Names | {{Names | ||
|eng-name=Fight at the Dragon's Maw | |eng-name=Fight at the Dragon's Maw | ||
| | |jpn-name={{h|竜の火口迎撃戦|Ryū no kakō geigekisen}} | ||
|jpn-mean=Counter-attack at the Dragon Crater | |||
| | |||
|span-name=Lucha en las Fauces | |span-name=Lucha en las Fauces | ||
|span-mean=Fight in the Maw | |span-mean=Fight in the Maw | ||
| Line 275: | Line 723: | ||
|dut-name=De Drakenmuil | |dut-name=De Drakenmuil | ||
|dut-mean=The Dragon's Maw | |dut-mean=The Dragon's Maw | ||
|ch-simp-name={{ | |kor-name={{h|용의 화구 요격전|yong-ui hwagu yogyeogjeon}} | ||
|kor-mean=Dragon's crater intercept battle | |||
|ch-simp-name={{h|龙之喷火口迎击战|Lóng zhī pēn huǒkǒu yíngjí zhàn}} | |||
|ch-simp-mean=Dragon's maw battle | |ch-simp-mean=Dragon's maw battle | ||
|ch-trad-name={{ | |ch-trad-name={{h|龍之噴火口迎擊戰|Lóng zhī pēn huǒkǒu yíngjí zhàn}} | ||
|ch-trad-mean=Dragon's maw battle | |ch-trad-mean=Dragon's maw battle | ||
}} | }} | ||
==Gallery== | ==Gallery== | ||
<gallery> | |||
Mt fe15 the dragon's maw.png|Thumbnail of the Dragon's Maw. | |||
</gallery> | |||
{{ChapterNav | {{ChapterNav | ||
| Line 292: | Line 744: | ||
{{Nav2}} | {{Nav2}} | ||
{{Nav15}} | {{Nav15}} | ||
[[Category:Acts of Fire Emblem Gaiden]] | [[Category:Acts of Fire Emblem Gaiden]] | ||
[[Category:Acts of Fire Emblem Echoes: Shadows of Valentia]] | [[Category:Acts of Fire Emblem Echoes: Shadows of Valentia]] | ||
Latest revision as of 17:58, 1 May 2023
| ||||||
|

Fight at the Dragon's Maw (Japanese: 竜の火口迎撃戦 Counter-attack at the Dragon Crater) is the seventh map of the fourth act of Alm's route in Fire Emblem Gaiden and Fire Emblem Echoes: Shadows of Valentia.
Map data
Gaiden Echoes: Shadows of Valentia
| ||||||
|
| |||||
| Victory: Rout the enemy | Player | Enemy | ||||
|---|---|---|---|---|---|---|
| Defeat: Alm dies | 1–16 | Varies | ||||
| Map dimensions: 30 columns by 20 rows | ||||||
Character data
Gaiden Echoes: Shadows of Valentia
| Characters | |
|---|---|
New units
| |
| |
Required characters
| |

| |
Available characters
| |
              
|
Enemy data
Gaiden
Battle #1 Battle #2 Battle #3 Battle #4 Battle #5 Battle #6 onward
Echoes: Shadows of Valentia
Battle #1, Normal Battle #1, Hard Battle #2, Normal Battle #2, Hard Battle #3, Normal Battle #3, Hard Battle #4, Normal Battle #4, Hard Battle #5, Normal Battle #5, Hard Battle #6 onward, Normal Battle #6 onward, Hard
Strategy
| This section details unofficial strategies that may help with completion of the chapter. This may not work for everybody. |
Should the player choose to complete Duma Tower before reaching the Dragon's Maw, no necrodragons will appear on the world map, making all skirmishes on this map completely optional. However, in Gaiden, three skirmishes must be defeated.
It should be noted that in the original Gaiden it is impossible for Alm's party to leave this world map location, if entered, until Celica reaches the peak of Duma Tower and three skirmishes have been defeated. As Celica's party makes her way through western Rigel, Alm's trapped party will be forced into skirmishes that cannot be retreated from. This does not occur in the remake, as Alm may leave the crater through the south entrance regardless of Celica's progress.
As for the battle itself, the terrain favors fliers. Your bowmen will prove very valuable here—Clair too, if she's promoted.
Flavor text
| Game | Text (English) |
Text (Japanese) |
|---|---|---|
| Echoes: Shadows of Valentia | A volcanic region in
the Rigelian Empire's west. Also called Mount Dragonsblight, the locals fear and avoid it. |
リゲル帝国領の西部に
位置する火山地帯。 呪われた竜の山とも 言われ地元の人間から 恐れられている。 |
Etymology and other languages
| Names, etymology, and in other regions | ||
|---|---|---|
| Language | Name | Definition, etymology, and notes |
| English |
Fight at the Dragon's Maw |
-- |
| Japanese |
竜の火口迎撃戦 |
Counter-attack at the Dragon Crater |
| Spanish |
Lucha en las Fauces |
Fight in the Maw |
| French |
La gueule du dragon |
The maw of the dragon |
| German |
Kampf am Drachenschlund |
Battle of the Dragon's Maw |
| Italian |
Scontro alle Fauci del Drago |
Clash at the Maw of the Dragon |
| Dutch |
De Drakenmuil |
The Dragon's Maw |
| Korean |
용의 화구 요격전 |
Dragon's crater intercept battle |
| Simplified Chinese |
龙之喷火口迎击战 |
Dragon's maw battle |
| Traditional Chinese |
龍之噴火口迎擊戰 |
Dragon's maw battle |
Gallery
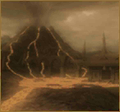
Thumbnail of the Dragon's Maw.

| ← Rigel Plains Battle • | Fight at the Dragon's Maw | • Rigel Falls Battle → |
|---|
| Fire Emblem Echoes: Shadows of Valentia | ||||||||||||||||||||||||||||||||||||||||||||||||||||||||||||||||||||||||||
|---|---|---|---|---|---|---|---|---|---|---|---|---|---|---|---|---|---|---|---|---|---|---|---|---|---|---|---|---|---|---|---|---|---|---|---|---|---|---|---|---|---|---|---|---|---|---|---|---|---|---|---|---|---|---|---|---|---|---|---|---|---|---|---|---|---|---|---|---|---|---|---|---|---|---|
| ||||||||||||||||||||||||||||||||||||||||||||||||||||||||||||||||||||||||||