| Site News |
|---|
| Warning: This wiki contains spoilers. Read at your own risk! Social media: If you would like, please join our Discord server, and/or follow us on X (Twitter) or Tumblr! |
Land of Sorrow (Gaiden)/Duma Tower: Difference between revisions
Thecornerman (talk | contribs) m (→Character data: Corrected Celica's portrait) |
Thecornerman (talk | contribs) m (Text replacement - "\b([Aa])ct (\d+)" to "$1ct $2") |
||
| (20 intermediate revisions by 5 users not shown) | |||
| Line 5: | Line 5: | ||
|image=[[File:Cm fe02 duma tower exterior.png|200px]] | |image=[[File:Cm fe02 duma tower exterior.png|200px]] | ||
|location=[[Duma Tower]] | |location=[[Duma Tower]] | ||
|previous=[[Land of Sorrow (Gaiden)/The Swamps of Duma Battle|The Swamps of Duma Battle]] | |||
|next=[[Together to the End/Duma Temple|Duma Temple]] | |||
}} | }} | ||
{{Quote|The tower is massive... Oppressive. Like Duma's power given form. What lies beyond the quest for ever-greater power? Perhaps that answer lies at the tower's peak.|[[Celica]]}} | {{Quote|The tower is massive... Oppressive. Like Duma's power given form. What lies beyond the quest for ever-greater power? Perhaps that answer lies at the tower's peak.|[[Celica]]}} | ||
| Line 18: | Line 20: | ||
|victory=Rout the enemy | |victory=Rout the enemy | ||
|defeat=[[Celica]] dies | |defeat=[[Celica]] dies | ||
|ally={{ | |ally={{h|6|Battle #1}}<br>{{h|5|Battle #2}}<br>{{h|4|Battle #3}} | ||
|enemy={{ | |enemy={{h|6|Battle #1}}<br>{{h|4|Battle #2}}<br>{{h|4|Battle #3}} | ||
|map=<br>{{Tab | |map=<br>{{Tab | ||
|tab1=Battle #1 | |tab1=Battle #1 | ||
| Line 33: | Line 35: | ||
|defeat=[[Celica]] dies | |defeat=[[Celica]] dies | ||
|ally=10 | |ally=10 | ||
|enemy={{ | |enemy={{h|Varies|The player can avoid fights at their choice, so the number of enemies they face will be different for each playthrough of the dungeon}}<br>{{h|8|Fixed encounter with the Fiend on floor 1}}<br>{{h|8|Fixed encounter with the Necrodragon on floor 2}}<br>{{h|10|Fixed encounter with the Bow Knight on floor 3}}<br>{{h|15|Fixed encounter with the Mogall on floor 4}}{{h|+reinforcements|number may vary}} | ||
|col=15 | |||
|row=16 | |||
}} | }} | ||
}} | }} | ||
| Line 45: | Line 49: | ||
|content1={{ChapChars | |content1={{ChapChars | ||
|game#=02 | |game#=02 | ||
| | |forced1=celica 02 | ||
| | |forced1article=Celica | ||
| | |return1=mae | ||
| | |return2=boey | ||
| | |return3=genny | ||
| | |return4=saber | ||
| | |return5=valbar | ||
| | |return6=kamui | ||
| | |return7=leon | ||
| | |return8=palla | ||
| | |return9=catria | ||
| | |return10=atlas | ||
| | |return11=jesse | ||
| | |return12=sonya | ||
| | |return13=deen | ||
| | |return13article=Deen (Gaiden) | ||
| | |return14=est | ||
|return15=nomah | |||
}} | }} | ||
|content2={{ChapChars | |content2={{ChapChars | ||
|game#=15 | |game#=15 | ||
| | |forced1=celica 02 | ||
| | |forced1article=Celica | ||
| | |return1=mae | ||
| | |return2=boey | ||
| | |return3=genny | ||
| | |return4=saber | ||
| | |return5=valbar | ||
| | |return6=kamui | ||
| | |return7=leon | ||
| | |return8=palla | ||
| | |return9=catria | ||
| | |return10=atlas | ||
| | |return11=jesse | ||
| | |return12=sonya | ||
| | |return13=deen | ||
| | |return13article=Deen (Gaiden) | ||
| | |return14=est | ||
| | |return15=nomah | ||
|return16=conrad | |||
}} | }} | ||
}} | }} | ||
| Line 440: | Line 446: | ||
|res=14 | |res=14 | ||
|mov=4 | |mov=4 | ||
|inventory=--<br>{{Item|15|Thunder | |inventory=--<br>{{Item|15|Thunder|image=black magic}} • {{Item|15|Teleportation|image=skill personal}} | ||
|last=y | |last=y | ||
}} | }} | ||
| Line 488: | Line 494: | ||
|res=14 | |res=14 | ||
|mov=4 | |mov=4 | ||
|inventory=--<br>{{Item|15|Thunder | |inventory=--<br>{{Item|15|Thunder|image=black magic}} • {{Item|15|Teleportation|image=skill personal}} | ||
|last=y | |last=y | ||
}} | }} | ||
| Line 572: | Line 578: | ||
|res=11 | |res=11 | ||
|mov=4 | |mov=4 | ||
|inventory=--<br>{{Item|15|Lance|link=Lance ( | |inventory=--<br>{{Item|15|Lance|link=Lance (Famicom)|image=lance forecast}} • {{Item|15|Heavy Armor|image=skill class}} | ||
|notes=Begins moving unprovoked on turn 3, or if it or a nearby [[Dread Fighter]] is provoked. | |notes=Begins moving unprovoked on turn 3, or if it or a nearby [[Dread Fighter]] is provoked. | ||
}} | }} | ||
| Line 586: | Line 592: | ||
|lck=0 | |lck=0 | ||
|def=11 | |def=11 | ||
|res=6{{ | |res=6{{h|+5|Granted by Resistance +5}} | ||
|mov=7 | |mov=7 | ||
|inventory=--<br>{{Item|15|Sword|link=Sword (Gaiden)|image=sword forecast}} • {{Item|15|Resistance +5|image=skill class}} • {{Item|15|Apotrope|image=skill class}} | |inventory=--<br>{{Item|15|Sword|link=Sword (Gaiden)|image=sword forecast}} • {{Item|15|Resistance +5|image=skill class}} • {{Item|15|Apotrope|image=skill class}} | ||
| Line 615: | Line 621: | ||
|#=1 | |#=1 | ||
|hp=51 | |hp=51 | ||
|atk=28{{ | |atk=28{{h|+3|Granted by Javelin}} | ||
|skill=8 | |skill=8 | ||
|spd=4{{ | |spd=4{{h|−2|Penalized by Javelin}} | ||
|lck=0 | |lck=0 | ||
|def=25 | |def=25 | ||
| Line 631: | Line 637: | ||
|#=2 | |#=2 | ||
|hp=41 | |hp=41 | ||
|atk=18{{ | |atk=18{{h|+4|Granted by Steel Sword}} | ||
|skill=19 | |skill=19 | ||
|spd=21{{ | |spd=21{{h|−1|Penalized by Steel Sword}} | ||
|lck=0 | |lck=0 | ||
|def=13 | |def=13 | ||
|res=6{{ | |res=6{{h|+5|Granted by Resistance +5}} | ||
|mov=7 | |mov=7 | ||
|inventory={{Item|15|Steel Sword}}<br>{{Item|15|Resistance +5|image=skill class}} • {{Item|15|Apotrope|image=skill class}} | |inventory={{Item|15|Steel Sword}}<br>{{Item|15|Resistance +5|image=skill class}} • {{Item|15|Apotrope|image=skill class}} | ||
| Line 662: | Line 668: | ||
|#=2 | |#=2 | ||
|hp=39 | |hp=39 | ||
|atk=17{{ | |atk=17{{h|+4|Granted by Steel Sword}} | ||
|skill=18 | |skill=18 | ||
|spd=20{{ | |spd=20{{h|−1|Penalized by Steel Sword}} | ||
|lck=0 | |lck=0 | ||
|def=12 | |def=12 | ||
|res=6{{ | |res=6{{h|+5|Granted by Resistance +5}} | ||
|mov=7 | |mov=7 | ||
|inventory={{Item|15|Steel Sword}}<br>{{Item|15|Resistance +5|image=skill class}} • {{Item|15|Apotrope|image=skill class}} | |inventory={{Item|15|Steel Sword}}<br>{{Item|15|Resistance +5|image=skill class}} • {{Item|15|Apotrope|image=skill class}} | ||
| Line 678: | Line 684: | ||
The [[Necrodragon]] encounter is a fixed encounter which must be fought in order to progress through the tower. | The [[Necrodragon]] encounter is a fixed encounter which must be fought in order to progress through the tower. | ||
The [[Fafnir (class)|Fafnir]] encounter is a rare encounter that only has a 10% chance of appearing after certain requirements have been met. It may appear starting from Act 4. | The [[Fafnir (class)|Fafnir]] encounter is a rare encounter that only has a 10% chance of appearing after certain requirements have been met. It may appear starting from Act 4. | ||
{{Tab | {{Tab | ||
|width=100% | |width=100% | ||
| Line 809: | Line 815: | ||
|#=2 | |#=2 | ||
|hp=43 | |hp=43 | ||
|atk=18{{ | |atk=18{{h|+13|Granted by Shadow Sword}} | ||
|skill=7 | |skill=7 | ||
|spd=6{{ | |spd=6{{h|−5|Penalized by Shadow Sword}} | ||
|lck=0 | |lck=0 | ||
|def=13 | |def=13 | ||
|res=4 | |res=4 | ||
|mov=5 | |mov=5 | ||
|inventory={{Item|15|Shadow Sword}}<br>{{Item|15|Bone Sword|image=monster forecast}} • {{Item|15|Lifetaker|image=skill sword}}{{ | |inventory={{Item|15|Shadow Sword}}<br>{{Item|15|Bone Sword|image=monster forecast}} • {{Item|15|Lifetaker|image=skill sword}}{{h|*|Granted by Shadow Sword}} • {{Item|15|Hex|image=skill sword}}{{h|*|Granted by Shadow Sword}} | ||
|last=y | |last=y | ||
}} | }} | ||
| Line 842: | Line 848: | ||
|#=2 | |#=2 | ||
|hp=49 | |hp=49 | ||
|atk=21{{ | |atk=21{{h|+13|Granted by Shadow Sword}} | ||
|skill=10 | |skill=10 | ||
|spd=8{{ | |spd=8{{h|−5|Penalized by Shadow Sword}} | ||
|lck=0 | |lck=0 | ||
|def=15 | |def=15 | ||
|res=4 | |res=4 | ||
|mov=5 | |mov=5 | ||
|inventory={{Item|15|Shadow Sword}}<br>{{Item|15|Bone Sword|image=monster forecast}} • {{Item|15|Lifetaker|image=skill sword}}{{ | |inventory={{Item|15|Shadow Sword}}<br>{{Item|15|Bone Sword|image=monster forecast}} • {{Item|15|Lifetaker|image=skill sword}}{{h|*|Granted by Shadow Sword}} • {{Item|15|Hex|image=skill sword}}{{h|*|Granted by Shadow Sword}} | ||
|last=y | |last=y | ||
}} | }} | ||
| Line 935: | Line 941: | ||
|res=6 | |res=6 | ||
|mov=8 | |mov=8 | ||
|inventory=--<br>{{Item|15|Bow|link=Bow ( | |inventory=--<br>{{Item|15|Bow|link=Bow (Famicom)|image=bow forecast}} • {{Item|15|Bowrange +2|image=skill class}} | ||
|notes=Begins moving unprovoked on turn 4. | |notes=Begins moving unprovoked on turn 4. | ||
}} | }} | ||
| Line 1,009: | Line 1,015: | ||
|#=1 | |#=1 | ||
|hp=51 | |hp=51 | ||
|atk=21{{ | |atk=21{{h|+3|Granted by Steel Bow}} | ||
|skill=13 | |skill=13 | ||
|spd=11{{ | |spd=11{{h|−3|Penalized by Steel Bow}} | ||
|lck=0 | |lck=0 | ||
|def=13 | |def=13 | ||
|res=6 | |res=6 | ||
|mov=8 | |mov=8 | ||
|inventory={{Item|15|Steel Bow}}<br>{{Item|15|Bowrange +2|image=skill class}} • {{Item|15|Anti-Fliers|image=skill bow}}{{ | |inventory={{Item|15|Steel Bow}}<br>{{Item|15|Bowrange +2|image=skill class}} • {{Item|15|Anti-Fliers|image=skill bow}}{{h|*|Granted by Steel Bow}} | ||
|notes=Begins moving unprovoked on turn 4. | |notes=Begins moving unprovoked on turn 4. | ||
}} | }} | ||
| Line 1,156: | Line 1,162: | ||
The [[Bow Knight]] encounter is a fixed encounter which must be fought in order to progress through the tower. | The [[Bow Knight]] encounter is a fixed encounter which must be fought in order to progress through the tower. | ||
The [[Guardian]] encounter is a rare encounter that only has a 10% chance of appearing after certain requirements have been met. It may appear starting from Act 4. | The [[Guardian]] encounter is a rare encounter that only has a 10% chance of appearing after certain requirements have been met. It may appear starting from Act 4. | ||
Floor 3 includes all possible [[Arcanist]] encounters from floor 1 as well as the following: | Floor 3 includes all possible [[Arcanist]] encounters from floor 1 as well as the following: | ||
| Line 1,178: | Line 1,184: | ||
|#=1 | |#=1 | ||
|hp=39 | |hp=39 | ||
|atk=17{{ | |atk=17{{h|+2|Granted by Iron Sword}} | ||
|skill=18 | |skill=18 | ||
|spd=20 | |spd=20 | ||
|lck=0 | |lck=0 | ||
|def=12 | |def=12 | ||
|res=6{{ | |res=6{{h|+5|Granted by Resistance +5}} | ||
|mov=7 | |mov=7 | ||
|inventory={{Item|15|Iron Sword}}<br>{{Item|15|Resistance +5|image=skill class}} • {{Item|15|Apotrope|image=skill class}} | |inventory={{Item|15|Iron Sword}}<br>{{Item|15|Resistance +5|image=skill class}} • {{Item|15|Apotrope|image=skill class}} | ||
| Line 1,193: | Line 1,199: | ||
|#=2 | |#=2 | ||
|hp=35 | |hp=35 | ||
|atk=14{{ | |atk=14{{h|+2|Granted by Iron Bow}} | ||
|skill=8 | |skill=8 | ||
|spd=8{{ | |spd=8{{h|−2|Penalized by Iron Bow}} | ||
|lck=0 | |lck=0 | ||
|def=8 | |def=8 | ||
|res=2 | |res=2 | ||
|mov=5 | |mov=5 | ||
|inventory={{Item|15|Iron Bow}}<br>{{Item|15|Bowrange +2|image=skill class}} • {{Item|15|Anti-Fliers|image=skill bow}}{{ | |inventory={{Item|15|Iron Bow}}<br>{{Item|15|Bowrange +2|image=skill class}} • {{Item|15|Anti-Fliers|image=skill bow}}{{h|*|Granted by Iron Bow}} | ||
|last=y | |last=y | ||
}} | }} | ||
| Line 1,211: | Line 1,217: | ||
|#=1 | |#=1 | ||
|hp=42 | |hp=42 | ||
|atk=19{{ | |atk=19{{h|+4|Granted by Steel Sword}} | ||
|skill=20 | |skill=20 | ||
|spd=22{{ | |spd=22{{h|−1|Penalized by Steel Sword}} | ||
|lck=0 | |lck=0 | ||
|def=13 | |def=13 | ||
|res=6{{ | |res=6{{h|+5|Granted by Resistance +5}} | ||
|mov=7 | |mov=7 | ||
|inventory={{Item|15|Steel Sword}}<br>{{Item|15|Resistance +5|image=skill class}} • {{Item|15|Apotrope|image=skill class}} | |inventory={{Item|15|Steel Sword}}<br>{{Item|15|Resistance +5|image=skill class}} • {{Item|15|Apotrope|image=skill class}} | ||
| Line 1,226: | Line 1,232: | ||
|#=2 | |#=2 | ||
|hp=41 | |hp=41 | ||
|atk=17{{ | |atk=17{{h|+3|Granted by Steel Bow}} | ||
|skill=11 | |skill=11 | ||
|spd=10{{ | |spd=10{{h|−3|Penalized by Steel Bow}} | ||
|lck=0 | |lck=0 | ||
|def=10 | |def=10 | ||
|res=2 | |res=2 | ||
|mov=5 | |mov=5 | ||
|inventory={{Item|15|Steel Bow}}<br>{{Item|15|Bowrange +2|image=skill class}} • {{Item|15|Anti-Fliers|image=skill bow}}{{ | |inventory={{Item|15|Steel Bow}}<br>{{Item|15|Bowrange +2|image=skill class}} • {{Item|15|Anti-Fliers|image=skill bow}}{{h|*|Granted by Steel Bow}} | ||
|last=y | |last=y | ||
}} | }} | ||
| Line 1,244: | Line 1,250: | ||
|#=1 | |#=1 | ||
|hp=39 | |hp=39 | ||
|atk=17{{ | |atk=17{{h|+2|Granted by Iron Sword}} | ||
|skill=18 | |skill=18 | ||
|spd=20 | |spd=20 | ||
|lck=0 | |lck=0 | ||
|def=12 | |def=12 | ||
|res=6{{ | |res=6{{h|+5|Granted by Resistance +5}} | ||
|mov=7 | |mov=7 | ||
|inventory={{Item|15|Iron Sword}}<br>{{Item|15|Resistance +5|image=skill class}} • {{Item|15|Apotrope|image=skill class}} | |inventory={{Item|15|Iron Sword}}<br>{{Item|15|Resistance +5|image=skill class}} • {{Item|15|Apotrope|image=skill class}} | ||
| Line 1,259: | Line 1,265: | ||
|#=1 | |#=1 | ||
|hp=42 | |hp=42 | ||
|atk=19{{ | |atk=19{{h|+2|Granted by Iron Lance}} | ||
|skill=8 | |skill=8 | ||
|spd=13 | |spd=13 | ||
| Line 1,274: | Line 1,280: | ||
|#=1 | |#=1 | ||
|hp=42 | |hp=42 | ||
|atk=23{{ | |atk=23{{h|+3|Granted by Javelin}} | ||
|skill=7 | |skill=7 | ||
|spd=5{{ | |spd=5{{h|−2|Penalized by Javelin}} | ||
|lck=0 | |lck=0 | ||
|def=19 | |def=19 | ||
| Line 1,292: | Line 1,298: | ||
|#=1 | |#=1 | ||
|hp=42 | |hp=42 | ||
|atk=19{{ | |atk=19{{h|+4|Granted by Steel Sword}} | ||
|skill=20 | |skill=20 | ||
|spd=22{{ | |spd=22{{h|−1|Penalized by Steel Sword}} | ||
|lck=0 | |lck=0 | ||
|def=13 | |def=13 | ||
|res=6{{ | |res=6{{h|+5|Granted by Resistance +5}} | ||
|mov=7 | |mov=7 | ||
|inventory={{Item|15|Steel Sword}}<br>{{Item|15|Resistance +5|image=skill class}} • {{Item|15|Apotrope|image=skill class}} | |inventory={{Item|15|Steel Sword}}<br>{{Item|15|Resistance +5|image=skill class}} • {{Item|15|Apotrope|image=skill class}} | ||
| Line 1,307: | Line 1,313: | ||
|#=1 | |#=1 | ||
|hp=47 | |hp=47 | ||
|atk=21{{ | |atk=21{{h|+4|Granted by Steel Lance}} | ||
|skill=10 | |skill=10 | ||
|spd=15{{ | |spd=15{{h|−1|Penalized by Steel Lance}} | ||
|lck=0 | |lck=0 | ||
|def=16 | |def=16 | ||
| Line 1,322: | Line 1,328: | ||
|#=1 | |#=1 | ||
|hp=47 | |hp=47 | ||
|atk=25{{ | |atk=25{{h|+3|Granted by Javelin}} | ||
|skill=9 | |skill=9 | ||
|spd=6{{ | |spd=6{{h|−2|Penalized by Javelin}} | ||
|lck=0 | |lck=0 | ||
|def=21 | |def=21 | ||
| Line 1,342: | Line 1,348: | ||
|atk=17 | |atk=17 | ||
|skill=18 | |skill=18 | ||
|spd=20{{ | |spd=20{{h|−1|Penalized by Iron Shield}} | ||
|lck=0 | |lck=0 | ||
|def=12{{ | |def=12{{h|+4|Granted by Iron Shield}} | ||
|res=6{{ | |res=6{{h|+5|Granted by Resistance +5}} | ||
|mov=7 | |mov=7 | ||
|inventory={{Item|15|Iron Shield}}<br>{{Item|15|Sword|link=Sword (Gaiden)|image=sword forecast}} • {{Item|15|Resistance +5|image=skill class}} • {{Item|15|Apotrope|image=skill class}} | |inventory={{Item|15|Iron Shield}}<br>{{Item|15|Sword|link=Sword (Gaiden)|image=sword forecast}} • {{Item|15|Resistance +5|image=skill class}} • {{Item|15|Apotrope|image=skill class}} | ||
| Line 1,377: | Line 1,383: | ||
|res=14 | |res=14 | ||
|mov=4 | |mov=4 | ||
|inventory=--<br>{{Item|15|Fire | |inventory=--<br>{{Item|15|Fire|image=black magic}} • {{Item|15|Teleportation|image=skill personal}} | ||
}} | }} | ||
{{ChapUnitCellFE15 | {{ChapUnitCellFE15 | ||
| Line 1,392: | Line 1,398: | ||
|res=14 | |res=14 | ||
|mov=4 | |mov=4 | ||
|inventory=--<br>{{Item|15|Thunder | |inventory=--<br>{{Item|15|Thunder|image=black magic}} • {{Item|15|Teleportation|image=skill personal}} | ||
|last=y | |last=y | ||
}} | }} | ||
| Line 1,405: | Line 1,411: | ||
|atk=19 | |atk=19 | ||
|skill=20 | |skill=20 | ||
|spd=22{{ | |spd=22{{h|−1|Penalized by Iron Shield}} | ||
|lck=0 | |lck=0 | ||
|def=13{{ | |def=13{{h|+4|Granted by Iron Shield}} | ||
|res=6{{ | |res=6{{h|+5|Granted by Resistance +5}} | ||
|mov=7 | |mov=7 | ||
|inventory={{Item|15|Iron Shield}}<br>{{Item|15|Sword|link=Sword (Gaiden)|image=sword forecast}} • {{Item|15|Resistance +5|image=skill class}} • {{Item|15|Apotrope|image=skill class}} | |inventory={{Item|15|Iron Shield}}<br>{{Item|15|Sword|link=Sword (Gaiden)|image=sword forecast}} • {{Item|15|Resistance +5|image=skill class}} • {{Item|15|Apotrope|image=skill class}} | ||
| Line 1,440: | Line 1,446: | ||
|res=14 | |res=14 | ||
|mov=4 | |mov=4 | ||
|inventory=--<br>{{Item|15|Fire | |inventory=--<br>{{Item|15|Fire|image=black magic}} • {{Item|15|Teleportation|image=skill personal}} | ||
}} | }} | ||
{{ChapUnitCellFE15 | {{ChapUnitCellFE15 | ||
| Line 1,455: | Line 1,461: | ||
|res=14 | |res=14 | ||
|mov=4 | |mov=4 | ||
|inventory=--<br>{{Item|15|Thunder | |inventory=--<br>{{Item|15|Thunder|image=black magic}} • {{Item|15|Teleportation|image=skill personal}} | ||
|last=y | |last=y | ||
}} | }} | ||
| Line 1,466: | Line 1,472: | ||
|#=1 | |#=1 | ||
|hp=45 | |hp=45 | ||
|atk=18{{ | |atk=18{{h|+2|Granted by Iron Bow}} | ||
|skill=10 | |skill=10 | ||
|spd=9{{ | |spd=9{{h|−2|Penalized by Iron Bow}} | ||
|lck=0 | |lck=0 | ||
|def=11 | |def=11 | ||
|res=6 | |res=6 | ||
|mov=8 | |mov=8 | ||
|inventory={{Item|15|Iron Bow}}<br>{{Item|15|Bowrange +2|image=skill class}} • {{Item|15|Anti-Fliers|image=skill bow}}{{ | |inventory={{Item|15|Iron Bow}}<br>{{Item|15|Bowrange +2|image=skill class}} • {{Item|15|Anti-Fliers|image=skill bow}}{{h|*|Granted by Iron Bow}} | ||
|notes=Begins moving unprovoked on turn 4, or if he or a nearby [[Bonewalker]] is provoked. | |notes=Begins moving unprovoked on turn 4, or if he or a nearby [[Bonewalker]] is provoked. | ||
}} | }} | ||
| Line 1,489: | Line 1,495: | ||
|res=6 | |res=6 | ||
|mov=8 | |mov=8 | ||
|inventory=--<br>{{Item|15|Bow|link=Bow ( | |inventory=--<br>{{Item|15|Bow|link=Bow (Famicom)|image=bow forecast}} • {{Item|15|Bowrange +2|image=skill class}} | ||
}} | }} | ||
{{ChapUnitCellFE15 | {{ChapUnitCellFE15 | ||
| Line 1,512: | Line 1,518: | ||
|#=2 | |#=2 | ||
|hp=49 | |hp=49 | ||
|atk=21{{ | |atk=21{{h|+4|Granted by Steel Sword}} | ||
|skill=10 | |skill=10 | ||
|spd=8{{ | |spd=8{{h|−1|Penalized by Steel Sword}} | ||
|lck=0 | |lck=0 | ||
|def=15 | |def=15 | ||
| Line 1,530: | Line 1,536: | ||
|atk=21 | |atk=21 | ||
|skill=10 | |skill=10 | ||
|spd=8{{ | |spd=8{{h|−2|Penalized by Steel Shield}} | ||
|lck=0 | |lck=0 | ||
|def=15{{ | |def=15{{h|+5|Granted by Steel Shield}} | ||
|res=4 | |res=4 | ||
|mov=5 | |mov=5 | ||
| Line 1,562: | Line 1,568: | ||
|#=1 | |#=1 | ||
|hp=51 | |hp=51 | ||
|atk=21{{ | |atk=21{{h|+5|Granted by Silver Bow}} | ||
|skill=13 | |skill=13 | ||
|spd=11{{ | |spd=11{{h|−4|Penalized by Silver Bow}} | ||
|lck=0 | |lck=0 | ||
|def=13 | |def=13 | ||
|res=6 | |res=6 | ||
|mov=8 | |mov=8 | ||
|inventory={{Item|15|Silver Bow}}<br>{{Item|15|Bowrange +2|image=skill class}} • {{Item|15|Anti-Fliers|image=skill bow}}{{ | |inventory={{Item|15|Silver Bow}}<br>{{Item|15|Bowrange +2|image=skill class}} • {{Item|15|Anti-Fliers|image=skill bow}}{{h|*|Granted by Silver Bow}} | ||
|notes=Begins moving unprovoked on turn 3, or if he or a nearby [[Bonewalker]] is provoked. | |notes=Begins moving unprovoked on turn 3, or if he or a nearby [[Bonewalker]] is provoked. | ||
}} | }} | ||
| Line 1,578: | Line 1,584: | ||
|#=2 | |#=2 | ||
|hp=46 | |hp=46 | ||
|atk=19{{ | |atk=19{{h|+2|Granted by Iron Bow}} | ||
|skill=11 | |skill=11 | ||
|spd=10{{ | |spd=10{{h|−2|Penalized by Iron Bow}} | ||
|lck=0 | |lck=0 | ||
|def=12 | |def=12 | ||
|res=6 | |res=6 | ||
|mov=8 | |mov=8 | ||
|inventory={{Item|15|Iron Bow}}<br>{{Item|15|Bowrange +2|image=skill class}} • {{Item|15|Anti-Fliers|image=skill bow}}{{ | |inventory={{Item|15|Iron Bow}}<br>{{Item|15|Bowrange +2|image=skill class}} • {{Item|15|Anti-Fliers|image=skill bow}}{{h|*|Granted by Iron Bow}} | ||
}} | }} | ||
{{ChapUnitCellFE15 | {{ChapUnitCellFE15 | ||
| Line 1,608: | Line 1,614: | ||
|#=2 | |#=2 | ||
|hp=52 | |hp=52 | ||
|atk=25{{ | |atk=25{{h|+8|Granted by Silver Sword}} | ||
|skill=12 | |skill=12 | ||
|spd=10{{ | |spd=10{{h|−2|Penalized by Silver Sword}} | ||
|lck=0 | |lck=0 | ||
|def=17 | |def=17 | ||
| Line 1,624: | Line 1,630: | ||
|#=1 | |#=1 | ||
|hp=52 | |hp=52 | ||
|atk=25{{ | |atk=25{{h|+13|Granted by Shadow Sword}} | ||
|skill=12 | |skill=12 | ||
|spd=10{{ | |spd=10{{h|−5|Penalized by Shadow Sword}} | ||
|lck=0 | |lck=0 | ||
|def=17 | |def=17 | ||
|res=4 | |res=4 | ||
|mov=5 | |mov=5 | ||
|inventory={{Item|15|Shadow Sword}}<br>{{Item|15|Bone Sword|image=monster forecast}} • {{Item|15|Lifetaker|image=skill sword}}{{ | |inventory={{Item|15|Shadow Sword}}<br>{{Item|15|Bone Sword|image=monster forecast}} • {{Item|15|Lifetaker|image=skill sword}}{{h|*|Granted by Shadow Sword}} • {{Item|15|Hex|image=skill sword}}{{h|*|Granted by Shadow Sword}} | ||
|notes=Begins moving unprovoked on turn 3, or if it, the [[Silver Bow]] [[Bow Knight]], or a [[Silver Sword]] Bonewalker is provoked. | |notes=Begins moving unprovoked on turn 3, or if it, the [[Silver Bow]] [[Bow Knight]], or a [[Silver Sword]] Bonewalker is provoked. | ||
}} | }} | ||
| Line 1,640: | Line 1,646: | ||
|#=2 | |#=2 | ||
|hp=52 | |hp=52 | ||
|atk=25{{ | |atk=25{{h|+4|Granted by Steel Sword}} | ||
|skill=12 | |skill=12 | ||
|spd=10{{ | |spd=10{{h|−1|Penalized by Steel Sword}} | ||
|lck=0 | |lck=0 | ||
|def=17 | |def=17 | ||
| Line 1,665: | Line 1,671: | ||
|res=7 | |res=7 | ||
|mov=5 | |mov=5 | ||
|inventory={{Item|15|Silver Purse|type=drop}}<br>{{Item|15|Lance|link=Lance ( | |inventory={{Item|15|Silver Purse|type=drop}}<br>{{Item|15|Lance|link=Lance (Famicom)|image=lance forecast}} • {{Item|15|Heavy Armor|image=skill class}}{{h|*|Hidden}} | ||
}} | }} | ||
{{ChapUnitCellFE15 | {{ChapUnitCellFE15 | ||
| Line 1,680: | Line 1,686: | ||
|res=5 | |res=5 | ||
|mov=8 | |mov=8 | ||
|inventory=--<br>{{Item|15|Lance|link=Lance ( | |inventory=--<br>{{Item|15|Lance|link=Lance (Famicom)|image=lance forecast}} | ||
}} | }} | ||
{{ChapUnitCellFE15 | {{ChapUnitCellFE15 | ||
| Line 1,710: | Line 1,716: | ||
|res=2 | |res=2 | ||
|mov=5 | |mov=5 | ||
|inventory=--<br>{{Item|15|Bow|link=Bow ( | |inventory=--<br>{{Item|15|Bow|link=Bow (Famicom)|image=bow forecast}} • {{Item|15|Bowrange +2|image=skill class}} | ||
}} | }} | ||
{{ChapUnitCellFE15 | {{ChapUnitCellFE15 | ||
| Line 1,725: | Line 1,731: | ||
|res=9 | |res=9 | ||
|mov=4 | |mov=4 | ||
|inventory=--<br>{{Item|15|Fire | |inventory=--<br>{{Item|15|Fire|image=black magic}} • {{Item|15|Sagittae|image=black magic}} • {{Item|15|Recover|image=white magic}} • {{Item|15|Discipline|image=skill class}} | ||
|last=y | |last=y | ||
}} | }} | ||
| Line 1,743: | Line 1,749: | ||
|res=8 | |res=8 | ||
|mov=5 | |mov=5 | ||
|inventory={{Item|15|Silver Purse|type=drop}}<br>{{Item|15|Lance|link=Lance ( | |inventory={{Item|15|Silver Purse|type=drop}}<br>{{Item|15|Lance|link=Lance (Famicom)|image=lance forecast}} • {{Item|15|Heavy Armor|image=skill class}}{{h|*|Hidden}} | ||
}} | }} | ||
{{ChapUnitCellFE15 | {{ChapUnitCellFE15 | ||
| Line 1,758: | Line 1,764: | ||
|res=6 | |res=6 | ||
|mov=8 | |mov=8 | ||
|inventory=--<br>{{Item|15|Lance|link=Lance ( | |inventory=--<br>{{Item|15|Lance|link=Lance (Famicom)|image=lance forecast}} | ||
}} | }} | ||
{{ChapUnitCellFE15 | {{ChapUnitCellFE15 | ||
| Line 1,788: | Line 1,794: | ||
|res=2 | |res=2 | ||
|mov=5 | |mov=5 | ||
|inventory=--<br>{{Item|15|Bow|link=Bow ( | |inventory=--<br>{{Item|15|Bow|link=Bow (Famicom)|image=bow forecast}} • {{Item|15|Bowrange +2|image=skill class}} | ||
}} | }} | ||
{{ChapUnitCellFE15 | {{ChapUnitCellFE15 | ||
| Line 1,803: | Line 1,809: | ||
|res=9 | |res=9 | ||
|mov=4 | |mov=4 | ||
|inventory=--<br>{{Item|15|Fire | |inventory=--<br>{{Item|15|Fire|image=black magic}} • {{Item|15|Sagittae|image=black magic}} • {{Item|15|Recover|image=white magic}} • {{Item|15|Discipline|image=skill class}} | ||
|last=y | |last=y | ||
}} | }} | ||
| Line 1,812: | Line 1,818: | ||
The [[Mogall]] encounter is a fixed encounter which must be fought in order to progress through the tower. | The [[Mogall]] encounter is a fixed encounter which must be fought in order to progress through the tower. | ||
The [[Balor]] encounter is a rare encounter that only has a 10% chance of appearing after certain requirements have been met. It may only appear starting from [[Together to the End|Act 5]]. | The [[Balor]] encounter is a rare encounter that only has a 10% chance of appearing after certain requirements have been met. It may only appear starting from [[Together to the End|Act 5]]. | ||
Floor 4 includes all possible [[Arcanist]] encounters from | Floor 4 includes all possible [[Arcanist]] encounters from floor 1, the first [[Gargoyle]] encounter from floor 2, and the third [[Dread Fighter]] encounter from floor 3, as well as the following: | ||
{{Tab | {{Tab | ||
|width=100% | |width=100% | ||
| Line 1,843: | Line 1,849: | ||
|res=9 | |res=9 | ||
|mov=4 | |mov=4 | ||
|inventory=--<br>{{Item|15|Miasma|image=black magic}} • {{Item|15|Conjure|image=white magic}}{{ | |inventory=--<br>{{Item|15|Miasma|image=black magic}} • {{Item|15|Conjure|image=white magic}}{{h|*|Bonewalker variant}} • {{Item|15|Incarnation|image=skill class}} | ||
|notes=Does not move. | |notes=Does not move. | ||
}} | }} | ||
| Line 1,857: | Line 1,863: | ||
|lck=0 | |lck=0 | ||
|def=12 | |def=12 | ||
|res=6{{ | |res=6{{h|+5|Granted by Resistance +5}} | ||
|mov=7 | |mov=7 | ||
|inventory=--<br>{{Item|15|Sword|link=Sword (Gaiden)|image=sword forecast}} • {{Item|15|Resistance +5|image=skill class}} • {{Item|15|Apotrope|image=skill class}} | |inventory=--<br>{{Item|15|Sword|link=Sword (Gaiden)|image=sword forecast}} • {{Item|15|Resistance +5|image=skill class}} • {{Item|15|Apotrope|image=skill class}} | ||
| Line 1,874: | Line 1,880: | ||
|res=14 | |res=14 | ||
|mov=4 | |mov=4 | ||
|inventory=--<br>{{Item|15|Fire | |inventory=--<br>{{Item|15|Fire|image=black magic}} • {{Item|15|Teleportation|image=skill personal}} | ||
|last=y | |last=y | ||
}} | }} | ||
| Line 1,910: | Line 1,916: | ||
|res=9 | |res=9 | ||
|mov=4 | |mov=4 | ||
|inventory=--<br>{{Item|15|Miasma|image=black magic}} • {{Item|15|Conjure|image=white magic}}{{ | |inventory=--<br>{{Item|15|Miasma|image=black magic}} • {{Item|15|Conjure|image=white magic}}{{h|*|Bonewalker variant}} • {{Item|15|Incarnation|image=skill class}} | ||
|notes=Does not move. | |notes=Does not move. | ||
}} | }} | ||
| Line 1,924: | Line 1,930: | ||
|lck=0 | |lck=0 | ||
|def=13 | |def=13 | ||
|res=6{{ | |res=6{{h|+5|Granted by Resistance +5}} | ||
|mov=7 | |mov=7 | ||
|inventory=--<br>{{Item|15|Sword|link=Sword (Gaiden)|image=sword forecast}} • {{Item|15|Resistance +5|image=skill class}} • {{Item|15|Apotrope|image=skill class}} | |inventory=--<br>{{Item|15|Sword|link=Sword (Gaiden)|image=sword forecast}} • {{Item|15|Resistance +5|image=skill class}} • {{Item|15|Apotrope|image=skill class}} | ||
| Line 1,941: | Line 1,947: | ||
|res=14 | |res=14 | ||
|mov=4 | |mov=4 | ||
|inventory=--<br>{{Item|15|Fire | |inventory=--<br>{{Item|15|Fire|image=black magic}} • {{Item|15|Teleportation|image=skill personal}} | ||
|last=y | |last=y | ||
}} | }} | ||
| Line 1,977: | Line 1,983: | ||
|res=9 | |res=9 | ||
|mov=4 | |mov=4 | ||
|inventory=--<br>{{Item|15|Miasma|image=black magic}} • {{Item|15|Conjure|image=white magic}}{{ | |inventory=--<br>{{Item|15|Miasma|image=black magic}} • {{Item|15|Conjure|image=white magic}}{{h|*|Revenant variant}} • {{Item|15|Incarnation|image=skill class}} | ||
|notes=Does not move. | |notes=Does not move. | ||
}} | }} | ||
| Line 1,986: | Line 1,992: | ||
|#=1 | |#=1 | ||
|hp=42 | |hp=42 | ||
|atk=19{{ | |atk=19{{h|+3|Granted by Javelin}} | ||
|skill=8 | |skill=8 | ||
|spd=13{{ | |spd=13{{h|−2|Penalized by Javelin}} | ||
|lck=0 | |lck=0 | ||
|def=14 | |def=14 | ||
| Line 2,008: | Line 2,014: | ||
|res=9 | |res=9 | ||
|mov=4 | |mov=4 | ||
|inventory=--<br>{{Item|15|Fire | |inventory=--<br>{{Item|15|Fire|image=black magic}} • {{Item|15|Sagittae|image=black magic}} • {{Item|15|Recover|image=white magic}} • {{Item|15|Discipline|image=skill class}} | ||
|last=y | |last=y | ||
}} | }} | ||
| Line 2,044: | Line 2,050: | ||
|res=9 | |res=9 | ||
|mov=4 | |mov=4 | ||
|inventory=--<br>{{Item|15|Miasma|image=black magic}} • {{Item|15|Conjure|image=white magic}}{{ | |inventory=--<br>{{Item|15|Miasma|image=black magic}} • {{Item|15|Conjure|image=white magic}}{{h|*|Revenant variant}} • {{Item|15|Incarnation|image=skill class}} | ||
|notes=Does not move. | |notes=Does not move. | ||
}} | }} | ||
| Line 2,053: | Line 2,059: | ||
|#=1 | |#=1 | ||
|hp=47 | |hp=47 | ||
|atk=21{{ | |atk=21{{h|+3|Granted by Javelin}} | ||
|skill=10 | |skill=10 | ||
|spd=15{{ | |spd=15{{h|−2|Penalized by Javelin}} | ||
|lck=0 | |lck=0 | ||
|def=16 | |def=16 | ||
| Line 2,068: | Line 2,074: | ||
|#=2 | |#=2 | ||
|hp=33 | |hp=33 | ||
|atk=14{{ | |atk=14{{h|+4|Granted by Steel Lance}} | ||
|skill=7 | |skill=7 | ||
|spd=10{{ | |spd=10{{h|−1|Penalized by Steel Lance}} | ||
|lck=0 | |lck=0 | ||
|def=10 | |def=10 | ||
| Line 2,090: | Line 2,096: | ||
|res=10 | |res=10 | ||
|mov=4 | |mov=4 | ||
|inventory=--<br>{{Item|15|Fire | |inventory=--<br>{{Item|15|Fire|image=black magic}} • {{Item|15|Sagittae|image=black magic}} • {{Item|15|Recover|image=white magic}} • {{Item|15|Discipline|image=skill class}} | ||
|last=y | |last=y | ||
}} | }} | ||
| Line 2,126: | Line 2,132: | ||
|res=9 | |res=9 | ||
|mov=4 | |mov=4 | ||
|inventory=--<br>{{Item|15|Mire|image=black magic}} • {{Item|15|Conjure|image=white magic}}{{ | |inventory=--<br>{{Item|15|Mire|image=black magic}} • {{Item|15|Conjure|image=white magic}}{{h|*|Gargoyle variant}} • {{Item|15|Incarnation|image=skill class}} | ||
|notes=Does not move. | |notes=Does not move. | ||
}} | }} | ||
| Line 2,135: | Line 2,141: | ||
|#=2 | |#=2 | ||
|hp=35 | |hp=35 | ||
|atk=14{{ | |atk=14{{h|+2|Granted by Iron Bow}} | ||
|skill=8 | |skill=8 | ||
|spd=8{{ | |spd=8{{h|−2|Penalized by Iron Bow}} | ||
|lck=0 | |lck=0 | ||
|def=8 | |def=8 | ||
|res=2 | |res=2 | ||
|mov=5 | |mov=5 | ||
|inventory={{Item|15|Iron Bow}}<br>{{Item|15|Bowrange +2|image=skill class}} • {{Item|15|Anti-Fliers|image=skill bow}}{{ | |inventory={{Item|15|Iron Bow}}<br>{{Item|15|Bowrange +2|image=skill class}} • {{Item|15|Anti-Fliers|image=skill bow}}{{h|*|Granted by Iron Bow}} | ||
}} | }} | ||
{{ChapUnitCellFE15 | {{ChapUnitCellFE15 | ||
| Line 2,193: | Line 2,199: | ||
|res=9 | |res=9 | ||
|mov=4 | |mov=4 | ||
|inventory=--<br>{{Item|15|Mire|image=black magic}} • {{Item|15|Conjure|image=white magic}}{{ | |inventory=--<br>{{Item|15|Mire|image=black magic}} • {{Item|15|Conjure|image=white magic}}{{h|*|Gargoyle variant}} • {{Item|15|Incarnation|image=skill class}} | ||
|notes=Does not move. | |notes=Does not move. | ||
}} | }} | ||
| Line 2,202: | Line 2,208: | ||
|#=2 | |#=2 | ||
|hp=37 | |hp=37 | ||
|atk=15{{ | |atk=15{{h|+3|Granted by Steel Bow}} | ||
|skill=9 | |skill=9 | ||
|spd=8{{ | |spd=8{{h|−3|Penalized by Steel Bow}} | ||
|lck=0 | |lck=0 | ||
|def=8 | |def=8 | ||
|res=2 | |res=2 | ||
|mov=5 | |mov=5 | ||
|inventory={{Item|15|Steel Bow}}<br>{{Item|15|Bowrange +2|image=skill class}} • {{Item|15|Anti-Fliers|image=skill bow}}{{ | |inventory={{Item|15|Steel Bow}}<br>{{Item|15|Bowrange +2|image=skill class}} • {{Item|15|Anti-Fliers|image=skill bow}}{{h|*|Granted by Steel Bow}} | ||
}} | }} | ||
{{ChapUnitCellFE15 | {{ChapUnitCellFE15 | ||
| Line 2,253: | Line 2,259: | ||
|#=3 | |#=3 | ||
|hp=44 | |hp=44 | ||
|atk=24{{ | |atk=24{{h|+4|Granted by Steel Lance}} | ||
|skill=6 | |skill=6 | ||
|spd=3{{ | |spd=3{{h|−1|Penalized by Steel Lance}} | ||
|lck=0 | |lck=0 | ||
|def=21 | |def=21 | ||
| Line 2,290: | Line 2,296: | ||
|res=14 | |res=14 | ||
|mov=4 | |mov=4 | ||
|inventory=--<br>{{Item|15|Thunder | |inventory=--<br>{{Item|15|Thunder|image=black magic}} • {{Item|15|Teleportation|image=skill personal}} | ||
|last=y | |last=y | ||
}} | }} | ||
| Line 2,301: | Line 2,307: | ||
|#=1 | |#=1 | ||
|hp=49 | |hp=49 | ||
|atk=27{{ | |atk=27{{h|+8|Granted by Silver Lance}} | ||
|skill=8 | |skill=8 | ||
|spd=4{{ | |spd=4{{h|−2|Penalized by Silver Lance}} | ||
|lck=0 | |lck=0 | ||
|def=24 | |def=24 | ||
| Line 2,316: | Line 2,322: | ||
|#=2 | |#=2 | ||
|hp=49 | |hp=49 | ||
|atk=27{{ | |atk=27{{h|+4|Granted by Steel Lance}} | ||
|skill=8 | |skill=8 | ||
|spd=4{{ | |spd=4{{h|−1|Penalized by Steel Lance}} | ||
|lck=0 | |lck=0 | ||
|def=24 | |def=24 | ||
| Line 2,353: | Line 2,359: | ||
|res=14 | |res=14 | ||
|mov=4 | |mov=4 | ||
|inventory=--<br>{{Item|15|Thunder | |inventory=--<br>{{Item|15|Thunder|image=black magic}} • {{Item|15|Teleportation|image=skill personal}} | ||
|last=y | |last=y | ||
}} | }} | ||
| Line 2,396: | Line 2,402: | ||
|#=2 | |#=2 | ||
|hp=44 | |hp=44 | ||
|atk=24{{ | |atk=24{{h|+3|Granted by Javelin}} | ||
|skill=6 | |skill=6 | ||
|spd=3{{ | |spd=3{{h|−2|Penalized by Javelin}} | ||
|lck=0 | |lck=0 | ||
|def=21 | |def=21 | ||
| Line 2,412: | Line 2,418: | ||
|#=1 | |#=1 | ||
|hp=35 | |hp=35 | ||
|atk=14{{ | |atk=14{{h|+3|Granted by Steel Bow}} | ||
|skill=8 | |skill=8 | ||
|spd=8{{ | |spd=8{{h|−3|Penalized by Steel Bow}} | ||
|lck=0 | |lck=0 | ||
|def=8 | |def=8 | ||
|res=2 | |res=2 | ||
|mov=5 | |mov=5 | ||
|inventory={{Item|15|Steel Bow}}<br>{{Item|15|Bowrange +2|image=skill class}} • {{Item|15|Anti-Fliers|image=skill bow}}{{ | |inventory={{Item|15|Steel Bow}}<br>{{Item|15|Bowrange +2|image=skill class}} • {{Item|15|Anti-Fliers|image=skill bow}}{{h|*|Granted by Steel Bow}} | ||
|notes=Begins moving unprovoked on turn 8, or if he or a [[Fiend]] is provoked. | |notes=Begins moving unprovoked on turn 8, or if he or a [[Fiend]] is provoked. | ||
}} | }} | ||
| Line 2,433: | Line 2,439: | ||
|lck=0 | |lck=0 | ||
|def=12 | |def=12 | ||
|res=6{{ | |res=6{{h|+5|Granted by Resistance +5}} | ||
|mov=7 | |mov=7 | ||
|inventory=--<br>{{Item|15|Sword|link=Sword (Gaiden)|image=sword forecast}} • {{Item|15|Resistance +5|image=skill class}} • {{Item|15|Apotrope|image=skill class}} | |inventory=--<br>{{Item|15|Sword|link=Sword (Gaiden)|image=sword forecast}} • {{Item|15|Resistance +5|image=skill class}} • {{Item|15|Apotrope|image=skill class}} | ||
| Line 2,450: | Line 2,456: | ||
|res=14 | |res=14 | ||
|mov=4 | |mov=4 | ||
|inventory=--<br>{{Item|15|Thunder | |inventory=--<br>{{Item|15|Thunder|image=black magic}} • {{Item|15|Teleportation|image=skill personal}} | ||
}} | }} | ||
{{ChapUnitCellFE15 | {{ChapUnitCellFE15 | ||
| Line 2,474: | Line 2,480: | ||
|#=1 | |#=1 | ||
|hp=42 | |hp=42 | ||
|atk=19{{ | |atk=19{{h|+2|Granted by Iron Lance}} | ||
|skill=8 | |skill=8 | ||
|spd=13 | |spd=13 | ||
| Line 2,490: | Line 2,496: | ||
|#=1 | |#=1 | ||
|hp=47 | |hp=47 | ||
|atk=20{{ | |atk=20{{h|+13|Granted by Shadow Sword}} | ||
|skill=9 | |skill=9 | ||
|spd=7{{ | |spd=7{{h|−5|Penalized by Shadow Sword}} | ||
|lck=0 | |lck=0 | ||
|def=14 | |def=14 | ||
|res=4 | |res=4 | ||
|mov=5 | |mov=5 | ||
|inventory={{Item|15|Shadow Sword}}<br>{{Item|15|Bone Sword|image=monster forecast}} • {{Item|15|Lifetaker|image=skill sword}}{{ | |inventory={{Item|15|Shadow Sword}}<br>{{Item|15|Bone Sword|image=monster forecast}} • {{Item|15|Lifetaker|image=skill sword}}{{h|*|Granted by Shadow Sword}} • {{Item|15|Hex|image=skill sword}}{{h|*|Granted by Shadow Sword}} | ||
|notes=Begins moving unprovoked on turn 4, or if it, a [[Gargoyle]], the [[Gold Knight]], or the other Bonewalker is provoked. | |notes=Begins moving unprovoked on turn 4, or if it, a [[Gargoyle]], the [[Gold Knight]], or the other Bonewalker is provoked. | ||
}} | }} | ||
| Line 2,506: | Line 2,512: | ||
|#=1 | |#=1 | ||
|hp=47 | |hp=47 | ||
|atk=20{{ | |atk=20{{h|+5|Granted by Brave Sword}} | ||
|skill=9 | |skill=9 | ||
|spd=7 | |spd=7 | ||
| Line 2,575: | Line 2,581: | ||
|#=2 | |#=2 | ||
|hp=47 | |hp=47 | ||
|atk=26{{ | |atk=26{{h|+3|Granted by Javelin}} | ||
|skill=7 | |skill=7 | ||
|spd=4{{ | |spd=4{{h|−2|Penalized by Javelin}} | ||
|lck=0 | |lck=0 | ||
|def=23 | |def=23 | ||
| Line 2,591: | Line 2,597: | ||
|#=1 | |#=1 | ||
|hp=38 | |hp=38 | ||
|atk=16{{ | |atk=16{{h|+5|Granted by Silver Bow}} | ||
|skill=10 | |skill=10 | ||
|spd=9{{ | |spd=9{{h|−4|Penalized by Silver Bow}} | ||
|lck=0 | |lck=0 | ||
|def=9 | |def=9 | ||
|res=2 | |res=2 | ||
|mov=5 | |mov=5 | ||
|inventory={{Item|15|Silver Bow}}<br>{{Item|15|Bowrange +2|image=skill class}} • {{Item|15|Anti-Fliers|image=skill bow}}{{ | |inventory={{Item|15|Silver Bow}}<br>{{Item|15|Bowrange +2|image=skill class}} • {{Item|15|Anti-Fliers|image=skill bow}}{{h|*|Granted by Silver Bow}} | ||
|notes=Begins moving unprovoked on turn 6, or if he or a [[Fiend]] is provoked. | |notes=Begins moving unprovoked on turn 6, or if he or a [[Fiend]] is provoked. | ||
}} | }} | ||
| Line 2,628: | Line 2,634: | ||
|lck=0 | |lck=0 | ||
|def=13 | |def=13 | ||
|res=6{{ | |res=6{{h|+5|Granted by Resistance +5}} | ||
|mov=7 | |mov=7 | ||
|inventory=--<br>{{Item|15|Sword|link=Sword (Gaiden)|image=sword forecast}} • {{Item|15|Resistance +5|image=skill class}} • {{Item|15|Apotrope|image=skill class}} | |inventory=--<br>{{Item|15|Sword|link=Sword (Gaiden)|image=sword forecast}} • {{Item|15|Resistance +5|image=skill class}} • {{Item|15|Apotrope|image=skill class}} | ||
| Line 2,645: | Line 2,651: | ||
|res=14 | |res=14 | ||
|mov=4 | |mov=4 | ||
|inventory=--<br>{{Item|15|Thunder | |inventory=--<br>{{Item|15|Thunder|image=black magic}} • {{Item|15|Teleportation|image=skill personal}} | ||
}} | }} | ||
{{ChapUnitCellFE15 | {{ChapUnitCellFE15 | ||
| Line 2,669: | Line 2,675: | ||
|#=1 | |#=1 | ||
|hp=45 | |hp=45 | ||
|atk=20{{ | |atk=20{{h|+4|Granted by Steel Lance}} | ||
|skill=9 | |skill=9 | ||
|spd=14{{ | |spd=14{{h|−1|Penalized by Steel Lance}} | ||
|lck=0 | |lck=0 | ||
|def=15 | |def=15 | ||
| Line 2,685: | Line 2,691: | ||
|#=1 | |#=1 | ||
|hp=49 | |hp=49 | ||
|atk=21{{ | |atk=21{{h|+13|Granted by Shadow Sword}} | ||
|skill=10 | |skill=10 | ||
|spd=8{{ | |spd=8{{h|−5|Penalized by Shadow Sword}} | ||
|lck=0 | |lck=0 | ||
|def=15 | |def=15 | ||
|res=4 | |res=4 | ||
|mov=5 | |mov=5 | ||
|inventory={{Item|15|Shadow Sword}}<br>{{Item|15|Bone Sword|image=monster forecast}} • {{Item|15|Lifetaker|image=skill sword}}{{ | |inventory={{Item|15|Shadow Sword}}<br>{{Item|15|Bone Sword|image=monster forecast}} • {{Item|15|Lifetaker|image=skill sword}}{{h|*|Granted by Shadow Sword}} • {{Item|15|Hex|image=skill sword}}{{h|*|Granted by Shadow Sword}} | ||
|notes=Begins moving unprovoked on turn 3, or if it, a [[Gargoyle]], the [[Gold Knight]], or the other Bonewalker is provoked. | |notes=Begins moving unprovoked on turn 3, or if it, a [[Gargoyle]], the [[Gold Knight]], or the other Bonewalker is provoked. | ||
}} | }} | ||
| Line 2,701: | Line 2,707: | ||
|#=1 | |#=1 | ||
|hp=49 | |hp=49 | ||
|atk=21{{ | |atk=21{{h|+5|Granted by Brave Sword}} | ||
|skill=10 | |skill=10 | ||
|spd=8 | |spd=8 | ||
| Line 2,775: | Line 2,781: | ||
|res=8 | |res=8 | ||
|mov=6 | |mov=6 | ||
|inventory=--<br>{{Item|15|Axe|link=Axe ( | |inventory=--<br>{{Item|15|Axe|link=Axe (Famicom)|image=axe forecast}} | ||
}} | }} | ||
{{ChapUnitCellFE15 | {{ChapUnitCellFE15 | ||
| Line 2,856: | Line 2,862: | ||
|res=9 | |res=9 | ||
|mov=6 | |mov=6 | ||
|inventory=--<br>{{Item|15|Axe|link=Axe ( | |inventory=--<br>{{Item|15|Axe|link=Axe (Famicom)|image=axe forecast}} | ||
}} | }} | ||
{{ChapUnitCellFE15 | {{ChapUnitCellFE15 | ||
| Line 2,896: | Line 2,902: | ||
==Strategy== | ==Strategy== | ||
{{ | {{strategy}} | ||
Welcome to the final dungeon of Celica's route. There's a Mila idol in the basement if you need to promote anyone, and the pots are prone to dropping Silver Marks that can be farmed for last-minute weapon upgrades. As usual, you can sneak past most enemies, but there are four fixed encounters. Note that exiting the tower will cause the fixed enemies to respawn; however, visiting the Mila idol is fine. | |||
The Fiend is accompanied by Arcanists and Dread Fighters. Hunter's Volley is your best friend here. | |||
The Necrodragons are accompanied by some Gargoyles and a Bow Knight. This is nothing you haven't dealt with before - just lure the Bow Knight in with your own bowman and mow the rest down on turn 2. | |||
The Bow Knight battle has you swarmed by Bow Knights, Bone Walkers, and a couple of Necrodragons. You are very likely to be overrun - Genny's Invoke is a godsend for drawing fire away from your units and giving you some breathing room. | |||
The Mogall battle is easy once you kill the Dread Fighter, Sniper, and Gold Knight. The Mogalls are pests who have great Speed and the ability to multiply, but have poor mobility and damage. Your Snipers and Bow Knights can use Hunter's Volley from outside their range to obliterate them. | |||
'''Be warned that crossing the threshold to the tower's aerie is the point of no return for Celica's half of the game. You cannot do anything on the aerie except talk to Jedah and end Act 4 for her. You will not be able to control Celica's army again until the final battle, you cannot visit the east half of Valentia or promote Celica's units until the post-game, and Alessio's sidequest chain will be left permanently incomplete if it has not been finished.''' Make sure you're ready before going up those stairs. | |||
Map Turn Count: 2<br>Game Turn Count: 269 (Fiend battle) | |||
Map Turn Count: 2<br>Game Turn Count: 271 (Necrodragon battle) | |||
Map Turn Count: 3<br>Game Turn Count: 274 (Bow Knight battle) | |||
Map Turn Count: 5<br>Game Turn Count: 279 (Mogall battle) | |||
==Flavor text== | |||
{{DescriptionHdr}} | |||
{{DescriptionCell | |||
|game={{title|Echoes: Shadows of Valentia}} | |||
|english=Seat of the Duma<br>Faithful. No records<br>remain of why this<br>ancient towering<br>spire was originally<br>constructed. | |||
|japanese=ドーマ教団の本拠地。<br>何らかの目的をもって<br>古の時代に建設された<br>神の名を冠する<br>巨大な塔。 | |||
}} | |||
{{DescriptionFtr}} | |||
<!-- | <!-- | ||
==Trivia== | ==Trivia== | ||
--> | --> | ||
==Etymology and other languages== | ==Etymology and other languages== | ||
{{Names | {{Names | ||
|eng-name=Duma Tower | |eng-name=Duma Tower | ||
|eng-fan-name=Tower of Doma | |eng-fan-name=Tower of Doma | ||
|eng-fan-mean=Used in the ''Gaiden'' [[fan translation]]. | |eng-fan-mean=Used in the ''Gaiden'' [[fan translation]]. | ||
| | |jpn-name={{h|ドーマの塔|Dōma no tō}} | ||
| | |jpn-mean=Officially romanized as '''Doma'''; literally "Doma's Tower" or "Tower of Doma". In ''Gaiden'', it is spelled with hiragana as {{hl|ドーマのとう|Dōma no tō}}. | ||
|span-name=Torre de Duma | |span-name=Torre de Duma | ||
|span-mean=Tower of Duma | |span-mean=Tower of Duma | ||
| Line 2,918: | Line 2,952: | ||
|dut-name=Duma-toren | |dut-name=Duma-toren | ||
|dut-mean=Duma tower | |dut-mean=Duma tower | ||
|ch-simp-name={{ | |por-name=Torre de Duma | ||
|por-mean=Tower of Duma; used in the "Way of the Heart" [[Lost Lore]] event in {{FEH}}. | |||
|ch-simp-name={{h|多玛之塔|Duōmǎ zhī tǎ}} | |||
|ch-simp-mean=Tower of Duoma | |ch-simp-mean=Tower of Duoma | ||
|ch-trad-name={{ | |ch-trad-name={{h|多瑪之塔|Duōmǎ zhī tǎ}} | ||
|ch-trad-mean=Tower of Duoma | |ch-trad-mean=Tower of Duoma | ||
}} | }} | ||
Latest revision as of 21:48, 28 March 2024
- For additional information on the location, see Duma Tower.
| ||||||
|

| “ | The tower is massive... Oppressive. Like Duma's power given form. What lies beyond the quest for ever-greater power? Perhaps that answer lies at the tower's peak. | ” | — Celica |
|---|
Duma Tower (Japanese: ドーマの塔 Doma) is the final map of the fourth act of Celica's route in Fire Emblem Gaiden and Fire Emblem Echoes: Shadows of Valentia.
Map data
Gaiden Echoes: Shadows of Valentia


| ||||||
|
| |||||
| Victory: Rout the enemy | Player | Enemy | ||||
|---|---|---|---|---|---|---|
| Defeat: Celica dies | 10 | Varies 8 8 10 15+reinforcements |
||||
| Map dimensions: 15 columns by 16 rows | ||||||
Character data
Gaiden Echoes: Shadows of Valentia
| Characters | |
|---|---|
New units
| |
| |
Required characters
| |

| |
Available characters
| |
               
|
Item data
| ||||||||||||||||||
|
- Note: There are no items to be obtained on this map in Gaiden. The item list above is for Echoes: Shadows of Valentia.
Sacred spring data
Gaiden Shadows of Valentia
Enemy data
Gaiden
Battle #1 Battle #2 Battle #3
Echoes: Shadows of Valentia
Floor 1
The Fiend encounter is a fixed encounter which must be fought in order to progress through the tower.
Arcanist #1, Normal Arcanist #1, Hard Arcanist #2, Normal Arcanist #2, Hard Arcanist #3, Normal Arcanist #3, Hard Fiend, Normal Fiend, Hard
Floor 2
The Necrodragon encounter is a fixed encounter which must be fought in order to progress through the tower.
The Fafnir encounter is a rare encounter that only has a 10% chance of appearing after certain requirements have been met. It may appear starting from Act 4.
Gargoyle #1, Normal Gargoyle #1, Hard Gargoyle #2, Normal Gargoyle #2, Hard Gargoyle #3, Normal Gargoyle #3, Hard Necrodragon, Normal Necrodragon, Hard Fafnir, Normal Fafnir, Hard
Floor 3
The Bow Knight encounter is a fixed encounter which must be fought in order to progress through the tower.
The Guardian encounter is a rare encounter that only has a 10% chance of appearing after certain requirements have been met. It may appear starting from Act 4.
Floor 3 includes all possible Arcanist encounters from floor 1 as well as the following:
Dread Fighter #1, Normal Dread Fighter #1, Hard Dread Fighter #2, Normal Dread Fighter #2, Hard Dread Fighter #3, Normal Dread Fighter #3, Hard Bow Knight, Normal Bow Knight, Hard Guardian, Normal Guardian, Hard
| ||||||||||||||||||||||||||||||||||||||||||||||||||||||||||||||||
| ||||||||||||||||||||||||||||||||||||||||||||||||||||||||||||||||
Floor 4
The Mogall encounter is a fixed encounter which must be fought in order to progress through the tower.
The Balor encounter is a rare encounter that only has a 10% chance of appearing after certain requirements have been met. It may only appear starting from Act 5.
Floor 4 includes all possible Arcanist encounters from floor 1, the first Gargoyle encounter from floor 2, and the third Dread Fighter encounter from floor 3, as well as the following:
Cantor #1, Normal Cantor #1, Hard Cantor #2, Normal Cantor #2, Hard Cantor #3, Normal Cantor #3, Hard Fiend, Normal Fiend, Hard Mogall, Normal Mogall, Hard Balor, Normal Balor, Hard
| |||||||||||||||||||||||||||||||||||||||||||||||||||||||||||||||||||||||||||||||||||||||||
| |||||||||||||||||||||||||||||||||||||||||||||||||||||||||||||||||||||||||||||||||||||||||
| |||||||||||||||||||||||||||||||||||||||||||||||||||||||||||||||||||||||||||||||||||||||||
| |||||||||||||||||||||||||||||||||||||||||||||||||||||||||||||||||||||||||||||||||||||||||
Strategy
| This section details unofficial strategies that may help with completion of the chapter. This may not work for everybody. |
Welcome to the final dungeon of Celica's route. There's a Mila idol in the basement if you need to promote anyone, and the pots are prone to dropping Silver Marks that can be farmed for last-minute weapon upgrades. As usual, you can sneak past most enemies, but there are four fixed encounters. Note that exiting the tower will cause the fixed enemies to respawn; however, visiting the Mila idol is fine.
The Fiend is accompanied by Arcanists and Dread Fighters. Hunter's Volley is your best friend here.
The Necrodragons are accompanied by some Gargoyles and a Bow Knight. This is nothing you haven't dealt with before - just lure the Bow Knight in with your own bowman and mow the rest down on turn 2.
The Bow Knight battle has you swarmed by Bow Knights, Bone Walkers, and a couple of Necrodragons. You are very likely to be overrun - Genny's Invoke is a godsend for drawing fire away from your units and giving you some breathing room.
The Mogall battle is easy once you kill the Dread Fighter, Sniper, and Gold Knight. The Mogalls are pests who have great Speed and the ability to multiply, but have poor mobility and damage. Your Snipers and Bow Knights can use Hunter's Volley from outside their range to obliterate them.
Be warned that crossing the threshold to the tower's aerie is the point of no return for Celica's half of the game. You cannot do anything on the aerie except talk to Jedah and end Act 4 for her. You will not be able to control Celica's army again until the final battle, you cannot visit the east half of Valentia or promote Celica's units until the post-game, and Alessio's sidequest chain will be left permanently incomplete if it has not been finished. Make sure you're ready before going up those stairs.
Map Turn Count: 2
Game Turn Count: 269 (Fiend battle)
Map Turn Count: 2
Game Turn Count: 271 (Necrodragon battle)
Map Turn Count: 3
Game Turn Count: 274 (Bow Knight battle)
Map Turn Count: 5
Game Turn Count: 279 (Mogall battle)
Flavor text
| Game | Text (English) |
Text (Japanese) |
|---|---|---|
| Echoes: Shadows of Valentia | Seat of the Duma
Faithful. No records remain of why this ancient towering spire was originally constructed. |
ドーマ教団の本拠地。
何らかの目的をもって 古の時代に建設された 神の名を冠する 巨大な塔。 |
Etymology and other languages
| Names, etymology, and in other regions | ||
|---|---|---|
| Language | Name | Definition, etymology, and notes |
| English |
Duma Tower |
-- |
| English (unofficial) |
Tower of Doma |
Used in the Gaiden fan translation. |
| Japanese |
ドーマの塔 |
Officially romanized as Doma; literally "Doma's Tower" or "Tower of Doma". In Gaiden, it is spelled with hiragana as ドーマのとう. |
| Spanish |
Torre de Duma |
Tower of Duma |
| French |
Tour de Duma |
Tower of Duma |
| German |
Turm des Duma |
Tower of Duma |
| Italian |
Torre di Duma |
Tower of Duma |
| Dutch |
Duma-toren |
Duma tower |
| Portuguese |
Torre de Duma |
Tower of Duma; used in the "Way of the Heart" Lost Lore event in Fire Emblem Heroes. |
| Simplified Chinese |
多玛之塔 |
Tower of Duoma |
| Traditional Chinese |
多瑪之塔 |
Tower of Duoma |
Gallery
This section has been marked as a stub. Please help improve the page by adding information.
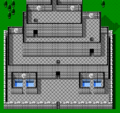
The exterior of Duma Tower as visited by Celica in Gaiden.
| ← The Swamps of Duma Battle • | Duma Tower | • Duma Temple → |
|---|
| Fire Emblem Echoes: Shadows of Valentia | ||||||||||||||||||||||||||||||||||||||||||||||||||||||||||||||||||||||||||
|---|---|---|---|---|---|---|---|---|---|---|---|---|---|---|---|---|---|---|---|---|---|---|---|---|---|---|---|---|---|---|---|---|---|---|---|---|---|---|---|---|---|---|---|---|---|---|---|---|---|---|---|---|---|---|---|---|---|---|---|---|---|---|---|---|---|---|---|---|---|---|---|---|---|---|
| ||||||||||||||||||||||||||||||||||||||||||||||||||||||||||||||||||||||||||