| Site News |
|---|
| Warning: This wiki contains spoilers. Read at your own risk! Social media: If you would like, please join our Discord server, and/or follow us on Twitter (X) or Tumblr! |
Duma Tower: Difference between revisions
No edit summary |
Thecornerman (talk | contribs) m (Text replacement - "\b([Aa])ct (\d+)" to "$1ct $2") |
||
| (28 intermediate revisions by 10 users not shown) | |||
| Line 1: | Line 1: | ||
{{Location Infobox | {{Location Infobox | ||
| image= [[File: Cm fe02 duma tower exterior.png|200px]] | |image= [[File: Cm fe02 duma tower exterior.png|200px]] | ||
| caption=The exterior of Duma Tower in {{title|Gaiden}}. | |caption=The exterior of Duma Tower in {{title|Gaiden}}. | ||
| chapter= | |help_text=Seat of the Duma Faithful. No records remain of why this ancient towering spire was originally constructed. | ||
*[[Land of Sorrow (Gaiden)|Act 4: Land of Sorrow]] | |chapter=*[[Land of Sorrow (Gaiden)|Act 4: Land of Sorrow]] | ||
*[[Together to the End|Act 5: Together to the End]] | *[[Together to the End|Act 5: Together to the End]] | ||
| country = [[Rigel]] | |country=[[Rigel]] | ||
| appearances = | |appearances=*{{title|Gaiden}} | ||
*{{title|Gaiden}} | |||
*{{title|Echoes: Shadows of Valentia}} | *{{title|Echoes: Shadows of Valentia}} | ||
}} | }} | ||
'''Duma Tower''' (Japanese: {{ | '''Duma Tower''' (Japanese: {{hl|ドーマの塔|Dōma no tō}} ''Doma's Tower'') is a [[Valentia]]n monument of worship to the fell god [[Duma]], situated in the northernmost reaches of [[Rigel]]. It is the final [[dungeon]] of {{FE2}}, and the final destination for both [[Alm]] and [[Celica]] on their different journeys. In the remake, {{FE15}}, it is the penultimate dungeon. | ||
==History== | ==History== | ||
In her quest to locate the missing Earth Mother [[Mila]], [[Celica]] ultimately arrived at Duma Tower, where after confronting waves of Duma's servants she encountered the dark priest [[Jedah]] at the tower's peak. Jedah offered Celica the opportunity to save [[Alm]] from being trapped in the Dragon's Maw by a landslide, by offering herself up as a sacrifice to Duma in exchange for Jedah clearing Alm's path.<ref>{{Cite|Heheh... Celica. Alm's trapped in Dragon Mountain. Follow me if you want to save him. If you sacrifice yourselves to Lord Duma, Alm's path shall again open up!|[[Jedah]]|Gaiden}}</ref> As a result, Celica was trapped in the tower's altar basement, beset by hordes of [[Mogall]]s and other servants led by Duma himself. | In her quest to locate the missing Earth Mother [[Mila]], [[Celica]] ultimately arrived at Duma Tower, where after confronting waves of Duma's servants she encountered the dark priest [[Jedah]] at the tower's peak. Jedah offered Celica the opportunity to save [[Alm]] from being trapped in the Dragon's Maw by a landslide, by offering herself up as a sacrifice to Duma in exchange for Jedah clearing Alm's path.<ref>{{Cite|Heheh... Celica. Alm's trapped in Dragon Mountain. Follow me if you want to save him. If you sacrifice yourselves to Lord Duma, Alm's path shall again open up!|[[Jedah]]|Gaiden}}</ref> As a result, Celica was trapped in the tower's altar basement, beset by hordes of [[Mogall]]s and other servants led by Duma himself. | ||
Later, after conquering Rigel and killing Emperor [[Rudolf]], Alm learned of a path to Duma's altar directly from the basement of Rigel Castle<ref>{{Cite|If you go down these stairs you should get to Duma's Altar. It's said that there's no return once you've entered. Your Highness, please take care!|A man at Rigel Castle|Gaiden}}</ref> and followed it, obtaining [[Falchion]] and emerging at the altar to aid Celica's struggling party. Together, the armies of the two defeated Jedah and Duma himself, ending the war and ridding Valentia of the influence of both gods as the culmination of Rudolf's plan. | Later, after conquering Rigel and killing Emperor [[Rudolf]], Alm learned of a path to Duma's altar directly from the basement of Rigel Castle<ref>{{Cite|If you go down these stairs you should get to Duma's Altar. It's said that there's no return once you've entered. Your Highness, please take care!|A man at Rigel Castle|Gaiden}}</ref> and followed it, obtaining [[Falchion (Valentia)|Falchion]] and emerging at the altar to aid Celica's struggling party. Together, the armies of the two defeated Jedah and Duma himself, ending the war and ridding Valentia of the influence of both gods as the culmination of Rudolf's plan. | ||
==Gameplay== | ==Gameplay== | ||
{{main|Land of Sorrow (Gaiden)/Duma Tower|Together to the End/Duma Temple}} | |||
===''Fire Emblem Gaiden''=== | ===''Fire Emblem Gaiden''=== | ||
====Celica's route==== | ====Celica's route==== | ||
In Celica's route, Duma Tower is accessed in late [[Land of Sorrow (Gaiden)|Act 4]] as her final destination. | In Celica's route, Duma Tower is accessed in late [[Land of Sorrow (Gaiden)|Act 4]] as her final destination. Celica must scale the tower by fighting her way through three rooms containing [[skirmish]]es, before being trapped by [[Jedah]] to allow Alm's route to continue past the Dragon's Maw. There are also three sets of [[Mila Shrine#Shrine locations and properties|lion heads]] present across the four intermediary floors: the entrance floor holds two, the second and third floor hold one each which are counted as the same pair in terms of uses, and the top floor contains another two. | ||
{| | {| class="cellpadding-3 basic" style="border-width: 2px; width: 60%" | ||
!style=" | ! style="background: none" colspan="3" | Skirmish enemies and allied units fielded | ||
|- style="color: #fff" | |||
! style="border-top-left-radius: 15px; width: 15%" | # | |||
! style="width: 15%" | Units | |||
! style="border-top-right-radius: 15px" | Skirmish enemies | |||
|- | |- | ||
| Skirmish 1 | |||
| {{h|6*|Celica + the first five units in the roster order}} | |||
| [[Dread Fighter]] ×3 • [[Fiend]] ×1 • [[Arcanist]] ×2 | |||
|- | |- | ||
| Skirmish 2 | |||
| {{h|4*|Celica + the first three units in the roster order}} | |||
| | | [[Bow Knight]] ×1 • [[Necrodragon]] ×3 | ||
|- | |- | ||
|style="border | | style="border-bottom-left-radius: 15px" | Skirmish 3 | ||
| {{h|4*|Celica + the first three units in the roster order}} | |||
| style="border-bottom-right-radius: 15px" | [[Bow Knight]] ×1 • [[Necrodragon]] ×3 | |||
|style="border | |||
|} | |} | ||
====Alm's route==== | ====Alm's route==== | ||
Alm accesses the basement dungeon of Duma Tower in [[Together to the End|Act 5]], comprising the chapter's entirety; unlike Celica's straightforward path through the main tower, Alm's path involves navigating a convoluted puzzle-like layout. | Alm accesses the basement dungeon of Duma Tower in [[Together to the End|Act 5]], comprising the chapter's entirety; unlike Celica's straightforward path through the main tower, Alm's path involves navigating a convoluted puzzle-like layout. | ||
The first goal is to have Alm navigate a series of pits and fall into the right places, fighting through three skirmishes with his army as he proceeds, to reach the stairway leading back up to the treasury. Once he enters the treasury, Alm must fight three more skirmishes, except these times he fights alone with no allies. After clearing all three, Alm receives [[Falchion]] from a treasure chest, then must backtrack and navigate the pits again to find another stairway leading to the door where Celica's army is trapped. On entering the doorway, the final battle against [[Duma]] begins, with Alm and Celica's armies fighting together. | The first goal is to have Alm navigate a series of pits and fall into the right places, fighting through three skirmishes with his army as he proceeds, to reach the stairway leading back up to the treasury. Once he enters the treasury, Alm must fight three more skirmishes, except these times he fights alone with no allies. After clearing all three, Alm receives [[Falchion (Valentia)|Falchion]] from a treasure chest, then must backtrack and navigate the pits again to find another stairway leading to the door where Celica's army is trapped. On entering the doorway, the final battle against [[Duma]] begins, with Alm and Celica's armies fighting together. | ||
While Alm explores Duma Tower, the player may be notified of the status of Celica's army while they are held captive. There is a random chance that one or two of Celica's units take small amounts of damage every time Alm enters a room in the dungeon, and once Alm reaches the final battle himself, all of Celica's units will still have the damage they took when Alm was exploring. | While Alm explores Duma Tower, the player may be notified of the status of Celica's army while they are held captive. There is a random chance that one or two of Celica's units take small amounts of damage every time Alm enters a room in the dungeon, and once Alm reaches the final battle himself, all of Celica's units will still have the damage they took when Alm was exploring. | ||
{| | {| class="cellpadding-3 basic" style="border-width: 2px; width: 60%" | ||
!style=" | ! style="background: none" colspan="3" | Skirmish enemies and allied units fielded | ||
|- | |- style="color: #fff" | ||
! style="border-top-left-radius: 15px; width: 15%" | # | |||
! style="width: 15%" | Units | |||
!style=" | ! style="border-top-right-radius: 15px" | Skirmish enemies | ||
!style=" | |||
!style=" | |||
|- | |- | ||
| Skirmish 1, basement 2 | |||
| | | {{h|10*|Alm + the first nine units in the roster order}} | ||
| [[Cantor]] ×1 • [[Witch]] ×4 • [[Dread Fighter]] ×2 • [[Fiend]] ×3 | |||
|- | |- | ||
| Skirmish 2, basement 3 | |||
| | | {{h|10*|Alm + the first nine units in the roster order}} | ||
| [[Mogall]] {{h|×1*|This Mogall may spawn another Mogall, which in turn will spawn more Mogalls.}} • [[Dread Fighter]] ×6 • [[Hades]] ×1 • [[Cerberus]] ×1 • [[Naberius]] ×1 | |||
|- | |- | ||
| Skirmish 3, basement 4 | |||
| | | {{h|10*|Alm + the first nine units in the roster order}} | ||
| [[Mogall]] ×2 • [[Dread Fighter]] ×2 • [[Witch]] ×4 • [[Fiend]] ×6 | |||
|- | |- | ||
| Skirmish 4, stairway to treasure room | |||
| | | {{h|1*|Alm only}} | ||
| [[Lich]] ×10 | |||
|- | |- | ||
| Skirmish 5, stairway to treasure room | |||
| | | {{h|1*|Alm only}} | ||
| [[Deathgoyle]] ×10 | |||
|- | |- | ||
| Skirmish 6, stairway to treasure room | |||
| | | {{h|1*|Alm only}} | ||
| [[White Dragon (monster)|White Dragon]] ×2 | |||
|- | |- | ||
|style="border | | style="border-bottom-left-radius: 15px" | Final battle | ||
| | | {{h|20*|Alm and Celica + the first nine units in Alm's roster + the first nine units in Celica's roster}} | ||
|style="border | | style="border-bottom-right-radius: 15px" | [[Duma]] • [[Jedah]] • [[Marla]] • [[Hestia]] • [[Gharn]] • [[Aurum]] ×2 • [[Hades]] ×1 • [[Cerberus]] ×1 • [[Naberius]] ×1 • [[Mogall]] ×9 | ||
|} | |} | ||
{| class="cellpadding-3 basic" style="border-width: 2px; width: 80%; margin: 0.9em auto 0.8em" | |||
{| | ! style="background: none" colspan="3" | Maps of Duma Tower (basements) | ||
!style=" | |- style="color: #fff" | ||
|- | ! style="border-top-left-radius: 15px; width: 15%" | Floor | ||
! Map | |||
! style="border-top-right-radius: 15px" | Insert map | |||
!style=" | |||
! | |||
!style=" | |||
|- | |- | ||
| Basement 1 | |||
| [[File:Cm fe02 duma tower b1.png|384px]] | |||
| | | [[File:Cm fe02 duma tower b1a.png|176px]] | ||
|- | |- | ||
| Basement 2 | |||
| [[File:Cm fe02 duma tower b2.png|512px]] | |||
| -- | |||
|- | |- | ||
| Basement 3 | |||
| [[File:Cm fe02 duma tower b3.png|512px]] | |||
| -- | |||
|- | |- | ||
| Basement 4 | |||
| [[File:Cm fe02 duma tower b4.png|512px]] | |||
| -- | |||
|- | |- | ||
| | | style="border-bottom-left-radius: 15px" | Basement 5 | ||
| [[File:Cm fe02 duma tower b5.png|448px]] | |||
| style="border-bottom-right-radius: 15px" | -- | |||
|} | |} | ||
===''Fire Emblem Echoes: Shadows of Valentia''=== | ===''Fire Emblem Echoes: Shadows of Valentia''=== | ||
{{sectstub}} | {{sectstub}} | ||
In {{title|Echoes: Shadows of Valentia}}, like in the original ''Gaiden'', Duma Tower is a major dungeon encountered at the end of [[Celica]]'s route of [[Land of Sorrow (Gaiden)|Act 4]], and comprising all of [[Together to the End|Act 5]] for [[Alm]]'s route. | In {{title|Echoes: Shadows of Valentia}}, like in the original ''Gaiden'', Duma Tower is a major dungeon encountered at the end of [[Celica]]'s route of [[Land of Sorrow (Gaiden)|Act 4]], and comprising all of [[Together to the End|Act 5]] for [[Alm]]'s route. | ||
==Flavor text== | |||
{{DescriptionHdr}} | |||
{{DescriptionCell | |||
|game={{title|Echoes: Shadows of Valentia}} | |||
|english=Seat of the Duma<br>Faithful. No records<br>remain of why this<br>ancient towering<br>spire was originally<br>constructed. | |||
|japanese=ドーマ教団の本拠地。<br>何らかの目的をもって<br>古の時代に建設された<br>神の名を冠する<br>巨大な塔。 | |||
}} | |||
{{DescriptionFtr}} | |||
==Trivia== | ==Trivia== | ||
* In {{FE2}}, the game cannot be saved while in the Duma Tower during Act 5. | |||
* In {{FE13}}, the area roughly where Duma Tower was in ''Gaiden'' is instead occupied by the [[Noble Lineage|Mila Shrine Ruins]]. | * In {{FE13}}, the area roughly where Duma Tower was in ''Gaiden'' is instead occupied by the [[Noble Lineage|Mila Shrine Ruins]]. | ||
==Etymology and other languages== | ==Etymology and other languages== | ||
| Line 144: | Line 136: | ||
|eng-fan-name=Tower of Doma | |eng-fan-name=Tower of Doma | ||
|eng-fan-mean=Used in the ''Gaiden'' [[fan translation]]. | |eng-fan-mean=Used in the ''Gaiden'' [[fan translation]]. | ||
| | |jpn-name={{h|ドーマの塔|Dōma no tō}} | ||
| | |jpn-mean=Officially romanized as '''Doma'''; literally "Doma's Tower" or "Tower of Doma". In ''Gaiden'', it is spelled with hiragana as {{hl|ドーマのとう|Dōma no tō}}. | ||
|ch-simp-name={{ | |span-name=Torre de Duma | ||
|span-mean=Tower of Duma | |||
|fren-name=Tour de Duma | |||
|fren-mean=Tower of Duma | |||
|ger-name=Turm des Duma | |||
|ger-mean=Tower of Duma | |||
|ital-name=Torre di Duma | |||
|ital-mean=tower of Duma | |||
|dut-name=Duma-toren | |||
|dut-mean=Duma Tower | |||
|por-name=Torre de Duma | |||
|por-mean=Tower of Duma; used in the "Way of the Heart" [[Lost Lore]] event in {{FEH}}. | |||
|ch-simp-name={{h|多玛之塔|Duō mǎ zhī tǎ}} | |||
|ch-simp-mean=Tower of Duoma | |ch-simp-mean=Tower of Duoma | ||
|ch-trad-name={{ | |ch-trad-name={{h|多瑪之塔|Duō mǎ zhī tǎ}} | ||
|ch-trad-mean=Tower of Duoma | |ch-trad-mean=Tower of Duoma | ||
}} | }} | ||
==Gallery== | |||
<gallery> | |||
Ss fe02 duma tower map.png|Duma Tower on the [[world map]] in {{title|Gaiden}}. | |||
Cm fe02 duma tower exterior.png|The exterior of Duma Tower, as visited by [[Celica]], in {{title|Gaiden}}. | |||
Mt fe15 duma tower.png|Thumbnail of Duma Tower from {{title|Echoes: Shadows of Valentia}}. | |||
</gallery> | |||
{{refbar}} | {{refbar}} | ||
{{Nav2}} | {{Nav2}} | ||
{{Nav15}} | |||
[[Category:Locations in Fire Emblem Gaiden]] | [[Category:Locations in Fire Emblem Gaiden]] | ||
[[Category:Dungeons in Fire Emblem Gaiden]] | [[Category:Dungeons in Fire Emblem Gaiden]] | ||
[[Category:Dungeons in Fire Emblem Echoes: Shadows of Valentia]] | [[Category:Dungeons in Fire Emblem Echoes: Shadows of Valentia]] | ||
[[Category:Locations in Fire Emblem Echoes: Shadows of Valentia]] | [[Category:Locations in Fire Emblem Echoes: Shadows of Valentia]] | ||
Latest revision as of 21:48, 28 March 2024
| ||||||
|

Duma Tower (Japanese: ドーマの塔 Doma's Tower) is a Valentian monument of worship to the fell god Duma, situated in the northernmost reaches of Rigel. It is the final dungeon of Fire Emblem Gaiden, and the final destination for both Alm and Celica on their different journeys. In the remake, Fire Emblem Echoes: Shadows of Valentia, it is the penultimate dungeon.
History
In her quest to locate the missing Earth Mother Mila, Celica ultimately arrived at Duma Tower, where after confronting waves of Duma's servants she encountered the dark priest Jedah at the tower's peak. Jedah offered Celica the opportunity to save Alm from being trapped in the Dragon's Maw by a landslide, by offering herself up as a sacrifice to Duma in exchange for Jedah clearing Alm's path.[1] As a result, Celica was trapped in the tower's altar basement, beset by hordes of Mogalls and other servants led by Duma himself.
Later, after conquering Rigel and killing Emperor Rudolf, Alm learned of a path to Duma's altar directly from the basement of Rigel Castle[2] and followed it, obtaining Falchion and emerging at the altar to aid Celica's struggling party. Together, the armies of the two defeated Jedah and Duma himself, ending the war and ridding Valentia of the influence of both gods as the culmination of Rudolf's plan.
Gameplay
- Main articles:
Land of Sorrow (Gaiden)/Duma Tower and Together to the End/Duma Temple
Fire Emblem Gaiden
Celica's route
In Celica's route, Duma Tower is accessed in late Act 4 as her final destination. Celica must scale the tower by fighting her way through three rooms containing skirmishes, before being trapped by Jedah to allow Alm's route to continue past the Dragon's Maw. There are also three sets of lion heads present across the four intermediary floors: the entrance floor holds two, the second and third floor hold one each which are counted as the same pair in terms of uses, and the top floor contains another two.
| Skirmish enemies and allied units fielded | ||
|---|---|---|
| # | Units | Skirmish enemies |
| Skirmish 1 | 6* | Dread Fighter ×3 • Fiend ×1 • Arcanist ×2 |
| Skirmish 2 | 4* | Bow Knight ×1 • Necrodragon ×3 |
| Skirmish 3 | 4* | Bow Knight ×1 • Necrodragon ×3 |
Alm's route
Alm accesses the basement dungeon of Duma Tower in Act 5, comprising the chapter's entirety; unlike Celica's straightforward path through the main tower, Alm's path involves navigating a convoluted puzzle-like layout.
The first goal is to have Alm navigate a series of pits and fall into the right places, fighting through three skirmishes with his army as he proceeds, to reach the stairway leading back up to the treasury. Once he enters the treasury, Alm must fight three more skirmishes, except these times he fights alone with no allies. After clearing all three, Alm receives Falchion from a treasure chest, then must backtrack and navigate the pits again to find another stairway leading to the door where Celica's army is trapped. On entering the doorway, the final battle against Duma begins, with Alm and Celica's armies fighting together.
While Alm explores Duma Tower, the player may be notified of the status of Celica's army while they are held captive. There is a random chance that one or two of Celica's units take small amounts of damage every time Alm enters a room in the dungeon, and once Alm reaches the final battle himself, all of Celica's units will still have the damage they took when Alm was exploring.
| Skirmish enemies and allied units fielded | ||
|---|---|---|
| # | Units | Skirmish enemies |
| Skirmish 1, basement 2 | 10* | Cantor ×1 • Witch ×4 • Dread Fighter ×2 • Fiend ×3 |
| Skirmish 2, basement 3 | 10* | Mogall ×1* • Dread Fighter ×6 • Hades ×1 • Cerberus ×1 • Naberius ×1 |
| Skirmish 3, basement 4 | 10* | Mogall ×2 • Dread Fighter ×2 • Witch ×4 • Fiend ×6 |
| Skirmish 4, stairway to treasure room | 1* | Lich ×10 |
| Skirmish 5, stairway to treasure room | 1* | Deathgoyle ×10 |
| Skirmish 6, stairway to treasure room | 1* | White Dragon ×2 |
| Final battle | 20* | Duma • Jedah • Marla • Hestia • Gharn • Aurum ×2 • Hades ×1 • Cerberus ×1 • Naberius ×1 • Mogall ×9 |
| Maps of Duma Tower (basements) | ||
|---|---|---|
| Floor | Map | Insert map |
| Basement 1 | 
|

|
| Basement 2 | 
|
-- |
| Basement 3 | 
|
-- |
| Basement 4 | 
|
-- |
| Basement 5 | 
|
-- |
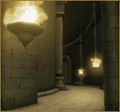
Fire Emblem Echoes: Shadows of Valentia
This section has been marked as a stub. Please help improve the page by adding information.
In Echoes: Shadows of Valentia, like in the original Gaiden, Duma Tower is a major dungeon encountered at the end of Celica's route of Act 4, and comprising all of Act 5 for Alm's route.
Flavor text
| Game | Text (English) |
Text (Japanese) |
|---|---|---|
| Echoes: Shadows of Valentia | Seat of the Duma
Faithful. No records remain of why this ancient towering spire was originally constructed. |
ドーマ教団の本拠地。
何らかの目的をもって 古の時代に建設された 神の名を冠する 巨大な塔。 |
Trivia
- In Fire Emblem Gaiden, the game cannot be saved while in the Duma Tower during Act 5.
- In Fire Emblem Awakening, the area roughly where Duma Tower was in Gaiden is instead occupied by the Mila Shrine Ruins.
Etymology and other languages
| Names, etymology, and in other regions | ||
|---|---|---|
| Language | Name | Definition, etymology, and notes |
| English |
Duma Tower |
-- |
| English (unofficial) |
Tower of Doma |
Used in the Gaiden fan translation. |
| Japanese |
ドーマの塔 |
Officially romanized as Doma; literally "Doma's Tower" or "Tower of Doma". In Gaiden, it is spelled with hiragana as ドーマのとう. |
| Spanish |
Torre de Duma |
Tower of Duma |
| French |
Tour de Duma |
Tower of Duma |
| German |
Turm des Duma |
Tower of Duma |
| Italian |
Torre di Duma |
tower of Duma |
| Dutch |
Duma-toren |
Duma Tower |
| Portuguese |
Torre de Duma |
Tower of Duma; used in the "Way of the Heart" Lost Lore event in Fire Emblem Heroes. |
| Simplified Chinese |
多玛之塔 |
Tower of Duoma |
| Traditional Chinese |
多瑪之塔 |
Tower of Duoma |
Gallery
Thumbnail of Duma Tower from Echoes: Shadows of Valentia.


References
- ↑ "Heheh... Celica. Alm's trapped in Dragon Mountain. Follow me if you want to save him. If you sacrifice yourselves to Lord Duma, Alm's path shall again open up!" — Jedah, Fire Emblem Gaiden
- ↑ "If you go down these stairs you should get to Duma's Altar. It's said that there's no return once you've entered. Your Highness, please take care!" — A man at Rigel Castle, Fire Emblem Gaiden
| Fire Emblem Echoes: Shadows of Valentia | ||||||||||||||||||||||||||||||||||||||||||||||||||||||||||||||||||||||||||
|---|---|---|---|---|---|---|---|---|---|---|---|---|---|---|---|---|---|---|---|---|---|---|---|---|---|---|---|---|---|---|---|---|---|---|---|---|---|---|---|---|---|---|---|---|---|---|---|---|---|---|---|---|---|---|---|---|---|---|---|---|---|---|---|---|---|---|---|---|---|---|---|---|---|---|
| ||||||||||||||||||||||||||||||||||||||||||||||||||||||||||||||||||||||||||