| Site News |
|---|
| Warning: This wiki contains spoilers. Read at your own risk! Social media: If you would like, please join our Discord server, and/or follow us on X (Twitter) or Tumblr! |
War of Deliverance/Skirmish: Difference between revisions
Infernape612 (talk | contribs) |
Thecornerman (talk | contribs) m (Text replacement - "\b([Aa])ct (\d+)" to "$1ct $2") |
||
| (12 intermediate revisions by 5 users not shown) | |||
| Line 1: | Line 1: | ||
{{Chapter Infobox | {{Chapter Infobox | ||
|title=Skirmish | |title=Skirmish | ||
| Line 9: | Line 7: | ||
*[[War of Deliverance/Storming of the Valley Approach|Storming of the Valley Approach]] | *[[War of Deliverance/Storming of the Valley Approach|Storming of the Valley Approach]] | ||
}} | }} | ||
'''Skirmish''' (Japanese: {{hl|遭遇戦|Sōgūsen}} ''Skirmish'') is the second map of the third act of [[Celica]]'s route in {{FE2}} and {{FE15}}. | '''Skirmish''' (Japanese: {{hl|遭遇戦|Sōgūsen}} ''Skirmish'') is the second map of the third act of [[Celica]]'s route in {{FE2}} and {{FE15}}. | ||
==Map data== | ==Map data== | ||
{{ChapData | {{Tab | ||
|default=2 | |||
|tab1=''Gaiden'' | |||
|tab2=''Echoes: Shadows of Valentia'' | |||
|content1={{ChapData | |||
|victory=Rout the enemy | |victory=Rout the enemy | ||
|defeat=[[Celica]] dies | |defeat=[[Celica]] dies | ||
|ally=10 | |ally={{h|10|Units available during first visit}}/{{h|20|Maximum}} | ||
|enemy=Varies | |enemy=Varies | ||
|map=[[File:Cm fe02 c3 m02 celica.png|200px]] | |map=[[File:Cm fe02 c3 m02 celica.png|200px]] | ||
|col=22 | |||
|row=13 | |||
}} | |||
|content2={{ChapData | |||
|victory=Rout the enemy | |||
|defeat=[[Celica]] dies | |||
|ally={{h|1–10|Units available during first visit}}/{{h|1–20|Maximum}} | |||
|enemy=Varies | |||
|col=22 | |||
|row=13 | |||
}} | |||
}} | }} | ||
| Line 28: | Line 42: | ||
|content1={{ChapChars | |content1={{ChapChars | ||
|game#=02 | |game#=02 | ||
| | |forced1=celica 01 | ||
| | |forced1article=Celica | ||
| | |return1=mae | ||
| | |return2=boey | ||
| | |return3=genny | ||
| | |return4=saber | ||
| | |return5=valbar | ||
| | |return6=kamui | ||
| | |return7=leon | ||
| | |return8=palla | ||
| | |return9=catria | ||
}} | }} | ||
|content2={{ChapChars | |content2={{ChapChars | ||
|game#=15 | |game#=15 | ||
| | |forced1=celica | ||
| | |return1=mae | ||
| | |return2=boey | ||
| | |return3=genny | ||
| | |return4=saber | ||
| | |return5=valbar | ||
| | |return6=kamui | ||
| | |return7=leon | ||
| | |return8=palla | ||
| | |return9=catria | ||
}} | }} | ||
}} | }} | ||
| Line 208: | Line 222: | ||
====''Echoes: Shadows of Valentia''==== | ====''Echoes: Shadows of Valentia''==== | ||
After taking the sidequests [[The Stolen Icon]] and [[Memories of a Father]], a level 1 [[Revenant]] that drops the [[Duma Carving]] and [[Red Tricorn]] respectively will appear as an additional enemy within any of the following encounters. | After taking the sidequests [[The Stolen Icon]] and [[Memories of a Father]], a level 1 [[Revenant]] that drops the [[Duma Carving]] and [[Red Tricorn]] respectively will appear as an additional enemy within any of the following encounters. | ||
{{Tab | {{Tab | ||
|width=100% | |width=100% | ||
| Line 540: | Line 554: | ||
|#=3 | |#=3 | ||
|hp=39 | |hp=39 | ||
|atk=15{{ | |atk=15{{h|+4|Granted by Steel Sword}} | ||
|skill=5 | |skill=5 | ||
|spd=5{{ | |spd=5{{h|−1|Penalized by Steel Sword}} | ||
|lck=0 | |lck=0 | ||
|def=11 | |def=11 | ||
| Line 563: | Line 577: | ||
|mov=5 | |mov=5 | ||
|inventory=--<br>{{Item|15|Bone Sword|image=monster forecast}} | |inventory=--<br>{{Item|15|Bone Sword|image=monster forecast}} | ||
|last=y | |||
}} | }} | ||
{{ChapUnitFtr}} | {{ChapUnitFtr}} | ||
| Line 569: | Line 584: | ||
==Strategy== | ==Strategy== | ||
{{strategy}} | {{strategy}} | ||
One of your big goals is to get Palla some kills to bring her closer to level 9 so that she can promote in the Seabound Shrine. Give Palla the Steel Lance and send her charging northeast supported by Leon and Genny. Meanwhile, the rest of your party can clean out the west side. Feel free to kill on enemy phase if you have to, as there are no supplies for the enemies to use here. | One of your big goals is to get Palla some kills to bring her closer to level 9 so that she can promote in the Seabound Shrine. Give Palla the Steel Lance and send her charging northeast supported by Leon and Genny. Meanwhile, the rest of your party can clean out the west side. Feel free to kill on enemy phase if you have to, as there are no supplies for the enemies to use here. | ||
After this map, you can enter the Mountain Village, recruit Atlas, and access the Blacksmith for the first time. Trade in any provisions you have except stat boosters and those you need for sidequests, and you can forge yourself something nice. A Silver Lance is a very powerful weapon for Act 3, although you will potentially threaten your ability to complete the sidequest "The Merchant of Death" if you do so. | After this map, you can enter the Mountain Village, recruit Atlas, and access the Blacksmith for the first time. Trade in any provisions you have except stat boosters and those you need for sidequests, and you can forge yourself something nice. A Silver Lance is a very powerful weapon for Act 3, although you will potentially threaten your ability to complete the sidequest "The Merchant of Death" if you do so. | ||
Sadly, you will most likely have to pass through this area and fight this skirmish a few times in order to promote Palla, deal with Grieth, and complete sidequests. | Sadly, you will most likely have to pass through this area and fight this skirmish a few times in order to promote Palla, deal with Grieth, and complete sidequests. | ||
| Line 584: | Line 599: | ||
Map Turn Count: 2<br>Game Turn Count: 138 (Fifth passthrough) | Map Turn Count: 2<br>Game Turn Count: 138 (Fifth passthrough) | ||
==Flavor text== | |||
{{DescriptionHdr}} | |||
{{DescriptionCell | |||
|game={{title|Echoes: Shadows of Valentia}} | |||
|english=Once placid, this<br>mountain graveyard<br>is now steeped in a<br>miasma that calls<br>forth hideous<br>Terrors, keeping<br>the living at bay. | |||
|japanese=山の中に作られた墓地。<br>近年は怪しい瘴気に<br>覆われ魔物がはびこる<br>恐ろしい場所に<br>なってしまっている。 | |||
}} | |||
{{DescriptionFtr}} | |||
<!-- | <!-- | ||
==Trivia== | ==Trivia== | ||
--> | --> | ||
| Line 592: | Line 615: | ||
{{Names | {{Names | ||
|eng-name=Skirmish | |eng-name=Skirmish | ||
| | |jpn-name={{h|遭遇戦|Sōgūsen}} | ||
|jpn-mean=Encounter battle | |||
| | |||
|span-name=Escaramuza | |span-name=Escaramuza | ||
|span-mean=Skirmish | |span-mean=Skirmish | ||
| Line 605: | Line 627: | ||
|dut-name=Confrontatie | |dut-name=Confrontatie | ||
|dut-mean=Confrontation | |dut-mean=Confrontation | ||
|ch-simp-name={{ | |kor-name={{h|조우전|joujeon}} | ||
|kor-mean=Encounter battle | |||
|ch-simp-name={{h|遭遇战|Zāoyù zhàn}} | |||
|ch-simp-mean=Encounter battle | |ch-simp-mean=Encounter battle | ||
|ch-trad-name={{ | |ch-trad-name={{h|遭遇戰|Zāoyù zhàn}} | ||
|ch-trad-mean=Encounter battle | |ch-trad-mean=Encounter battle | ||
}} | }} | ||
==Gallery== | ==Gallery== | ||
<gallery> | |||
Mt fe15 mountain graveyard.png|Thumbnail of Mountain Graveyard. | |||
</gallery> | |||
{{ChapterNav | {{ChapterNav | ||
Latest revision as of 21:37, 28 March 2024
| ||||||
|

Skirmish (Japanese: 遭遇戦 Skirmish) is the second map of the third act of Celica's route in Fire Emblem Gaiden and Fire Emblem Echoes: Shadows of Valentia.
Map data
Gaiden Echoes: Shadows of Valentia
| ||||||
|
| |||||
| Victory: Rout the enemy | Player | Enemy | ||||
|---|---|---|---|---|---|---|
| Defeat: Celica dies | 1–10/1–20 | Varies | ||||
| Map dimensions: 22 columns by 13 rows | ||||||
Character data
Gaiden Echoes: Shadows of Valentia
| Characters | |
|---|---|
New units
| |
| |
Required characters
| |

| |
Available characters
| |
        
|
Enemy data
Gaiden
Layout 1 Layout 2 Layout 3 Layout 4 Layout 5
Echoes: Shadows of Valentia
After taking the sidequests The Stolen Icon and Memories of a Father, a level 1 Revenant that drops the Duma Carving and Red Tricorn respectively will appear as an additional enemy within any of the following encounters.
Revenant #1, Normal Revenant #1, Hard Revenant #2, Normal Revenant #2, Hard Revenant #3, Normal Revenant #3, Hard Bonewalker #1, Normal Bonewalker #1, Hard Bonewalker #2, Normal Bonewalker #2, Hard
Strategy
| This section details unofficial strategies that may help with completion of the chapter. This may not work for everybody. |
One of your big goals is to get Palla some kills to bring her closer to level 9 so that she can promote in the Seabound Shrine. Give Palla the Steel Lance and send her charging northeast supported by Leon and Genny. Meanwhile, the rest of your party can clean out the west side. Feel free to kill on enemy phase if you have to, as there are no supplies for the enemies to use here.
After this map, you can enter the Mountain Village, recruit Atlas, and access the Blacksmith for the first time. Trade in any provisions you have except stat boosters and those you need for sidequests, and you can forge yourself something nice. A Silver Lance is a very powerful weapon for Act 3, although you will potentially threaten your ability to complete the sidequest "The Merchant of Death" if you do so.
Sadly, you will most likely have to pass through this area and fight this skirmish a few times in order to promote Palla, deal with Grieth, and complete sidequests.
Map Turn Count: 2
Game Turn Count: 92 (First passthrough)
Map Turn Count: 2
Game Turn Count: 96 (Second passthrough)
Map Turn Count: 2
Game Turn Count: 98 (Third passthrough)
Map Turn Count: 2
Game Turn Count: 136 (Fourth passthrough)
Map Turn Count: 2
Game Turn Count: 138 (Fifth passthrough)
Flavor text
| Game | Text (English) |
Text (Japanese) |
|---|---|---|
| Echoes: Shadows of Valentia | Once placid, this
mountain graveyard is now steeped in a miasma that calls forth hideous Terrors, keeping the living at bay. |
山の中に作られた墓地。
近年は怪しい瘴気に 覆われ魔物がはびこる 恐ろしい場所に なってしまっている。 |
Etymology and other languages
| Names, etymology, and in other regions | ||
|---|---|---|
| Language | Name | Definition, etymology, and notes |
| English |
Skirmish |
-- |
| Japanese |
遭遇戦 |
Encounter battle |
| Spanish |
Escaramuza |
Skirmish |
| French |
Escarmouche |
Skirmish |
| German |
Herausforderung |
Challenge |
| Italian |
Contesa |
Dispute |
| Dutch |
Confrontatie |
Confrontation |
| Korean |
조우전 |
Encounter battle |
| Simplified Chinese |
遭遇战 |
Encounter battle |
| Traditional Chinese |
遭遇戰 |
Encounter battle |
Gallery
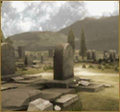
Thumbnail of Mountain Graveyard.

| ← Zofian Coast Battle • | Skirmish | • Attack on the Desert Stronghold → • Storming of the Valley Approach → |
|---|
| Fire Emblem Echoes: Shadows of Valentia | ||||||||||||||||||||||||||||||||||||||||||||||||||||||||||||||||||||||||||
|---|---|---|---|---|---|---|---|---|---|---|---|---|---|---|---|---|---|---|---|---|---|---|---|---|---|---|---|---|---|---|---|---|---|---|---|---|---|---|---|---|---|---|---|---|---|---|---|---|---|---|---|---|---|---|---|---|---|---|---|---|---|---|---|---|---|---|---|---|---|---|---|---|---|---|
| ||||||||||||||||||||||||||||||||||||||||||||||||||||||||||||||||||||||||||