| Site News |
|---|
| Warning: This wiki contains spoilers. Read at your own risk! Social media: If you would like, please join our Discord server, and/or follow us on Twitter (X) or Tumblr! |
Saga:Arrival at Wellt: Difference between revisions
Infernape612 (talk | contribs) (→Plot) |
Tags: Mobile edit Mobile web edit |
||
| (17 intermediate revisions by 6 users not shown) | |||
| Line 1: | Line 1: | ||
{{DISPLAYTITLE:Arrival at Wellt}} | {{DISPLAYTITLE:Arrival at Wellt}} | ||
{{Chapter Infobox | {{Chapter Infobox | ||
|image=[[File:Cm trs1 1.png|200px]] | |image=[[File:Cm trs1 1.png|200px]] | ||
|location={{ | |location={{Saga|Wellt|Port Saura}} | ||
|new units={{ | |new units={{Saga|Runan}}, {{Saga|Kreiss}}, {{Saga|Arkis}}, {{Saga|Garo}}, {{Saga|Sasha}}, {{Saga|Kate}} | ||
|boss={{ | |boss={{Saga|Russ}} | ||
|next={{Saga|Subduing the Bandits}} | |||
}} | }} | ||
{{quote|In that case, we should do what we can to get into the queen's good graces. Our first course of action should be to get a grasp of what exactly the situation is here in Wellt.|{{ | {{quote|In that case, we should do what we can to get into the queen's good graces. Our first course of action should be to get a grasp of what exactly the situation is here in Wellt.|{{Saga|Runan}} discussing how to get aid from Wellt with {{Saga|Eugen}}.}} | ||
'''Arrival at Wellt''' (Japanese: {{ | '''Arrival at Wellt''' (Japanese: {{hl|ウエルト上陸|Ueruto jōriku}} ''Arrival at Wellt'') is the first chapter in {{TRS1}}. {{Saga|Holmes}} drops {{Saga|Runan}} off at Wellt to seek aid against the {{Saga|Zoa}} Empire. | ||
==Plot== | ==Plot== | ||
{{main| | {{main|Saga:Arrival at Wellt/Script}} | ||
Long ago, the dark god {{ | Long ago, the dark god {{Saga|Gerxel}} ruled the continent of {{Saga|Lieberia}} as a tyrant. His reign was brought to an end by the slave {{Saga|Carluon}} and his wife {{Saga|Yutona}}. Their daughters founded four kingdoms: {{Saga|Reeve}} to the east, {{Saga|Canaan}} to the north, {{Saga|Leda}} to the west, and {{Saga|Salia}} to the south. Peace lasted for seven and a half centuries until Leda and Salia destroyed themselves in a war. In the aftermath, the Cult of Gerxel seized power and spread its influence. King {{Saga|Bahanuk}} of Canaan requested the aid of King {{Saga|Badoum}} of Reeve to stamp out the Cult, but was rejected. Bahanuk had a sudden and radical shift in policy; he declared the restoration of the Gerxel Empire and crushed Reeve. | ||
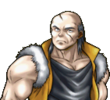
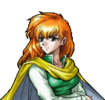
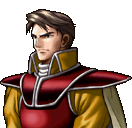
Two young men from Reeve, {{ | Two young men from Reeve, {{Saga|Runan}} and {{Saga|Holmes}}, arrive at the island kingdom of {{Saga|Wellt}} to petition aid. Runan departs with {{Saga|Kreiss}} and {{Saga|Arkis}}, two cavalrymen, {{Saga|Garo}}, a pirate in service to Holmes, and {{Saga|Eugen}}, a crippled former knight of Reeve who serves as his tactician while Holmes moves on to {{Saga|Isura}}. As Runan gathers information at the port town of Saura, Princess {{Saga|Sasha}} of Wellt and her bodyguard {{Saga|Kate}} flee from enemy forces led by {{Saga|Russ}}, a knight in service to Chancellor {{Saga|Codha}}. Runan rescues Sasha and learns that after King {{Saga|Loffaru}} went missing in battle with the Empire half a year ago, Codha has declared himself ruler of Wellt and rules as a tyrant. Queen {{Saga|Liza}} sent Sasha to deliver a letter to the trusted Count {{Saga|Marlon}} of Verje naming him the new chancellor, but Codha sent assassins to stop her. Runan agrees to escort her to Verje. | ||
Meanwhile, Codha decides to kill Marlon before he can be named chancellor. Marlon discusses recent events with his adopted son {{ | Meanwhile, Codha decides to kill Marlon before he can be named chancellor. Marlon discusses recent events with his adopted son {{Saga|Raffin}} and daughter {{Saga|Esther}}. Runan explains to Sasha that his father, Lord {{Saga|Gramud}} of Razelia, was killed by the dragon {{Saga|Muse}} during an alleged peace conference with Canaan. | ||
==Chapter data== | ==Chapter data== | ||
{{ | {{ChapData | ||
|victory=Rout enemy | |victory=Rout enemy | ||
|defeat=Runan or Sasha dies | |defeat=Runan or Sasha dies | ||
|ally=4{{ | |ally=4{{h|+2|Recruitable units}} | ||
|other=2{{ | |other=2{{h|−2|When recruited}} | ||
|enemy=0{{ | |enemy=0{{h|+6|Reinforcements}} | ||
|map= | |map={{tab | ||
{{tab | |||
|tab1=Start | |tab1=Start | ||
|tab2=Reinforcements | |tab2=Reinforcements | ||
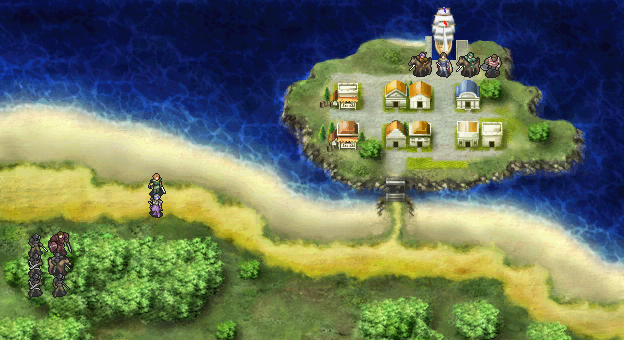
|content1=[[File:Cm trs1 1.png]] | |content1=<div>[[File:Cm trs1 1.png]]</div> | ||
|content2=[[File:Cm trs1 1 reinforcements.png]] | |content2=<div>[[File:Cm trs1 1 reinforcements.png]]</div> | ||
}} | }} | ||
}} | }} | ||
* <small>Note: The Map takes place on a world map location consisting of '''{{ | * <small>Note: The Map takes place on a world map location consisting of '''{{Saga|Plains Fighter|Plains}}''' terrain.</small> | ||
===Character data=== | ===Character data=== | ||
{{ | {{ChapChars | ||
|newunit1={{NewUnitTRS1 | |||
|newunit1={{ | |||
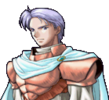
|name=Runan | |name=Runan | ||
|portrait=[[File:Portrait runan 01 trs01.png| | |portrait=[[File:Portrait runan 01 trs01.png|x100px]] | ||
|class=Knight Lord | |class=Knight Lord | ||
|HP=22 | |HP=22 | ||
|lv=2 | |lv=2 | ||
|recruitment method=Automatically from turn 1}} | |inventory={{Item|ps1|Rapier}} | ||
|newunit2={{ | |recruitment method=Automatically from turn 1 | ||
}} | |||
|newunit2={{NewUnitTRS1 | |||
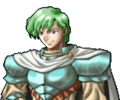
|name=Kreiss | |name=Kreiss | ||
|portrait=[[File:Portrait kreiss trs01.png| | |portrait=[[File:Portrait kreiss trs01.png|x100px]] | ||
|class=Rook Knight | |class=Rook Knight | ||
|HP=24 | |HP=24 | ||
|lv=2 | |lv=2 | ||
|recruitment method=Automatically from turn 1}} | |inventory={{Item|ps1|Hand Spear}}<br>{{Item|ps1|Iron Sword}} | ||
|newunit3={{ | |recruitment method=Automatically from turn 1 | ||
}} | |||
|newunit3={{NewUnitTRS1 | |||
|name=Arkis | |name=Arkis | ||
|portrait=[[File:Portrait arkis trs01.png| | |portrait=[[File:Portrait arkis trs01.png|x100px]] | ||
|class=Rook Knight | |class=Rook Knight | ||
|HP=22 | |HP=22 | ||
|lv=2 | |lv=2 | ||
|recruitment method=Automatically from turn 1}} | |inventory={{Item|ps1|Slim Spear}}<br>{{Item|ps1|Iron Sword}} | ||
|newunit4={{ | |recruitment method=Automatically from turn 1 | ||
}} | |||
|newunit4={{NewUnitTRS1 | |||
|name=Garo | |name=Garo | ||
|portrait=[[File:Portrait garo trs01.png| | |portrait=[[File:Portrait garo trs01.png|x100px]] | ||
|class=Pirate | |class=Pirate | ||
|HP=35 | |HP=35 | ||
|lv=7 | |lv=7 | ||
|recruitment method=Automatically from turn 1}} | |inventory={{Item|ps1|Hatchet}}<br>{{Item|ps1|Iron Axe}} | ||
|newunit5={{ | |recruitment method=Automatically from turn 1 | ||
}} | |||
|newunit5={{NewUnitTRS1 | |||
|name=Sasha | |name=Sasha | ||
|portrait=[[File:Portrait sasha trs01.png| | |portrait=[[File:Portrait sasha trs01.png|x100px]] | ||
|class=Princess | |class=Princess | ||
|HP=18 | |HP=18 | ||
|lv=1 | |lv=1 | ||
|recruitment method=NPC, talk with Runan}} | |inventory={{Item|ps1|Shortsword}} | ||
|newunit6={{ | |recruitment method=NPC, talk with Runan | ||
}} | |||
|newunit6={{NewUnitTRS1 | |||
|name=Kate | |name=Kate | ||
|portrait=[[File:Portrait kate trs01.png| | |portrait=[[File:Portrait kate trs01.png|x100px]] | ||
|class=Lady Knight | |class=Lady Knight | ||
|HP=22 | |HP=22 | ||
|lv=2 | |lv=2 | ||
|recruitment method=Automatically joins with Sasha}} | |inventory={{Item|ps1|Estoc}}<br>{{Item|ps1|Bowgun}} | ||
|recruitment method=Automatically joins with Sasha | |||
}} | |||
}} | }} | ||
| Line 90: | Line 98: | ||
|platform=ps1 | |platform=ps1 | ||
|item1=Iron Sword | |item1=Iron Sword | ||
|item1article= | |item1article=Saga:Iron Sword | ||
|obtain1=Visit the left house in the top row. | |obtain1=Visit the left house in the top row.<br>Has 51 kills (+1 crit). | ||
|item2=Weapon Level Plus | |item2=Weapon Level Plus | ||
|item2article= | |item2article=Saga:Weapon Level Plus | ||
|item2image=wlv plus | |item2image=wlv plus | ||
|obtain2=Visit the middle house in the top row. | |obtain2=Visit the middle house in the top row. | ||
|item3=Sea Fighter | |item3=Sea Fighter | ||
|item3article= | |item3article=Saga:Sea Fighter | ||
|obtain3=Visit the house with the blue roof with anyone except Garo. | |obtain3=Visit the house with the blue roof with anyone except Garo. | ||
|item4=Amulet | |item4=Amulet | ||
|item4article= | |item4article=Saga:Amulet | ||
|obtain4=Visit the center left house in the bottom row. | |obtain4=Visit the center left house in the bottom row. | ||
|item5=Leather Shield | |item5=Leather Shield | ||
|item5article= | |item5article=Saga:Leather Shield | ||
|obtain5=Visit the center right house in the bottom row. | |obtain5=Visit the center right house in the bottom row. | ||
|item6=Medicinal Herb | |item6=Medicinal Herb | ||
|item6article= | |item6article=Saga:Medicinal Herb | ||
|obtain6=Visit the rightmost house in the bottom row. | |obtain6=Visit the rightmost house in the bottom row. | ||
|itemlast=Medicinal Herb | |itemlast=Medicinal Herb | ||
|itemlastarticle= | |itemlastarticle=Saga:Medicinal Herb | ||
|obtainlast=Dropped by a Bowman.}} | |obtainlast=Dropped by a Bowman.}} | ||
===Shop data=== | ===Shop data=== | ||
{{ChapShop PS1 | {{ChapShop PS1 | ||
|sword1= | |sword1=Shortsword | ||
|sword1article= | |sword1article=Saga:Shortsword | ||
|swcost1=460 | |swcost1=460 | ||
| | |spear1=Slim Spear | ||
| | |spear1article=Saga:Slim Spear | ||
| | |spcost1=500 | ||
|axe1=Hand Axe | |axe1=Hand Axe | ||
|axe1article= | |axe1article=Saga:Hand Axe | ||
|axcost1=600 | |axcost1=600 | ||
|bow1= | |bow1=Hand Bow | ||
|bow1article= | |bow1article=Saga:Hand Bow | ||
|bocost1=500 | |bocost1=500 | ||
|staff1= | |staff1=Healing Staff | ||
|staff1article= | |staff1article=Saga:Healing Staff | ||
|stcost1=2200 | |stcost1=2200 | ||
|item1=Herb | |item1=Medicinal Herb | ||
|item1article= | |item1article=Saga:Medicinal Herb | ||
|itcost1=1200 | |itcost1=1200 | ||
|item2=Leather Shield | |item2=Leather Shield | ||
|item2article= | |item2article=Saga:Leather Shield | ||
|itcost2=2000 | |itcost2=2000 | ||
}} | }} | ||
| Line 142: | Line 150: | ||
|namer1=Gram Soldier | |namer1=Gram Soldier | ||
|classr1=Spear Rider | |classr1=Spear Rider | ||
|classr1article= | |classr1article=Saga:Spear Rider | ||
|lvr1=1 | |lvr1=1 | ||
|#r1=1 | |#r1=1 | ||
|inventoryr1= | |inventoryr1={{Item|ps1|Slim Spear}} | ||
|- | |- | ||
|namer2=Gram Soldier | |namer2=Gram Soldier | ||
|classr2=Soldier | |classr2=Soldier | ||
|classr2article= | |classr2article=Saga:Soldier | ||
|lvr2=1 | |lvr2=1 | ||
|#r2=1 | |#r2=1 | ||
|inventoryr2= | |inventoryr2={{Item|ps1|Iron Spear}} | ||
|- | |- | ||
|namer3=Gram Soldier | |namer3=Gram Soldier | ||
|classr3=Soldier | |classr3=Soldier | ||
|classr3article= | |classr3article=Saga:Soldier | ||
|lvr3=2 | |lvr3=2 | ||
|#r3=1 | |#r3=1 | ||
|inventoryr3= | |inventoryr3={{Item|ps1|Iron Spear}} | ||
|- | |- | ||
|namer4=Gram Soldier | |namer4=Gram Soldier | ||
|classr4=Archer | |classr4=Archer | ||
|classr4article= | |classr4article=Saga:Archer | ||
|lvr4=1 | |lvr4=1 | ||
|#r4=1 | |#r4=1 | ||
|inventoryr4= | |inventoryr4={{Item|ps1|Bowgun}} | ||
|- | |- | ||
|namer5=Gram Soldier | |namer5=Gram Soldier | ||
|classr5=Archer | |classr5=Archer | ||
|classr5article= | |classr5article=Saga:Archer | ||
|lvr5=2 | |lvr5=2 | ||
|#r5=1 | |#r5=1 | ||
|inventoryr5= | |inventoryr5={{Item|ps1|Bowgun}} • {{Item|ps1|Medicinal Herb|type=drop}} | ||
|- | |- | ||
|namerl={{ | |namerl={{Saga|Russ}} | ||
|classrl=Armor Knight | |classrl=Armor Knight | ||
|versionrl=russ | |versionrl=russ | ||
|classrlarticle= | |classrlarticle=Saga:Armor Knight | ||
|lvrl=3 | |lvrl=3 | ||
|#rl=1 | |#rl=1 | ||
|inventoryrl= | |inventoryrl={{Item|ps1|Iron Sword}} | ||
}} | }} | ||
| Line 189: | Line 197: | ||
===NPC data=== | ===NPC data=== | ||
{{ | {{ChapUnitHdr|type=NPC|platform=ps1}} | ||
|platform=ps1 | {{ChapUnitCellTRS1 | ||
| | |name={{Saga|Sasha}} | ||
| | |class=Princess | ||
| | |version=sasha | ||
| | |type=other | ||
| | |lv=1 | ||
|#1=1 | |#=1 | ||
| | |hp=18 | ||
|str=6 | |||
| | |mag=2 | ||
| | |skill=8 | ||
| | |spd=8 | ||
| | |lck=6 | ||
| | |def=2 | ||
|# | |res=1 | ||
| | |mov=4 | ||
|inventory={{Item|ps1|Shortsword}}<br>{{Item|ps1|Charisma}} | |||
}} | |||
{{ChapUnitCellTRS1 | |||
|name={{Saga|Kate}} | |||
|class=Lady Knight | |||
|version=kate | |||
|type=other | |||
|lv=2 | |||
|#=1 | |||
|hp=22 | |||
|str=6 | |||
|mag=0 | |||
|skill=6 | |||
|spd=8 | |||
|lck=2 | |||
|def=5 | |||
|res=0 | |||
|mov=4 | |||
|inventory={{Item|ps1|Estoc}} • {{Item|ps1|Bowgun}}<br>{{Item|ps1|Continuation|image=continuation skill}} • {{Item|ps1|Castle Fighter}} | |||
|last=y | |||
}} | }} | ||
{{ChapUnitFtr}} | |||
===Boss data=== | ===Boss data=== | ||
{{main| | {{main|Saga:Russ {{!}} Russ}} | ||
{{BossStats TRS1 | {{BossStats TRS1 | ||
|portrait=[[File:Portrait russ trs01.png]] | |portrait=[[File:Portrait russ trs01.png]] | ||
|class | |class=Armor Knight | ||
|lv=3 | |lv=3 | ||
|move=3 | |move=3 | ||
| Line 225: | Line 253: | ||
|def=10 | |def=10 | ||
|wlv=3 | |wlv=3 | ||
|sw= | |sw=y | ||
|inventory= | |inventory={{Item|ps1|Iron Sword}} | ||
}} | }} | ||
==Strategy== | ==Strategy== | ||
{{Strategy}} | {{Strategy}} | ||
You cannot leave the harbor island until turn 5 when the drawbridge is lowered in a cutscene, so spend the first few turns having your units visit the houses to obtain several items. The NPCs, {{ | You cannot leave the harbor island until turn 5 when the drawbridge is lowered in a cutscene, so spend the first few turns having your units visit the houses to obtain several items. The NPCs, {{Saga|Kate}} and {{Saga|Sasha}}, will flee from their pursuers in the intermittent turns and will be near the bridge by the time it is lowered; have {{Saga|Runan}} near the bridge on turn 4 so he can [[Talk]] to Sasha. Sasha is a very fragile unit, so make sure to keep her from getting attacked by too many enemies at once. | ||
Concerning the boss, {{Saga|Russ}}, he has a total of 4 points in [[Skill (stat)|Skill]] making him able to trigger a critical hit if put against Arkis, who only has 3 points of [[Luck]] in total, so it's advised to keep him out of his reach except if Arkis gains an extra point of Luck during a Level up. Due to Russ being an {{Saga|Armor Knight}}, he only has a movement stat of 3 points so it shouldn't be too hard to keep Arkis safe. On the other hand, Runan's {{Saga|rapier}} and Kate's {{Saga|Estoc}} will be useful for defeating the boss as they deal extra damage against his class. | |||
<!-- | |||
==Trivia== | ==Trivia== | ||
--> | |||
==Etymology and other languages== | ==Etymology and other languages== | ||
{{Names | {{Names | ||
|eng-fan-name=Arrival at Wellt | |eng-fan-name=Arrival at Wellt | ||
|eng-fan-mean=Used in various {{TRS1}} fan translations. | |eng-fan-mean=Used in various {{TRS1}} fan translations. | ||
| | |jpn-name={{h|ウエルト上陸|Ueruto jōriku}} | ||
| | |jpn-mean=Arrival/Landing at Wellt | ||
}} | }} | ||
| Line 252: | Line 279: | ||
{{ChapterNav | {{ChapterNav | ||
|nextchapter=Saga:Subduing the Bandits{{!}}Subduing the Bandits | |||
|nextchapter= | |||
}} | }} | ||
{{NavTRS1}} | {{NavTRS1}} | ||
[[Category:Chapters of | [[Category:Chapters of TearRing Saga: Yutona Heroes War Chronicles]] | ||
Latest revision as of 18:46, 17 December 2023
| ||||||||
|
| “ | In that case, we should do what we can to get into the queen's good graces. Our first course of action should be to get a grasp of what exactly the situation is here in Wellt. | ” | — Runan discussing how to get aid from Wellt with Eugen. |
|---|
Arrival at Wellt (Japanese: ウエルト上陸 Arrival at Wellt) is the first chapter in TearRing Saga: Yutona Heroes War Chronicles. Holmes drops Runan off at Wellt to seek aid against the Zoa Empire.
Plot
- Main article:
Saga:Arrival at Wellt/Script
Long ago, the dark god Gerxel ruled the continent of Lieberia as a tyrant. His reign was brought to an end by the slave Carluon and his wife Yutona. Their daughters founded four kingdoms: Reeve to the east, Canaan to the north, Leda to the west, and Salia to the south. Peace lasted for seven and a half centuries until Leda and Salia destroyed themselves in a war. In the aftermath, the Cult of Gerxel seized power and spread its influence. King Bahanuk of Canaan requested the aid of King Badoum of Reeve to stamp out the Cult, but was rejected. Bahanuk had a sudden and radical shift in policy; he declared the restoration of the Gerxel Empire and crushed Reeve.
Two young men from Reeve, Runan and Holmes, arrive at the island kingdom of Wellt to petition aid. Runan departs with Kreiss and Arkis, two cavalrymen, Garo, a pirate in service to Holmes, and Eugen, a crippled former knight of Reeve who serves as his tactician while Holmes moves on to Isura. As Runan gathers information at the port town of Saura, Princess Sasha of Wellt and her bodyguard Kate flee from enemy forces led by Russ, a knight in service to Chancellor Codha. Runan rescues Sasha and learns that after King Loffaru went missing in battle with the Empire half a year ago, Codha has declared himself ruler of Wellt and rules as a tyrant. Queen Liza sent Sasha to deliver a letter to the trusted Count Marlon of Verje naming him the new chancellor, but Codha sent assassins to stop her. Runan agrees to escort her to Verje.
Meanwhile, Codha decides to kill Marlon before he can be named chancellor. Marlon discusses recent events with his adopted son Raffin and daughter Esther. Runan explains to Sasha that his father, Lord Gramud of Razelia, was killed by the dragon Muse during an alleged peace conference with Canaan.
Chapter data
| ||||||
|
| |||||
| Victory: Rout enemy | Player | Other | Enemy | |||
|---|---|---|---|---|---|---|
| Defeat: Runan or Sasha dies | 4+2 | 2−2 | 0+6 | |||
|
| ||||||
- Note: The Map takes place on a world map location consisting of Plains terrain.
Character data
| Characters | ||||||||||||||||||||||||||||||||||||||||||||||||||||||||||||||||||
|---|---|---|---|---|---|---|---|---|---|---|---|---|---|---|---|---|---|---|---|---|---|---|---|---|---|---|---|---|---|---|---|---|---|---|---|---|---|---|---|---|---|---|---|---|---|---|---|---|---|---|---|---|---|---|---|---|---|---|---|---|---|---|---|---|---|---|
New units
| ||||||||||||||||||||||||||||||||||||||||||||||||||||||||||||||||||
| ||||||||||||||||||||||||||||||||||||||||||||||||||||||||||||||||||
Available characters
| ||||||||||||||||||||||||||||||||||||||||||||||||||||||||||||||||||
| None | ||||||||||||||||||||||||||||||||||||||||||||||||||||||||||||||||||
Item data
| ||||||||||||||||||||||||
|
Shop data
Enemy data
| |||||||||||||||||||||||||||||||||||||||||||||||||
| |||||||||||||||||||||||||||||||||||||||||||||||||
| |||||||||||||||||||||||||||||||||||||||||||||||||
|
Reinforcements
- Enemy Phase 1
- All enemies appear in the southwest region of the map.
NPC data
| |||||||||||||||||||||||||||||||||||||||||||||||||||||||||||||||||||||
| |||||||||||||||||||||||||||||||||||||||||||||||||||||||||||||||||||||
Boss data
- Main article:
Russ
|
|
| ||||||||||||||||||||||||||||||||||||||||||||||||||||||
Strategy
| This section details unofficial strategies that may help with completion of the chapter. This may not work for everybody. |
You cannot leave the harbor island until turn 5 when the drawbridge is lowered in a cutscene, so spend the first few turns having your units visit the houses to obtain several items. The NPCs, Kate and Sasha, will flee from their pursuers in the intermittent turns and will be near the bridge by the time it is lowered; have Runan near the bridge on turn 4 so he can Talk to Sasha. Sasha is a very fragile unit, so make sure to keep her from getting attacked by too many enemies at once.
Concerning the boss, Russ, he has a total of 4 points in Skill making him able to trigger a critical hit if put against Arkis, who only has 3 points of Luck in total, so it's advised to keep him out of his reach except if Arkis gains an extra point of Luck during a Level up. Due to Russ being an Armor Knight, he only has a movement stat of 3 points so it shouldn't be too hard to keep Arkis safe. On the other hand, Runan's rapier and Kate's Estoc will be useful for defeating the boss as they deal extra damage against his class.
Etymology and other languages
| Names, etymology, and in other regions | ||
|---|---|---|
| Language | Name | Definition, etymology, and notes |
| English (unofficial) |
Arrival at Wellt |
Used in various TearRing Saga: Yutona Heroes War Chronicles fan translations. |
| Japanese |
ウエルト上陸 |
Arrival/Landing at Wellt |
Gallery
This section has been marked as a stub. Please help improve the page by adding information.
References
| Arrival at Wellt | • Subduing the Bandits → |
|---|
