| Site News |
|---|
| Warning: This wiki contains spoilers. Read at your own risk! Social media: If you would like, please join our Discord server, and/or follow us on Twitter (X) or Tumblr! |
Light and Shadow: Difference between revisions
m (Text replacement - " ==Trivia== ==" to "<!-- ==Trivia== --> ==") |
Thecornerman (talk | contribs) m (Misc.) |
||
| Line 1: | Line 1: | ||
:''Not to be confused with [[Light and Dark]], the tenth chapter of | :''Not to be confused with [[Light and Dark]], the tenth chapter of ''Genealogy of the Holy War''.'' | ||
{{Chapter Infobox | {{Chapter Infobox | ||
|title=The Dragon's Table<br>Light and Shadow | |title=The Dragon's Table<br>Light and Shadow | ||
| Line 14: | Line 13: | ||
{{sectstub}} | {{sectstub}} | ||
{{main|Light and Shadow/Script}} | {{main|Light and Shadow/Script}} | ||
==Chapter data== | ==Chapter data== | ||
{{Tab | {{Tab | ||
| Line 24: | Line 23: | ||
|defeat=Marth dies | |defeat=Marth dies | ||
|ally=15 | |ally=15 | ||
|enemy={{ | |enemy={{h|5|Five Earth Dragons are present at the start of the map, but are banished by the Binding Shield on turn 1.}}{{h|+150|Reinforcements}} | ||
|map=[[File:Cm fe03 b2 e2-3.png]] | |map=[[File:Cm fe03 b2 e2-3.png]] | ||
}} | }} | ||
| Line 31: | Line 30: | ||
|defeat=Marth dies | |defeat=Marth dies | ||
|ally=12 | |ally=12 | ||
|enemy=23{{ | |enemy=23{{h|+∞|Reinforcements (infinite)}} | ||
|map=[[File:Cm fe12 24.png|512px]] | |map=[[File:Cm fe12 24.png|512px]] | ||
}} | }} | ||
}} | }} | ||
In ''Mystery of the Emblem'', no preparations menu appears before this chapter; the player's character selections carry over from the first | In ''Mystery of the Emblem'', no preparations menu appears before this chapter; the player's character selections and turn count carry over from the first two parts. The game cannot be saved before this chapter. | ||
===Character data=== | ===Character data=== | ||
| Line 45: | Line 44: | ||
|content1={{ChapChars | |content1={{ChapChars | ||
|game#=03 | |game#=03 | ||
|newunit1={{NewUnit | |newunit1={{NewUnit | ||
|name=Maria | |name=Maria | ||
| Line 127: | Line 125: | ||
|content2={{ChapChars | |content2={{ChapChars | ||
|game#=12 | |game#=12 | ||
|newunit1={{NewUnit | |newunit1={{NewUnit | ||
|name=Maria | |name=Maria | ||
| Line 914: | Line 911: | ||
|#=4 | |#=4 | ||
|mov=6 | |mov=6 | ||
|inventory={{Item|12|Fire Breath}}{{ | |inventory={{Item|12|Fire Breath}}{{h|*|1-2 range version}} | ||
|notes=Immediately begins moving unprovoked. | |notes=Immediately begins moving unprovoked. | ||
}} | }} | ||
| Line 923: | Line 920: | ||
|#=4 | |#=4 | ||
|mov=6 | |mov=6 | ||
|inventory={{Item|12|Ice Breath}}{{ | |inventory={{Item|12|Ice Breath}}{{h|*|1-2 range version}} | ||
|notes=Immediately begins moving unprovoked. | |notes=Immediately begins moving unprovoked. | ||
}} | }} | ||
| Line 932: | Line 929: | ||
|#=4 | |#=4 | ||
|mov=12 | |mov=12 | ||
|inventory={{Item|12|Fire Breath}}{{ | |inventory={{Item|12|Fire Breath}}{{h|*|1-2 range version}} | ||
|notes=Immediately begins moving unprovoked. | |notes=Immediately begins moving unprovoked. | ||
}} | }} | ||
| Line 941: | Line 938: | ||
|#=3 | |#=3 | ||
|mov=6 | |mov=6 | ||
|inventory={{Item|12|Mage Breath}}{{ | |inventory={{Item|12|Mage Breath}}{{h|*|1-2 range version}} | ||
|notes=Immediately begins moving unprovoked. | |notes=Immediately begins moving unprovoked. | ||
}} | }} | ||
| Line 1,050: | Line 1,047: | ||
|#=∞ | |#=∞ | ||
|mov=6 | |mov=6 | ||
|inventory={{Item|12|Fire Breath}}{{ | |inventory={{Item|12|Fire Breath}}{{h|*|1-2 range version}} | ||
}} | }} | ||
{{ChapUnitCellFE12 | {{ChapUnitCellFE12 | ||
| Line 1,058: | Line 1,055: | ||
|#=∞ | |#=∞ | ||
|mov=6 | |mov=6 | ||
|inventory={{Item|12|Ice Breath}}{{ | |inventory={{Item|12|Ice Breath}}{{h|*|1-2 range version}} | ||
}} | }} | ||
{{ChapUnitCellFE12 | {{ChapUnitCellFE12 | ||
| Line 1,066: | Line 1,063: | ||
|#=∞ | |#=∞ | ||
|mov=12 | |mov=12 | ||
|inventory={{Item|12|Fire Breath}}{{ | |inventory={{Item|12|Fire Breath}}{{h|*|1-2 range version}} | ||
}} | }} | ||
{{ChapUnitCellFE12 | {{ChapUnitCellFE12 | ||
| Line 1,074: | Line 1,071: | ||
|#=∞ | |#=∞ | ||
|mov=6 | |mov=6 | ||
|inventory={{Item|12|Mage Breath}}{{ | |inventory={{Item|12|Mage Breath}}{{h|*|1-2 range version}} | ||
}} | }} | ||
{{ChapUnitCellFE12 | {{ChapUnitCellFE12 | ||
| Line 1,091: | Line 1,088: | ||
====Reinforcements==== | ====Reinforcements==== | ||
=====''Mystery of the Emblem''===== | =====''Mystery of the Emblem''===== | ||
*Starting | *Starting two turns after the part starts, continuing until 30 of each have appeared; which ones appear each turn is random | ||
**5 [[Earth Dragon]]s from the altars; they will be banished by the [[Binding Shield]] at the start of the next turn | **5 [[Earth Dragon]]s from the altars; they will be banished by the [[Binding Shield]] at the start of the next turn | ||
*Note: All reinforcements are halted when [[Medeus]] is defeated | *Note: All reinforcements are halted when [[Medeus]] is defeated | ||
| Line 1,208: | Line 1,205: | ||
===''New Mystery of the Emblem''=== | ===''New Mystery of the Emblem''=== | ||
The best way to beat this map in Lunatic and Lunatic Reverse is to beat it in 1 turn in order to avoid having to deal with the many dangerous dragons. Sirius can reach Nyna and talk to her with a dance from Phina, you should have Sirius hold a rescue staff and pass it around the four princesses in order to recruit all of them and finally warp in Marth. Marth should be equipped with Falchion as it's the only weapon effective against him and as such will be the best way of fighting him. Marth needs to have capped speed in order to avoid getting doubled, if you haven't trained up Marth and don't have any statboosters left over it's best to try and play this map slowly and use your other strongest characters and staffbots. | The best way to beat this map in Lunatic and Lunatic Reverse is to beat it in 1 turn in order to avoid having to deal with the many dangerous dragons. Sirius can reach Nyna and talk to her with a dance from Phina, you should have Sirius hold a rescue staff and pass it around the four princesses in order to recruit all of them and finally warp in Marth. Marth should be equipped with Falchion as it's the only weapon effective against him and as such will be the best way of fighting him. Marth needs to have capped speed in order to avoid getting doubled, if you haven't trained up Marth and don't have any statboosters left over it's best to try and play this map slowly and use your other strongest characters and staffbots. | ||
Tiki and Nagi are recommended, as well as dragonpikes and wyrmslayers to fight the dragons the chapter. Medeus is the biggest problem in the chapter and it's recommended to fight him with powerful weapons like the Gradivus, since only Falchion is effective against him and other weapons will to pitiful damage in comparison. Forged weapons are also very useful, particularly a +10 forged Thoron tome, an again staff and rainbow tonics are equally useful. In order to defeat him without losing any characters it's a good idea to rig a critical hit, this is luckily very easy as there's a save point near the start of the chapter allowing you to try and try again until you get that one lucky crit (the final hit on Medeus will always be a crit, even if he dies to a normal hit). | Tiki and Nagi are recommended, as well as dragonpikes and wyrmslayers to fight the dragons the chapter. Medeus is the biggest problem in the chapter and it's recommended to fight him with powerful weapons like the Gradivus, since only Falchion is effective against him and other weapons will to pitiful damage in comparison. Forged weapons are also very useful, particularly a +10 forged Thoron tome, an again staff and rainbow tonics are equally useful. In order to defeat him without losing any characters it's a good idea to rig a critical hit, this is luckily very easy as there's a save point near the start of the chapter allowing you to try and try again until you get that one lucky crit (the final hit on Medeus will always be a crit, even if he dies to a normal hit). | ||
| Line 1,221: | Line 1,218: | ||
|eng-fan-name=The Dragons' Altar | |eng-fan-name=The Dragons' Altar | ||
|eng-fan-mean=Used in the ''Mystery of the Emblem'' [[fan translation]]. | |eng-fan-mean=Used in the ''Mystery of the Emblem'' [[fan translation]]. | ||
|jap-name={{ | |jap-name={{h|竜の祭壇|Ryū no saidan}} | ||
|jap-mean=The Dragon's/Dragons' Altar | |jap-mean=The Dragon's/Dragons' Altar | ||
}} | }} | ||
| Line 1,229: | Line 1,226: | ||
|eng-fan-name=Light and Shadow | |eng-fan-name=Light and Shadow | ||
|eng-fan-mean=Used in the ''New Mystery of the Emblem'' [[fan translation]]. | |eng-fan-mean=Used in the ''New Mystery of the Emblem'' [[fan translation]]. | ||
|jap-name={{ | |jap-name={{h|光と影|Hikari to kage}} | ||
|jap-mean=Light and Shadow | |jap-mean=Light and Shadow | ||
}} | }} | ||
| Line 1,237: | Line 1,234: | ||
{{ref}} | {{ref}} | ||
<!-- | |||
==See also== | ==See also== | ||
--> | |||
{{ChapterNav | {{ChapterNav | ||
|prechapter=The Dark Pontifex Lives | |prechapter=The Dark Pontifex Lives | ||
Revision as of 18:14, 31 July 2021
- Not to be confused with Light and Dark, the tenth chapter of Genealogy of the Holy War.
| ||||||
|
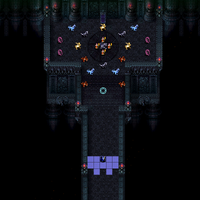
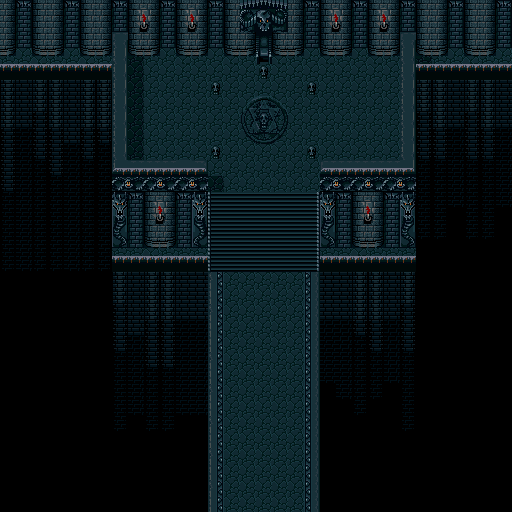
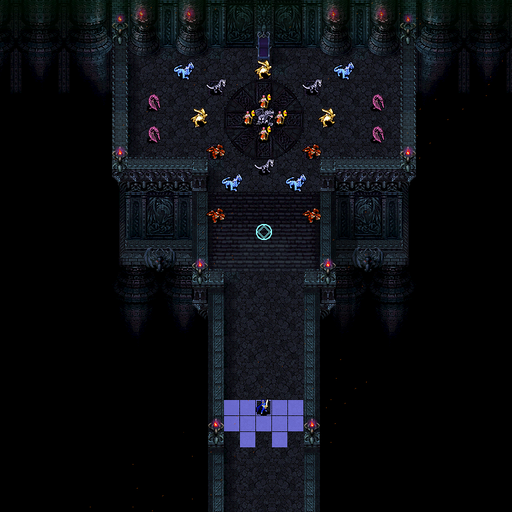
Light and Shadow (Japanese: 光と影 Light and Shadow) is the endgame of Fire Emblem: New Mystery of the Emblem. In Fire Emblem: Mystery of the Emblem, the same map is the final part of the three-part endgame-2, The Dragon's Table.
Plot
This section has been marked as a stub. Please help improve the page by adding information.
- Main article:
Light and Shadow/Script
Chapter data
Mystery of the Emblem New Mystery of the Emblem
In Mystery of the Emblem, no preparations menu appears before this chapter; the player's character selections and turn count carry over from the first two parts. The game cannot be saved before this chapter.
Character data
Mystery of the Emblem New Mystery of the Emblem
| Characters | ||||||||||||||||||||||||||||||||||||||||||||
|---|---|---|---|---|---|---|---|---|---|---|---|---|---|---|---|---|---|---|---|---|---|---|---|---|---|---|---|---|---|---|---|---|---|---|---|---|---|---|---|---|---|---|---|---|
New units
| ||||||||||||||||||||||||||||||||||||||||||||
| ||||||||||||||||||||||||||||||||||||||||||||
Available characters
| ||||||||||||||||||||||||||||||||||||||||||||
Default female player's unit                                                                        
| ||||||||||||||||||||||||||||||||||||||||||||
Item data
| |||||||||||||||
|
- Note: There are no items to be found in the original Mystery of the Emblem. The item list above is for New Mystery of the Emblem.
Enemy data
| This section is missing stats, calculations, or growth rates which may be currently unknown. If this information is available, please help improve the page by adding it. |
Mystery of the Emblem New Mystery of the Emblem
Normal Hard Maniac Lunatic
| |||||||||||||||||||||||||||||||||||||||||||||||||||||||||||||||||||||||||||||||||||||||||||||||||||||||||||||||||||||||||||||||||||||||||||||||||||||||||||||||||||||||||||||||||||||||||||||||||||||||||||||||||||||||||||||||||||||||||||||||||||||||||||||||||||||||||||||||||||||||||||||
| |||||||||||||||||||||||||||||||||||||||||||||||||||||||||||||||||||||||||||||||||||||||||||||||||||||||||||||||||||||||||||||||||||||||||||||||||||||||||||||||||||||||||||||||||||||||||||||||||||||||||||||||||||||||||||||||||||||||||||||||||||||||||||||||||||||||||||||||||||||||||||||
| |||||||||||||||||||||||||||||||||||||||||||||||||||||||||||||||||||||||||||||||||||||||||||||||||||||||||||||||||||||||||||||||||||||||||||||||||||||||||||||||||||||||||||||||||||||||||||||||||||||||||||||||||||||||||||||||||||||||||||||||||||||||||||||||||||||||||||||||||||||||||||||
| |||||||||||||||||||||||||||||||||||||||||||||||||||||||||||||||||||||||||||||||||||||||||||||||||||||||||||||||||||||||||||||||||||||||||||||||||||||||||||||||||||||||||||||||||||||||||||||||||||||||||||||||||||||||||||||||||||||||||||||||||||||||||||||||||||||||||||||||||||||||||||||
Reinforcements
Mystery of the Emblem
- Starting two turns after the part starts, continuing until 30 of each have appeared; which ones appear each turn is random
- 5 Earth Dragons from the altars; they will be banished by the Binding Shield at the start of the next turn
- Note: All reinforcements are halted when Medeus is defeated
New Mystery of the Emblem
- Each turn from turn 2 onwards, several dragons will appear from the altars surrounding Medeus. They spawn in seemingly random orders and amounts between 1-5. Any Earth Dragons will be banished by the Binding Shield at the start of the next turn
Boss data
- Main article:
Medeus
Mystery of the Emblem New Mystery of the Emblem
Normal Hard Maniac Lunatic
|
|
| |||||||||||||||||||||||||||||||||||||||||||
Strategy
| This section details unofficial strategies that may help with completion of the chapter. This may not work for everybody. |
Mystery of the Emblem
A high priority is recruiting Nyna, Maria, Lena, and Elice, as, if Medeus is killed without recruiting them, Medeus will kill them all and fully restore his HP. If you do not have Sirius, Minerva, Julian, or Merric, then it is advisable to kill the ones you can't recruit as this will prevent Medeus from reviving himself.
Marth should fight Medeus with Falchion. Using anything other than Falchion will do very little damage due to attack stats being halved when fighting against Medeus, and magic is completely useless against him. Other units should also be placed in the range of the earth dragons (but not in Medeus's range) to prevent them from all attacking Marth when they appear.
Two or more staff-using units should stay out of range of Medeus and the earth dragons and use Physic on Marth before he engages Medeus, and Fortify after to heal Marth and the people who are being attacked by earth dragons. Yuliya's Rescue can also be used to prevent Marth from being attacked by Medeus on the enemy phase if he is too low on health. Anew is also very useful, as it will give everyone an extra turn (up to three times, if you haven't used it before).
New Mystery of the Emblem
The best way to beat this map in Lunatic and Lunatic Reverse is to beat it in 1 turn in order to avoid having to deal with the many dangerous dragons. Sirius can reach Nyna and talk to her with a dance from Phina, you should have Sirius hold a rescue staff and pass it around the four princesses in order to recruit all of them and finally warp in Marth. Marth should be equipped with Falchion as it's the only weapon effective against him and as such will be the best way of fighting him. Marth needs to have capped speed in order to avoid getting doubled, if you haven't trained up Marth and don't have any statboosters left over it's best to try and play this map slowly and use your other strongest characters and staffbots.
Tiki and Nagi are recommended, as well as dragonpikes and wyrmslayers to fight the dragons the chapter. Medeus is the biggest problem in the chapter and it's recommended to fight him with powerful weapons like the Gradivus, since only Falchion is effective against him and other weapons will to pitiful damage in comparison. Forged weapons are also very useful, particularly a +10 forged Thoron tome, an again staff and rainbow tonics are equally useful. In order to defeat him without losing any characters it's a good idea to rig a critical hit, this is luckily very easy as there's a save point near the start of the chapter allowing you to try and try again until you get that one lucky crit (the final hit on Medeus will always be a crit, even if he dies to a normal hit).
Etymology and other languages
Mystery of the Emblem
| Names, etymology, and in other regions | ||
|---|---|---|
| Language | Name | Definition, etymology, and notes |
| English |
The Dragon's Table |
Implied by the location's name in Fire Emblem Awakening. |
| English (unofficial) |
The Dragons' Altar |
Used in the Mystery of the Emblem fan translation. |
New Mystery of the Emblem
| Names, etymology, and in other regions | ||
|---|---|---|
| Language | Name | Definition, etymology, and notes |
| English (unofficial) |
Light and Shadow |
Used in the New Mystery of the Emblem fan translation. |
Gallery
This section has been marked as a stub. Please help improve the page by adding information.
References
| ← The Dark Pontifex Lives • | Light and Shadow |
|---|
| Fire Emblem: New Mystery of the Emblem: Heroes of Light and Shadow | ||||||||||||||||||||||||||||||||||
|---|---|---|---|---|---|---|---|---|---|---|---|---|---|---|---|---|---|---|---|---|---|---|---|---|---|---|---|---|---|---|---|---|---|---|
| ||||||||||||||||||||||||||||||||||
